Larger Project, Check Back For Updates!
Day 1: First Arcade Cabinet
Since I’ve been fixing up computers, I wanted to take on a larger challenge. And so, I found one. I was scrolling through Facebook Marketplace and came across a man selling a $50 Arcade Cabinet. From the pictures, the exterior seemed… good. But it didn’t work. It actually is just the monitor, cabinet, and coin slots. I thought to myself “Alright, I’ll purchase it, plug it in to a PC and get it to play a bunch of MAME games!”
So I called him and found out that he didn’t just have one arcade cabinet… He had two. So I scheduled a trip to meet him and see the cabinets. I looked inside and found that both were in good shape. Here’s what happened.
Originally he had a bar and owned the Golden Tee Fore! Arcade. It worked perfectly for a long time but broke a few years back. He took the arcade cabinet home, sent the motherboard and hard drive to get fixed, and received a quote for a thousand to get it fixed. He then found a second Golden Tee Fore! Arcade cabinet that had working electronics but a bad monitor (he told me that it looks brown). He planned to swap the monitors of both then throw away the first cabinet… but just didn’t.
Then I realized; This was the perfect project.
So, initially I scheduled getting the cabinets next week. I don’t have the car to take both. So I’d take one and he would take one. However, he decided to drive the first one to me… a week early. So now I get to explore the cabinet and learn more about it! However, there’s no keys… So I’ll need to break it open and then get new locks for it.
Here's the goals:
- Perform the monitor swap and get one arcade cabinet working
- Sell or lease the first arcade cabinet for cash
- Attempt to fix the “brown” monitor to see if that can be fixed. If not, recycle it
- Set up the “broken” cabinet with a PC and run an emulator
- Sell or lease the second arcade cabinet
I’ll keep you up to date on this task, likely adding a “Diary” section for a larger project like this rather than filling up the “Blog” section. Thanks for reading!
Day 2: Ripping It Open to Check the Monitor
I was able to drill out the back lock. I opened the backside of the cabinet to find a lot of extra chords. There was a spare telephone line, two golf balls, and a hot wheels car.
What I also discovered is that the previous owner had done a lot to try and remove the monitor. There’s a ground wire that has been cut from the monitor to the bottom of the cabinet, and the Molex connector was removed. I’ll have to get a replacement end for the Molex, however, as that was also cut. One of the wire connectors was also disconnected. That might explain why the monitor shows a brown image, but I will need to double check. The AC input was also disconnected.
There’s still one or two things I need to disconnect. The on-screen display board still seems to be connected. I’m also gonna wait to remove the monitor. I wanna confirm the monitor in the second arcade cabinet would be the same and have the same connectors. If not, I would likely need to splice different connectors.
This particular monitor is a Hitachi 468KRQ58X. I certainly did not realize just how much electronics were going to be in the back. I’m thankful I can quickly identify what these connectors are. I’ll need to do some more research in order to determine what might’ve caused the monitor to brown.
Day 3: Disconnecting all Monitor Connections
I’ve done a bit more research on the monitor. There are a lot of other things I would want to inspect on the monitor, as this one may be fixable without a lot of work.
For the time being, I’ve found the five connectors on this monitor and removed them:
- Ground Wire: Connects monitor frame to earth.
- Video & Sync: 6-port Molex that uses 5 wires (R,G,B,W,W/B). Picture feed, and a potential culprit for “brown monitor.” Has a missing connector.
- Yoke/Deflection: 3-prong connector, carries deflection current for the tube.
- OSD connector: Controls adjustors to the monitor, it’s connected by a series of pins on the monitor’s board.
- AC Input: 3-Prong connector, powers the monitor.
Everything else seems to be intact. I’ll need to check the speaker lines to see if there’s any connection to the chassis. I will be removing this monitor and replacing it with the known good one. This monitor will be tested another time to check if service is needed.
Day 4: On The Verge of Greatness
Currently I have one cabinet in my workshop, the other will be transported soon. In the meanwhile, I had a thought: What if I just plugged everything back up and tried to see what the errors were? The seller said "brown monitor," so if everything's working correctly I should just see a brown monitor.
So I got to work. The Sync cable was busted, so I had purchased the connectors and crimper to get those working again. I had also found a missing grey connector cap, so I added that back on (I had assumed this was the cause of the 'brown monitor' issue). They had also cut the ground wire from the monitor to a ground (since they were going to replace the monitor), so I fanned out the current wire and placed it under the bolt that the previous ground wire was on. There was an additional wire that looked set up as a ground, so I connected that to the other ground wires.
With everything else plugged in and connected, I plugged in the arcade cabinet and heard the hum of the money dispenser. Then I flipped the switch on the cabinet and.... it turned on for a second and turned back off.
So there's currently two things that could cause this.
TWO POTENTIAL CAUSES
- Short somewhere in the wiring. The PSU has an automatic shutdown if the wiring is bad.
- Issue with the PSU itself
So fair enough. Here's the list of troubleshooting steps that I will take to determine the cause of the issue:
📋 TROUBLESHOOTING STEPS
- Disconnect the monitor again (since that's what I was messing with) and try powering on everything else.
- Disconnect other sections one at a time and powering back on to see if bad wiring can be traced back elsewhere.
- Disconnect JAMMA connector to visually inspect and confirm it isn't damaged.
- Disconnect Hard Drive since it produced a loud noise as well.
- Determine the cause is the PSU and get a replacement.
I will admit there's concerns about breaking this thing. However, I have to remember it was already broken to begin with. Thankfully I haven't invested more money than I can afford to lose, so if this whole thing is bad I can properly recycle it.
But I'm not giving up yet. Not when we're on the Verge of Greatness! Everything else seems to power on and function, I just need to know why it won't keep power going.
Day 5: Take a Step Back
Given the issues from day four, I wanted to get better acquainted to how everything is supposed to connect together. I have a copy of the arcade cabinet manual that contained a circuit diagram. However, all of the connections were barely legible because the circuit diagram had been squished down. I was unable to read it. I eventually found a better copy of the diagram, but that too was also barely legible. But not impossible.
INFO
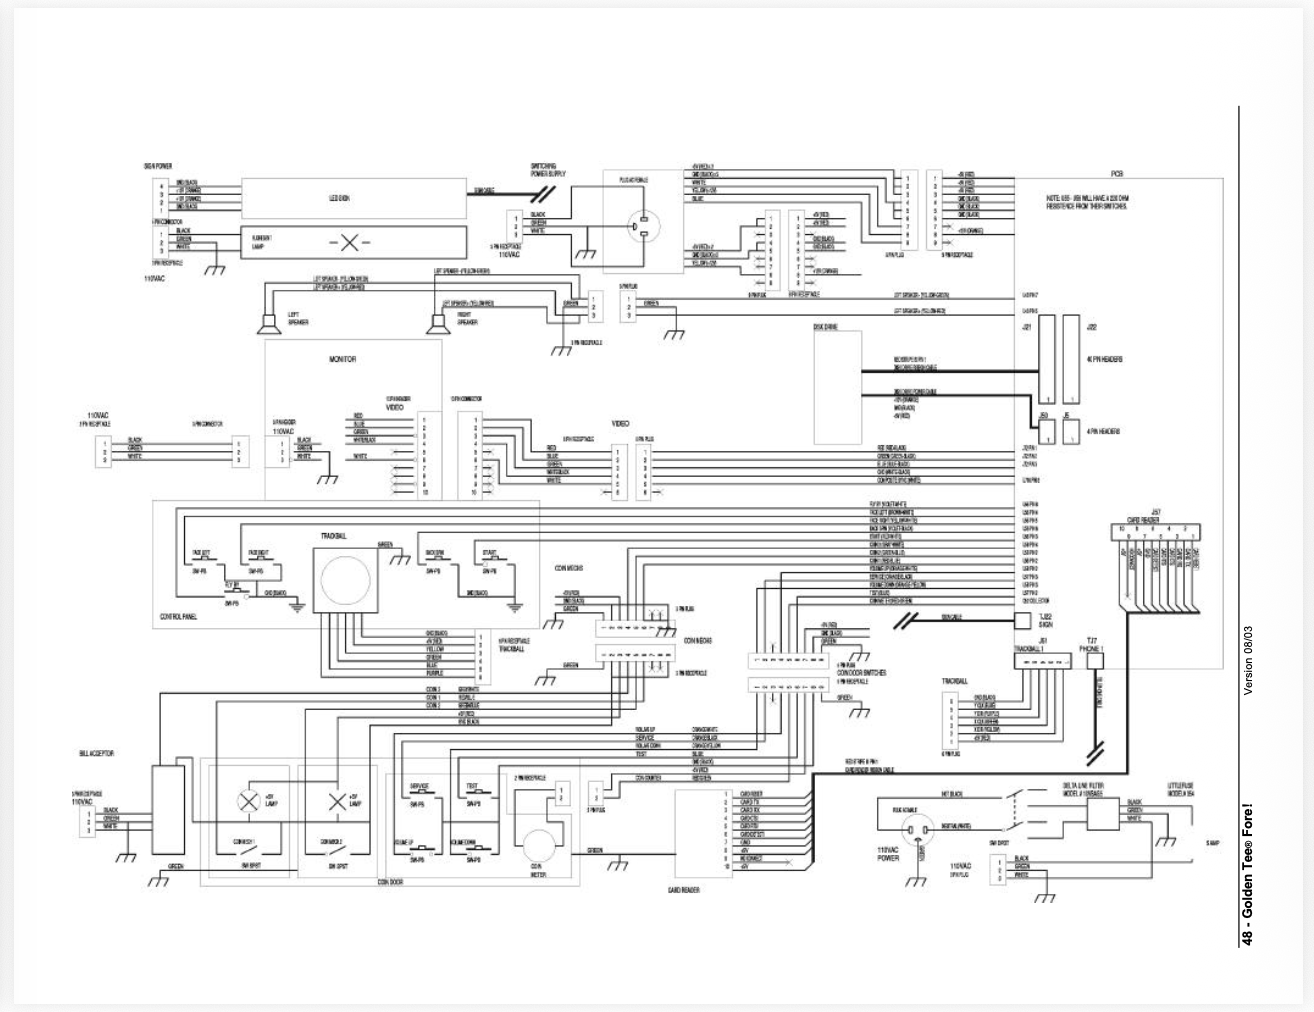
What is this? A CIRCUIT DIAGRAM FOR ANTS?!?
So what I decided to do is create my own. I took the base of that circuit diagram and put it into an Inkscape project. Then, I used small squares to block out the previous wording and add my own. I believe this to be what the original writing said, the only hairy spot was on the JAMMA connector. But this has helped me make so much more sense of this arcade cabinet.
For instance, did you know that there isn't a deflection cable in this arcade cabinet? Neither did I. My mistake for believing everything Perplexity says. It's actually just the speaker lines.
At some point, I will need to create a blog post about the number of times that AI has actively lied to me while attempting to fix an issue. For now, here is the circuit diagram. I have put this in a 36 x 24 format, I hope this is helpful for any of you looking to fix up your own Golden Tee Fore! arcade cabinets. Also, this is for the green board, not the red board.
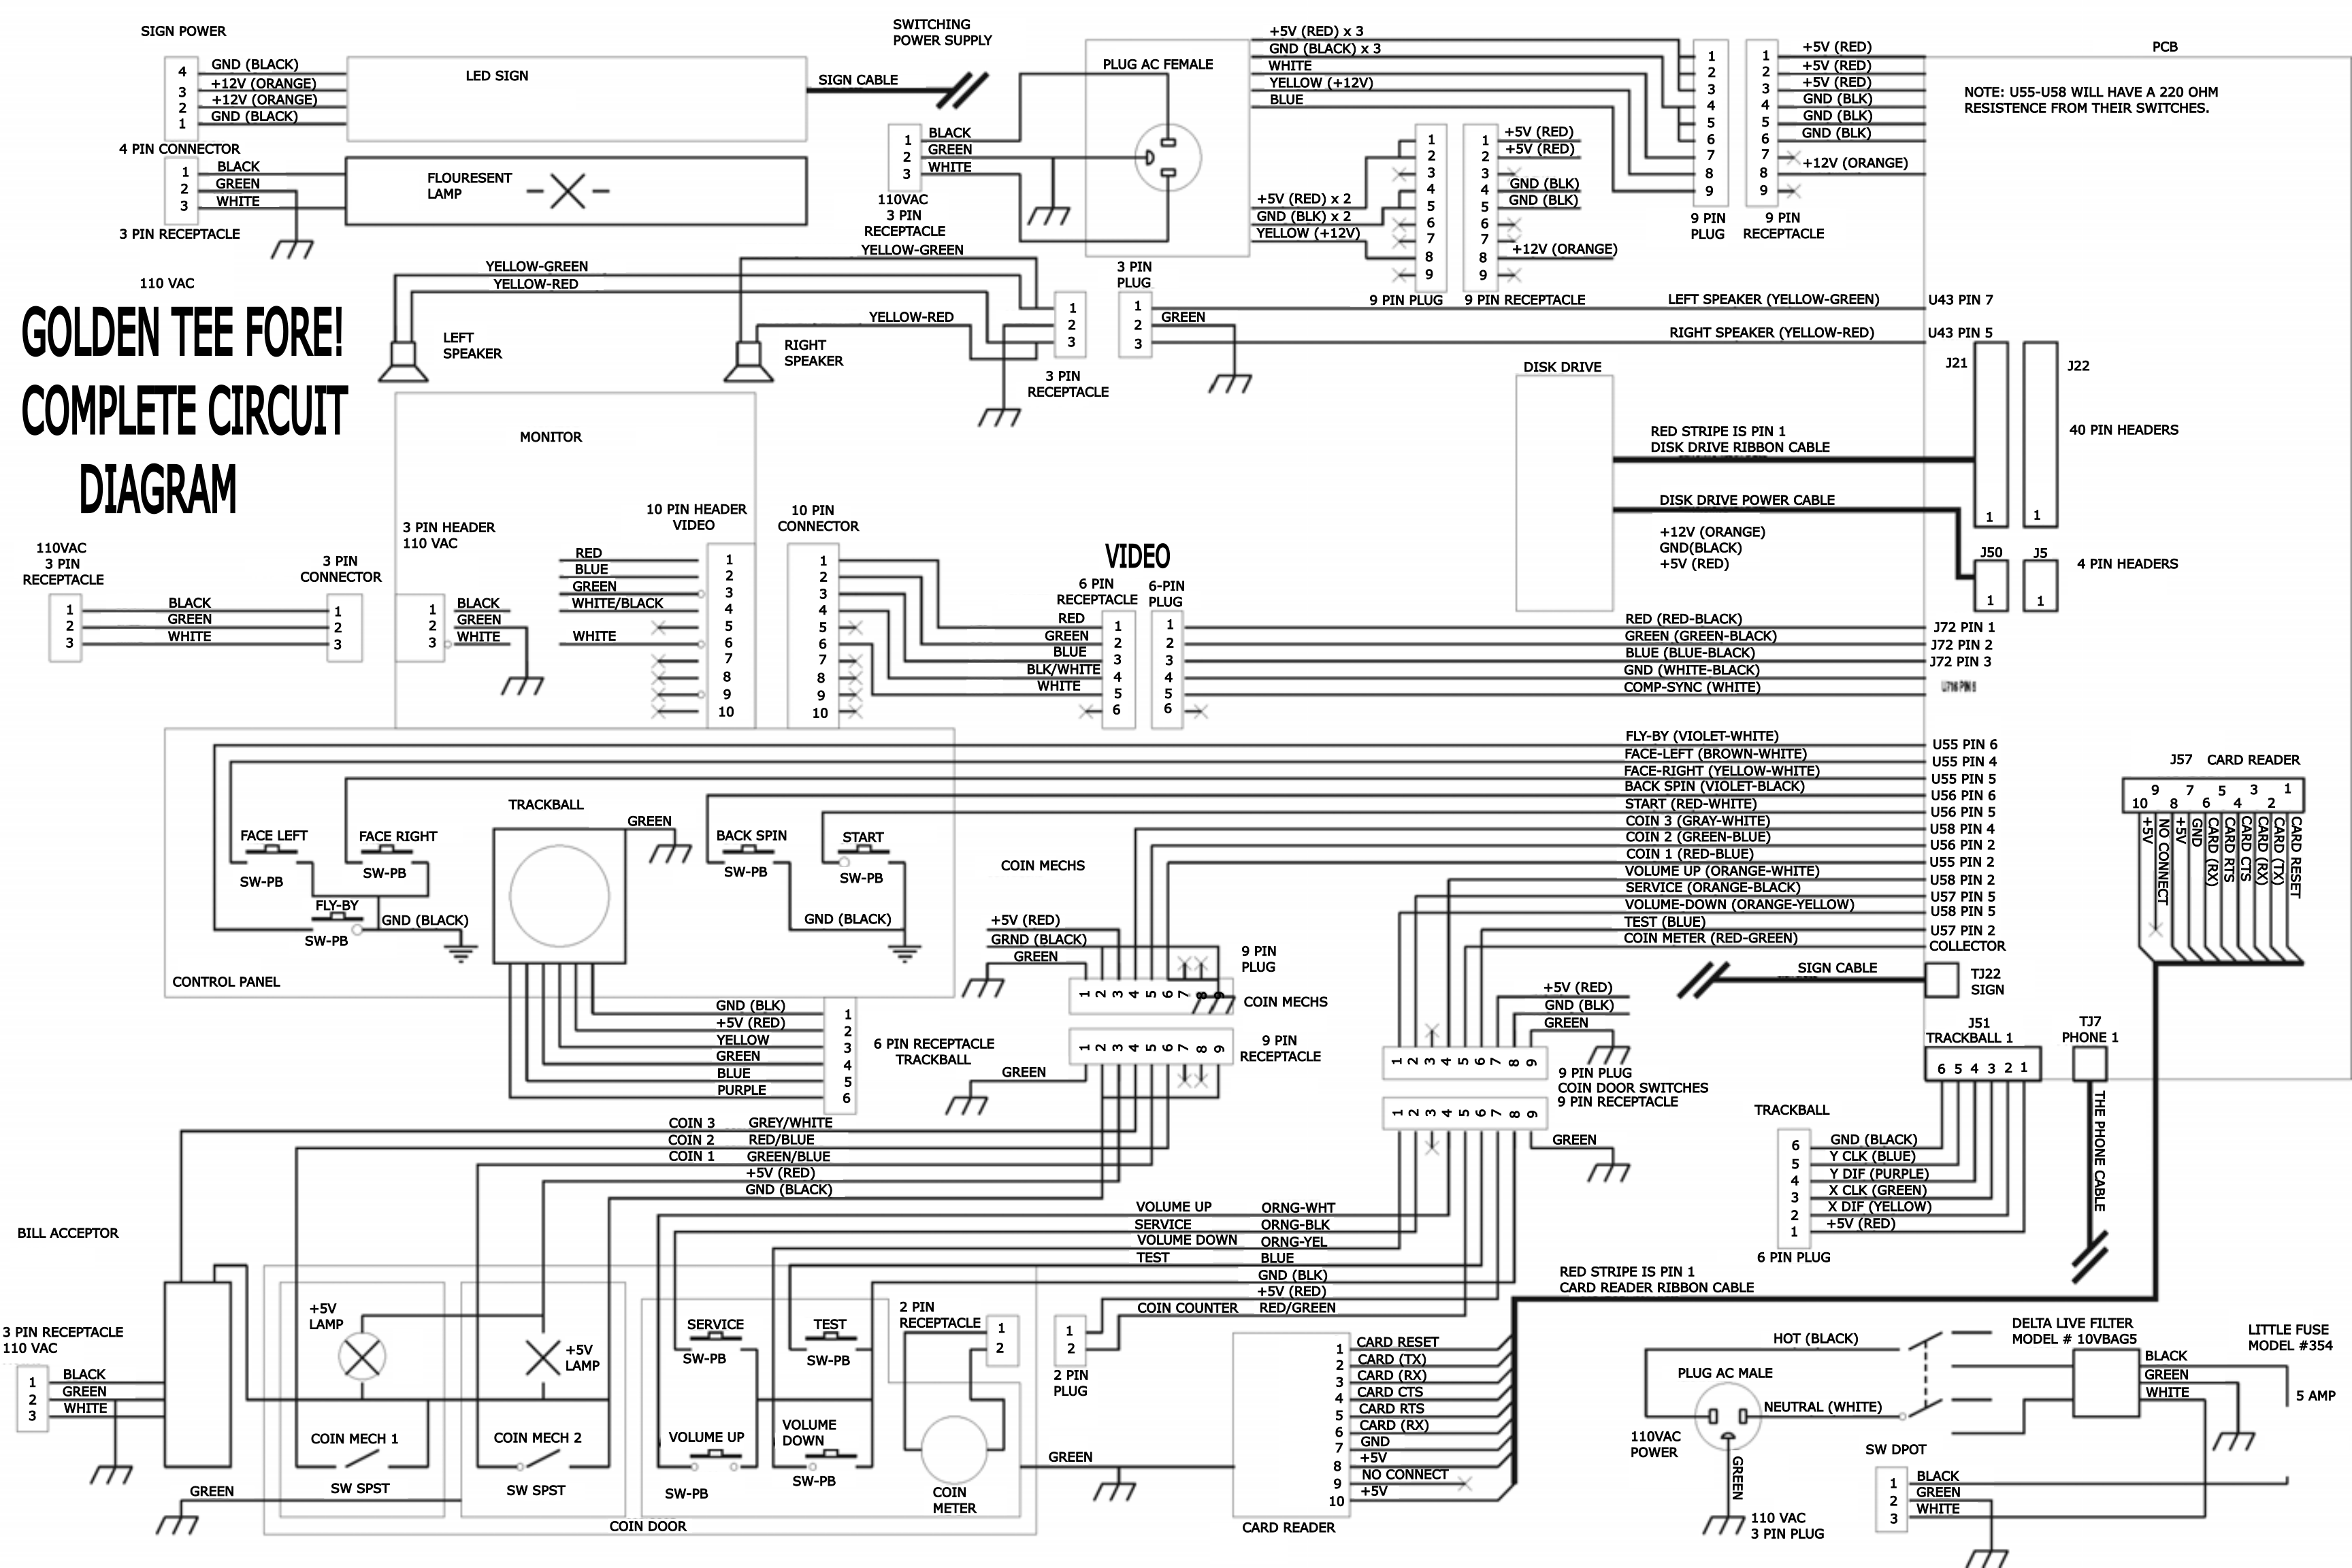
Day 6: Yeah, It's the PSU.
Shorter update, it's the PSU. I unplugged everything from the PSU and attempted to power it on. It immediately started and stopped. I suppose that the previous time it worked was just its final breath.
I've reached out the the seller of the two arcade cabinets (since he has the other cabinet) to see if the second one has a PSU inside of it. If not, I'll just need to order one.
In the meanwhile, I'll give the cabinet a bit of a bath. It could use some Isopropyl Alcohol around the contacts just to be safe.
Day 7: Clean & Prep
This is another short update: I've cleaned up the main board with some Isopropyl Alcohol and removed the PSU. I'm expecting the second arcade cabinet to be delivered tomorrow. I'm praying it has a spare PSU inside it that I hadn't noticed, but it's not likely. If it has one, I'll swap it into the main arcade and test it. Otherwise, I'll order it.
Day 8: Second Arcade Cabinet
Finally, after a couple of weeks of planning and rescheduling, I have received the second arcade cabinet!
INFO
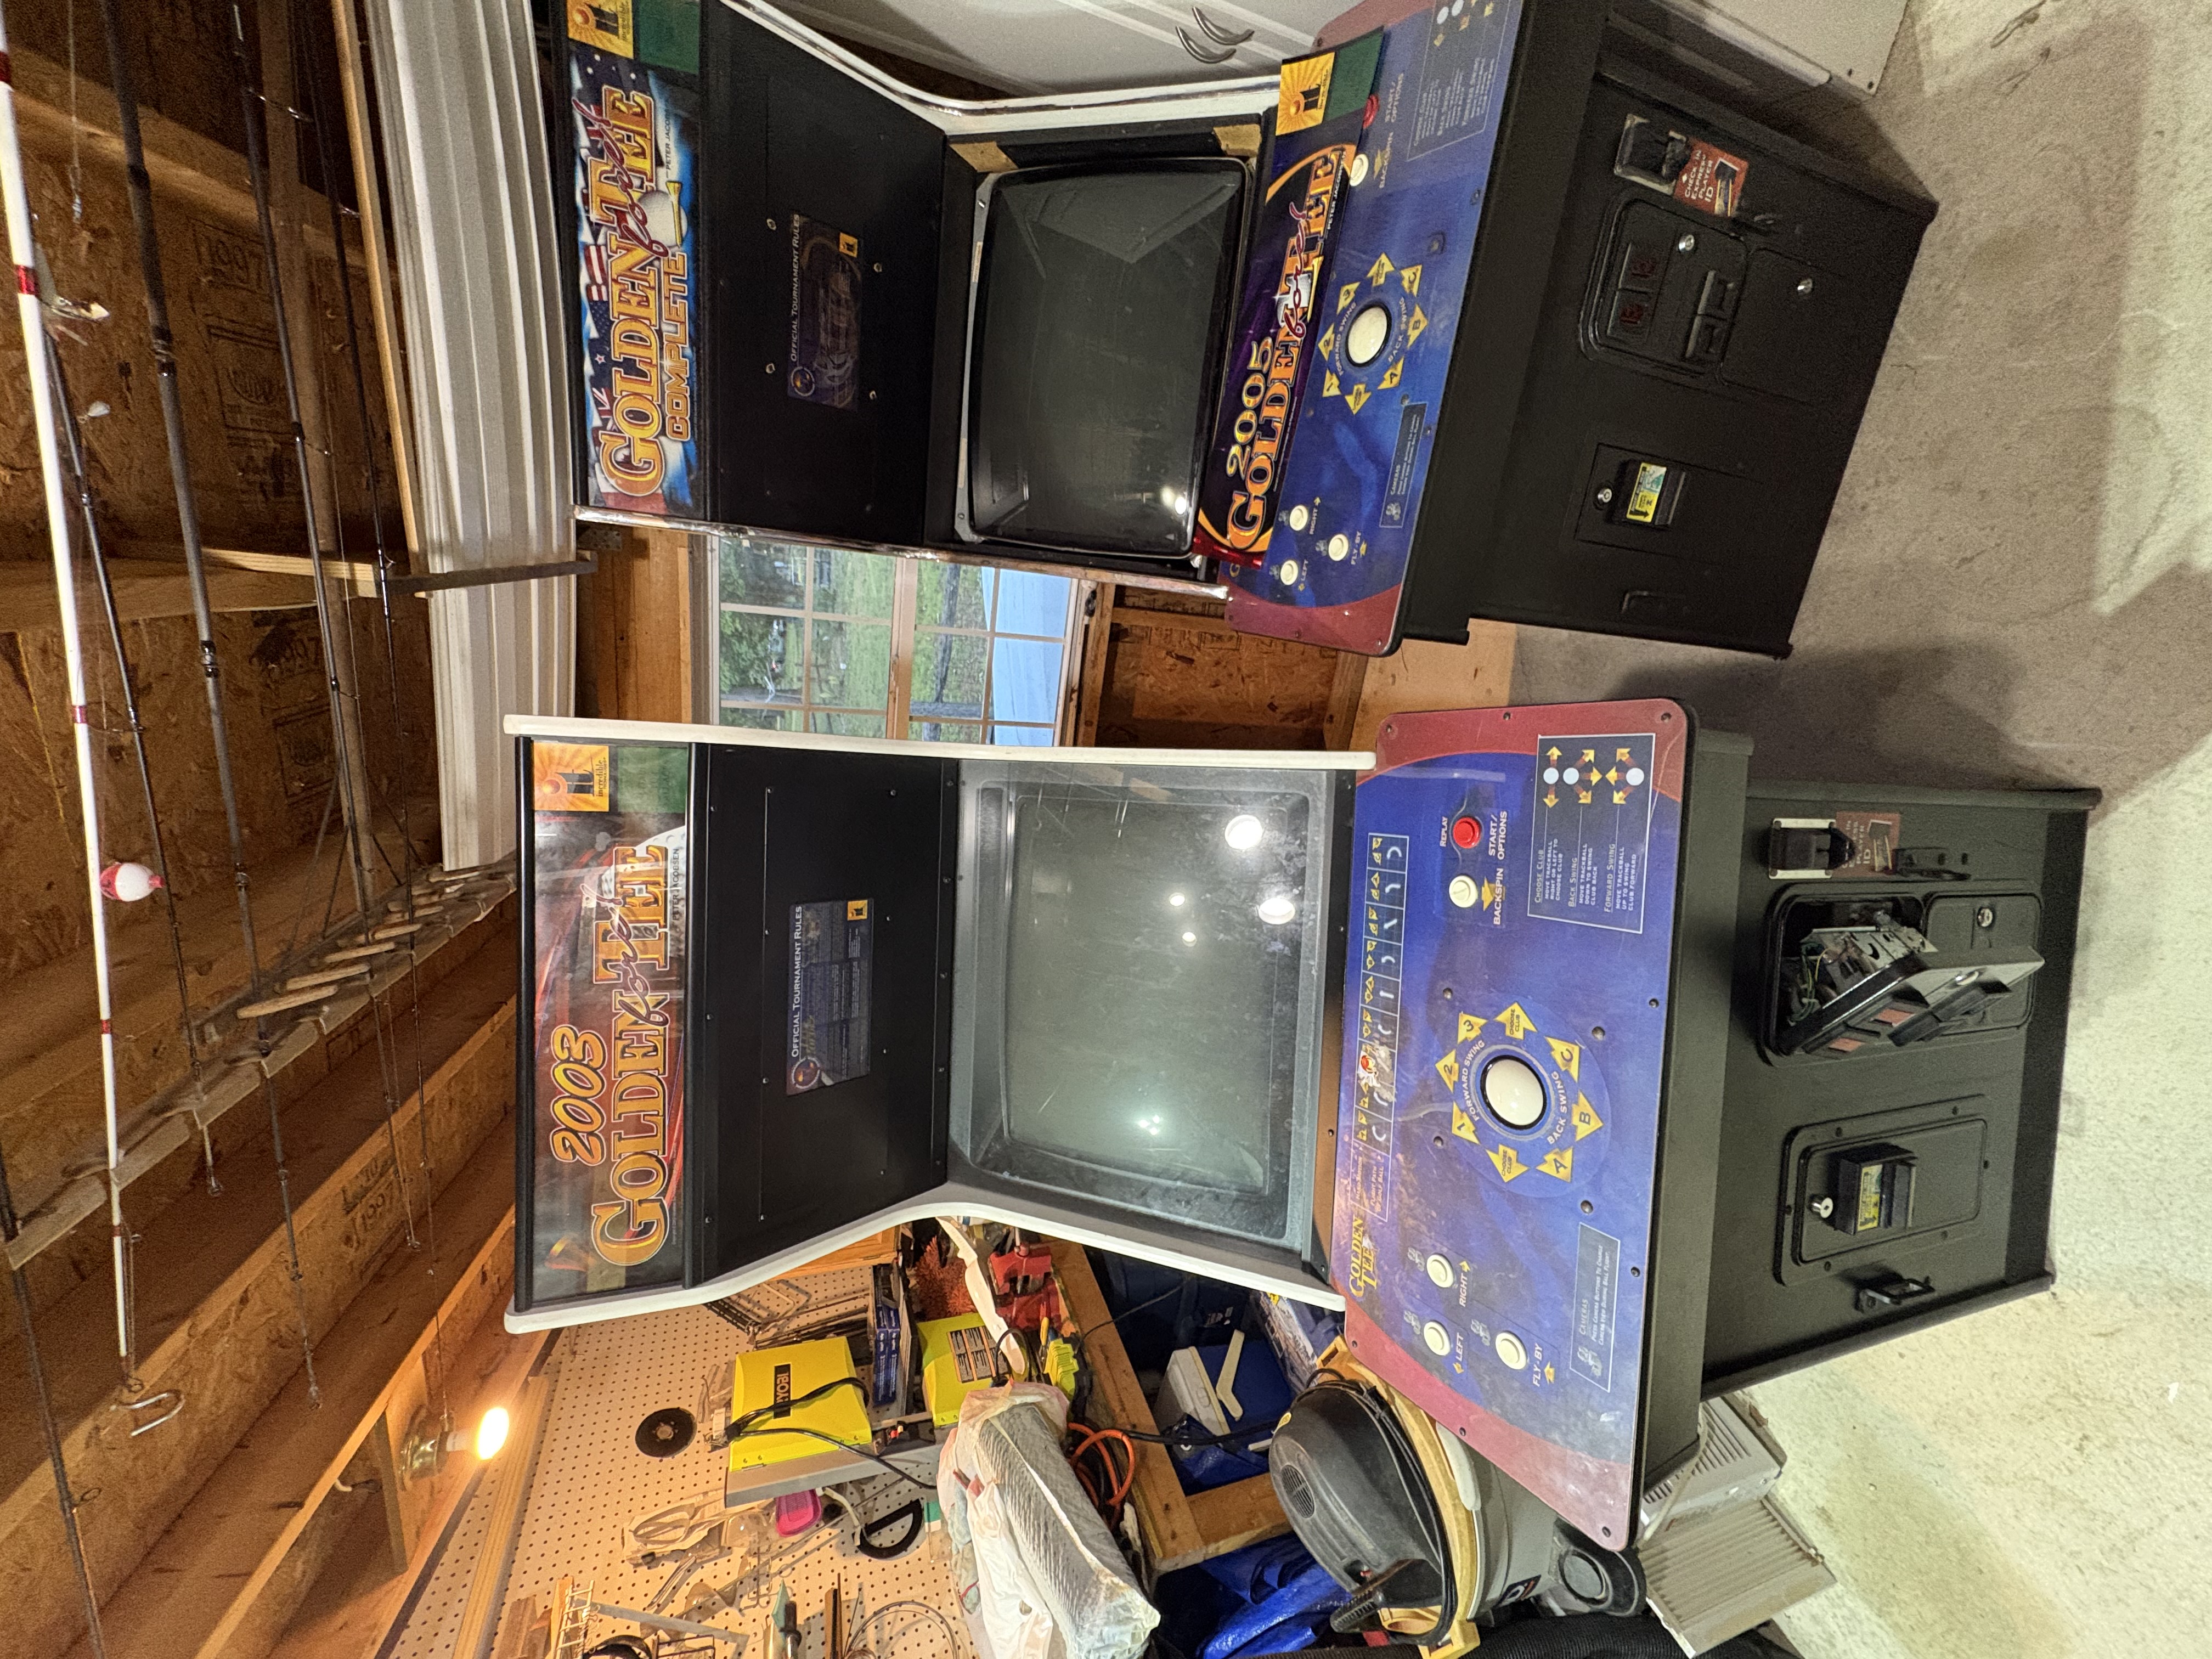
Look, my first arcade cabinet had a baby
The first thing I did was open it up to see if it had a spare PSU... Which it unfortunately did not. Thankfully, I found one online and was able to get it ordered for $50! That part should be in next week, and I look forward to being able to finally hook it up and see if it all works!
Upon closer inspection of the second cabinet, I found a few unique quirks. Firstly, some of the control panel buttons have their cords cut. However, the JAMMA connector is located inside of the arcade cabinet still, so I'll likely need to reseat a few of those to get it fully connected. The monitor seems to be in good condition, but there's still a lot of extra cables inside the machine that are not in use (like the phone line). The second device also came with a tournament play sign that lights up. I look forward to trying to hook that up as well.
I hope that I am able to fix the issues of the first monitor so that then I can keep the second monitor for another project. If not, I'll do the swap as previously planned and go from there! I'll send more updates once I receive the power supply unit or make changes to the second cabinet.
Day 9: Again, On The Verge Of Greatness
Hey there! It’s been a few days, so I would like to provide some updates!
The PSU did come in! And I’m excited to announce that it…almost works.
The Power Supply Unit turns on and doesn’t seem to have an issue itself. The connectors are the same and connect properly. However, when I plugged it in correctly… it wouldn’t work. I would just hear a low hum.
I then worked my way backwards. I found that the connectors going to the JAMMA were the ones causing problems. And the reason why they were failing is because there were modifications that had been done to the previous arcade cabinet PSU.
INFO
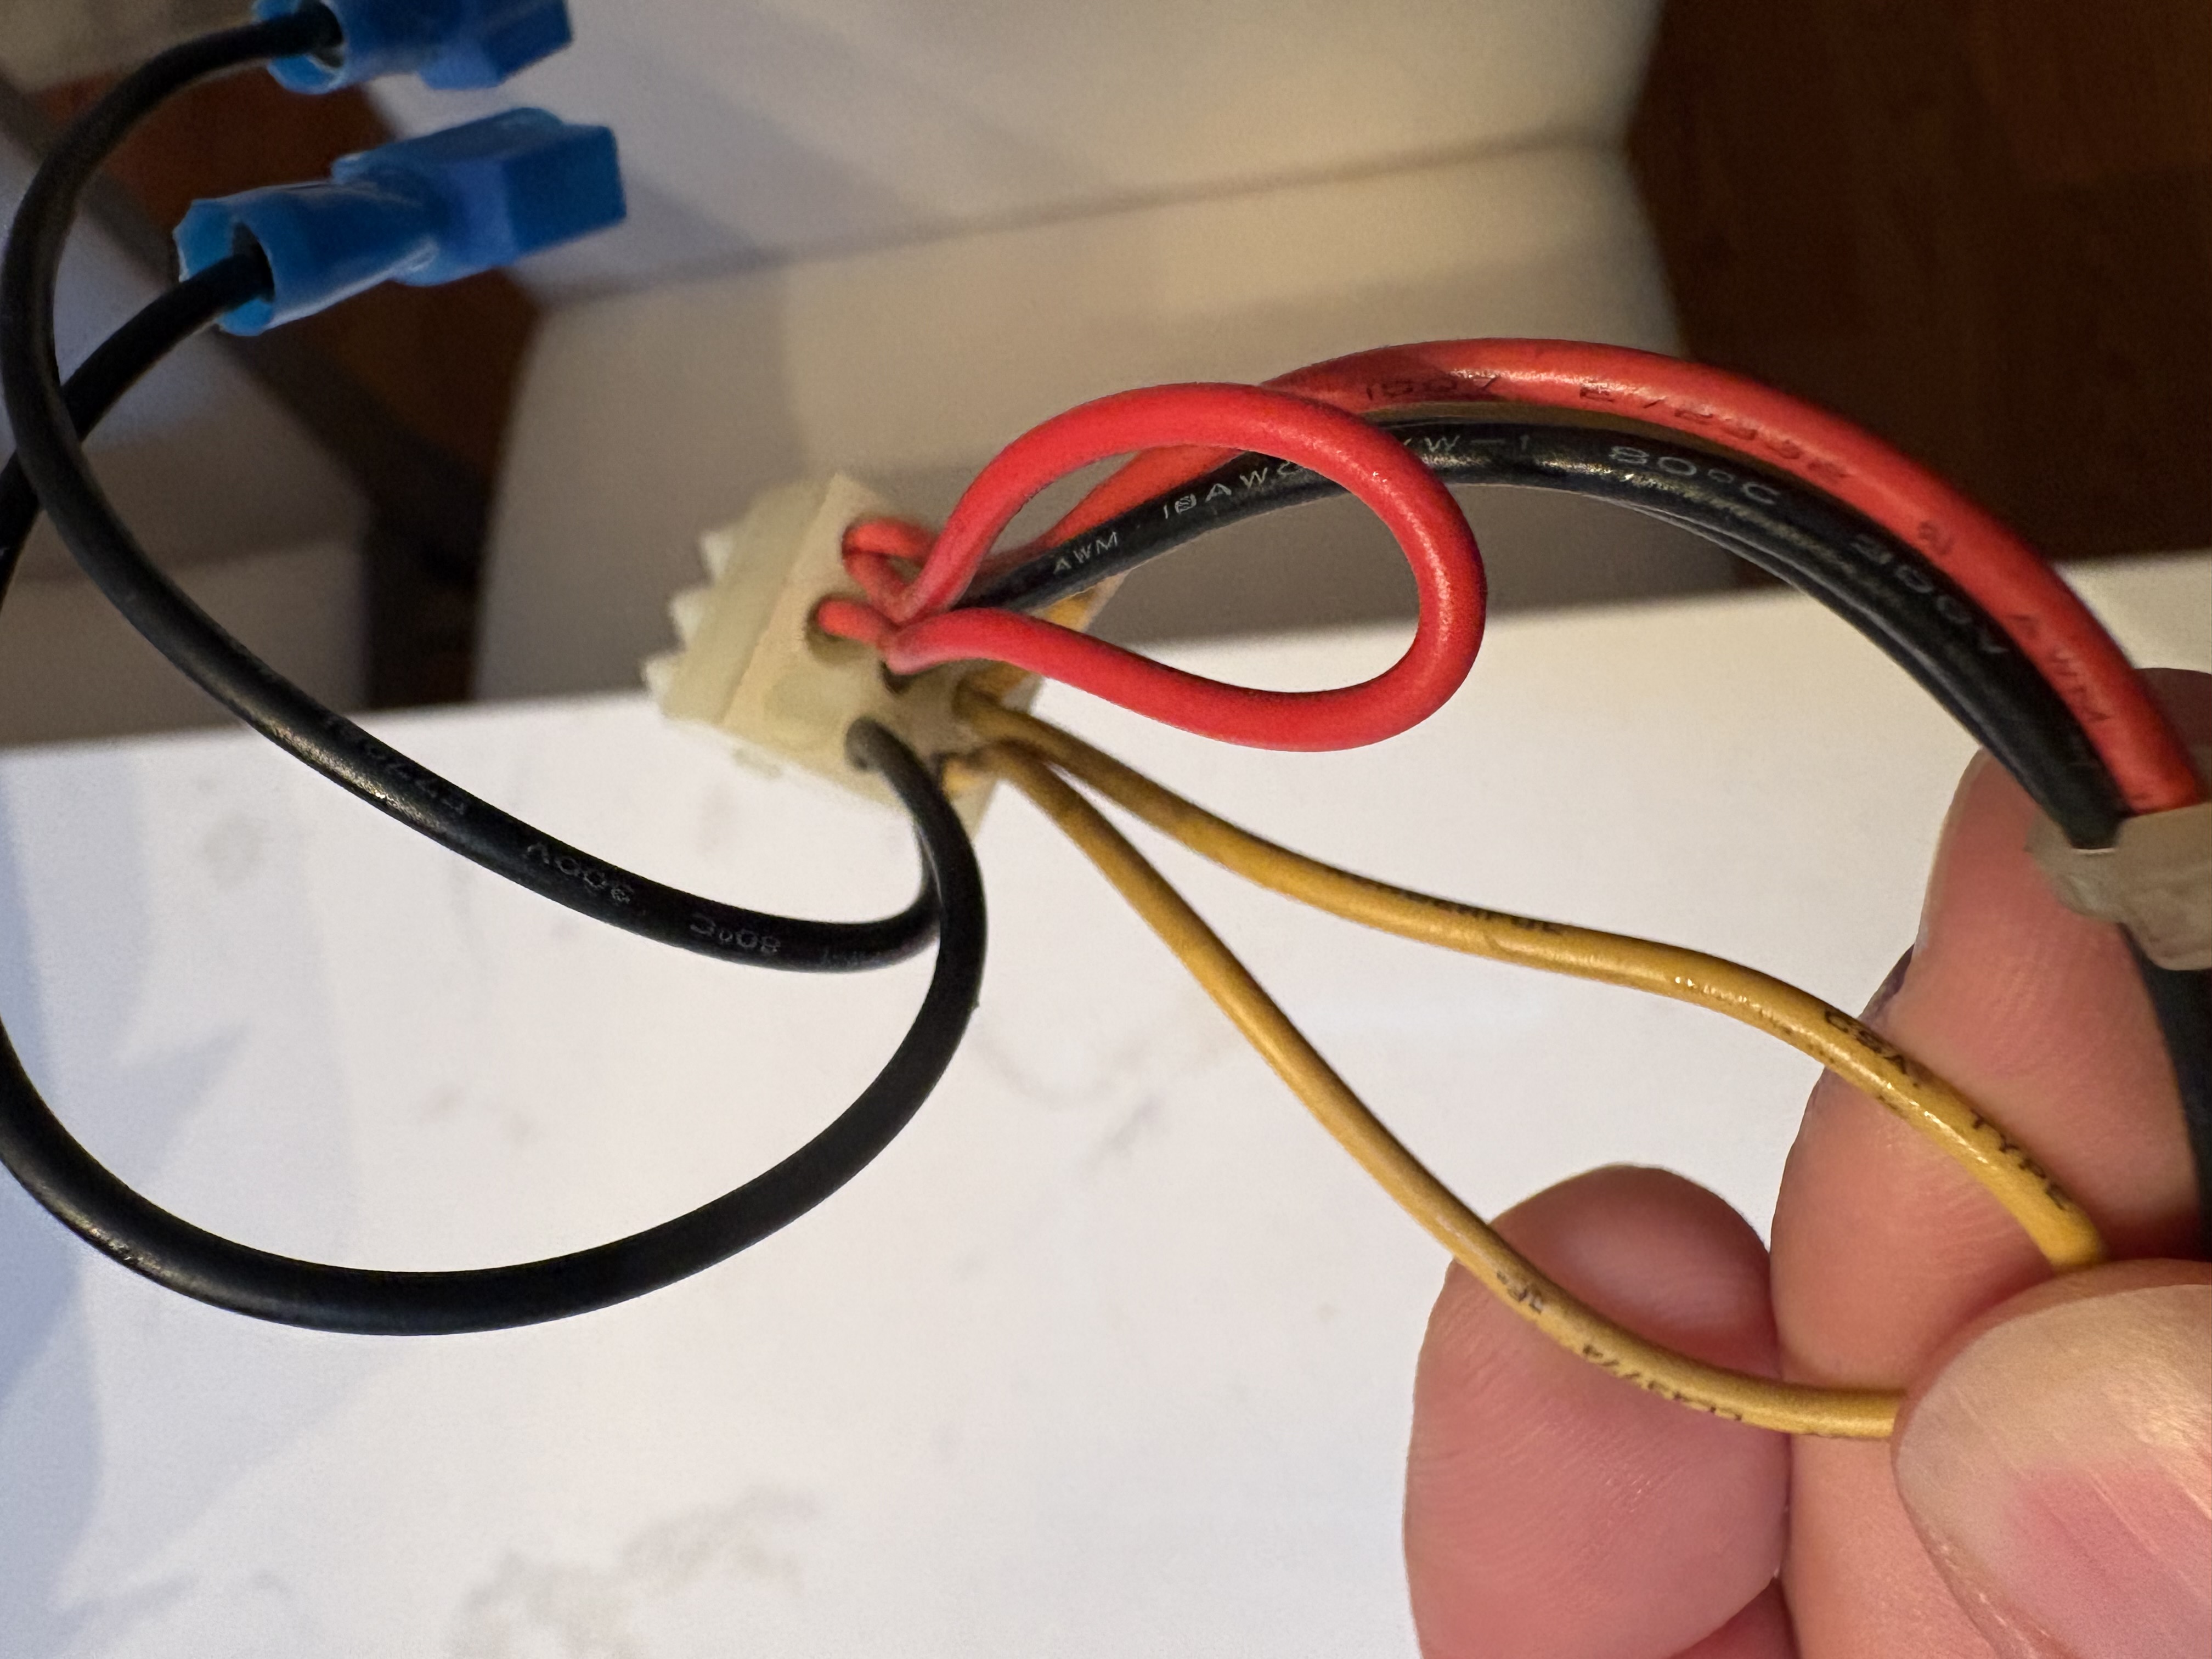
You seeing this nonsense?
On the previous Arcade Cabinet PSU, one of the 9-pin connectors at the ground had a new terminal with two ground wires that connect to the hard drive and J50s on the board. In order to resolve this, I’ll be taking the old PSU’s crimp out and installing the crimp in the new PSU.
INFO
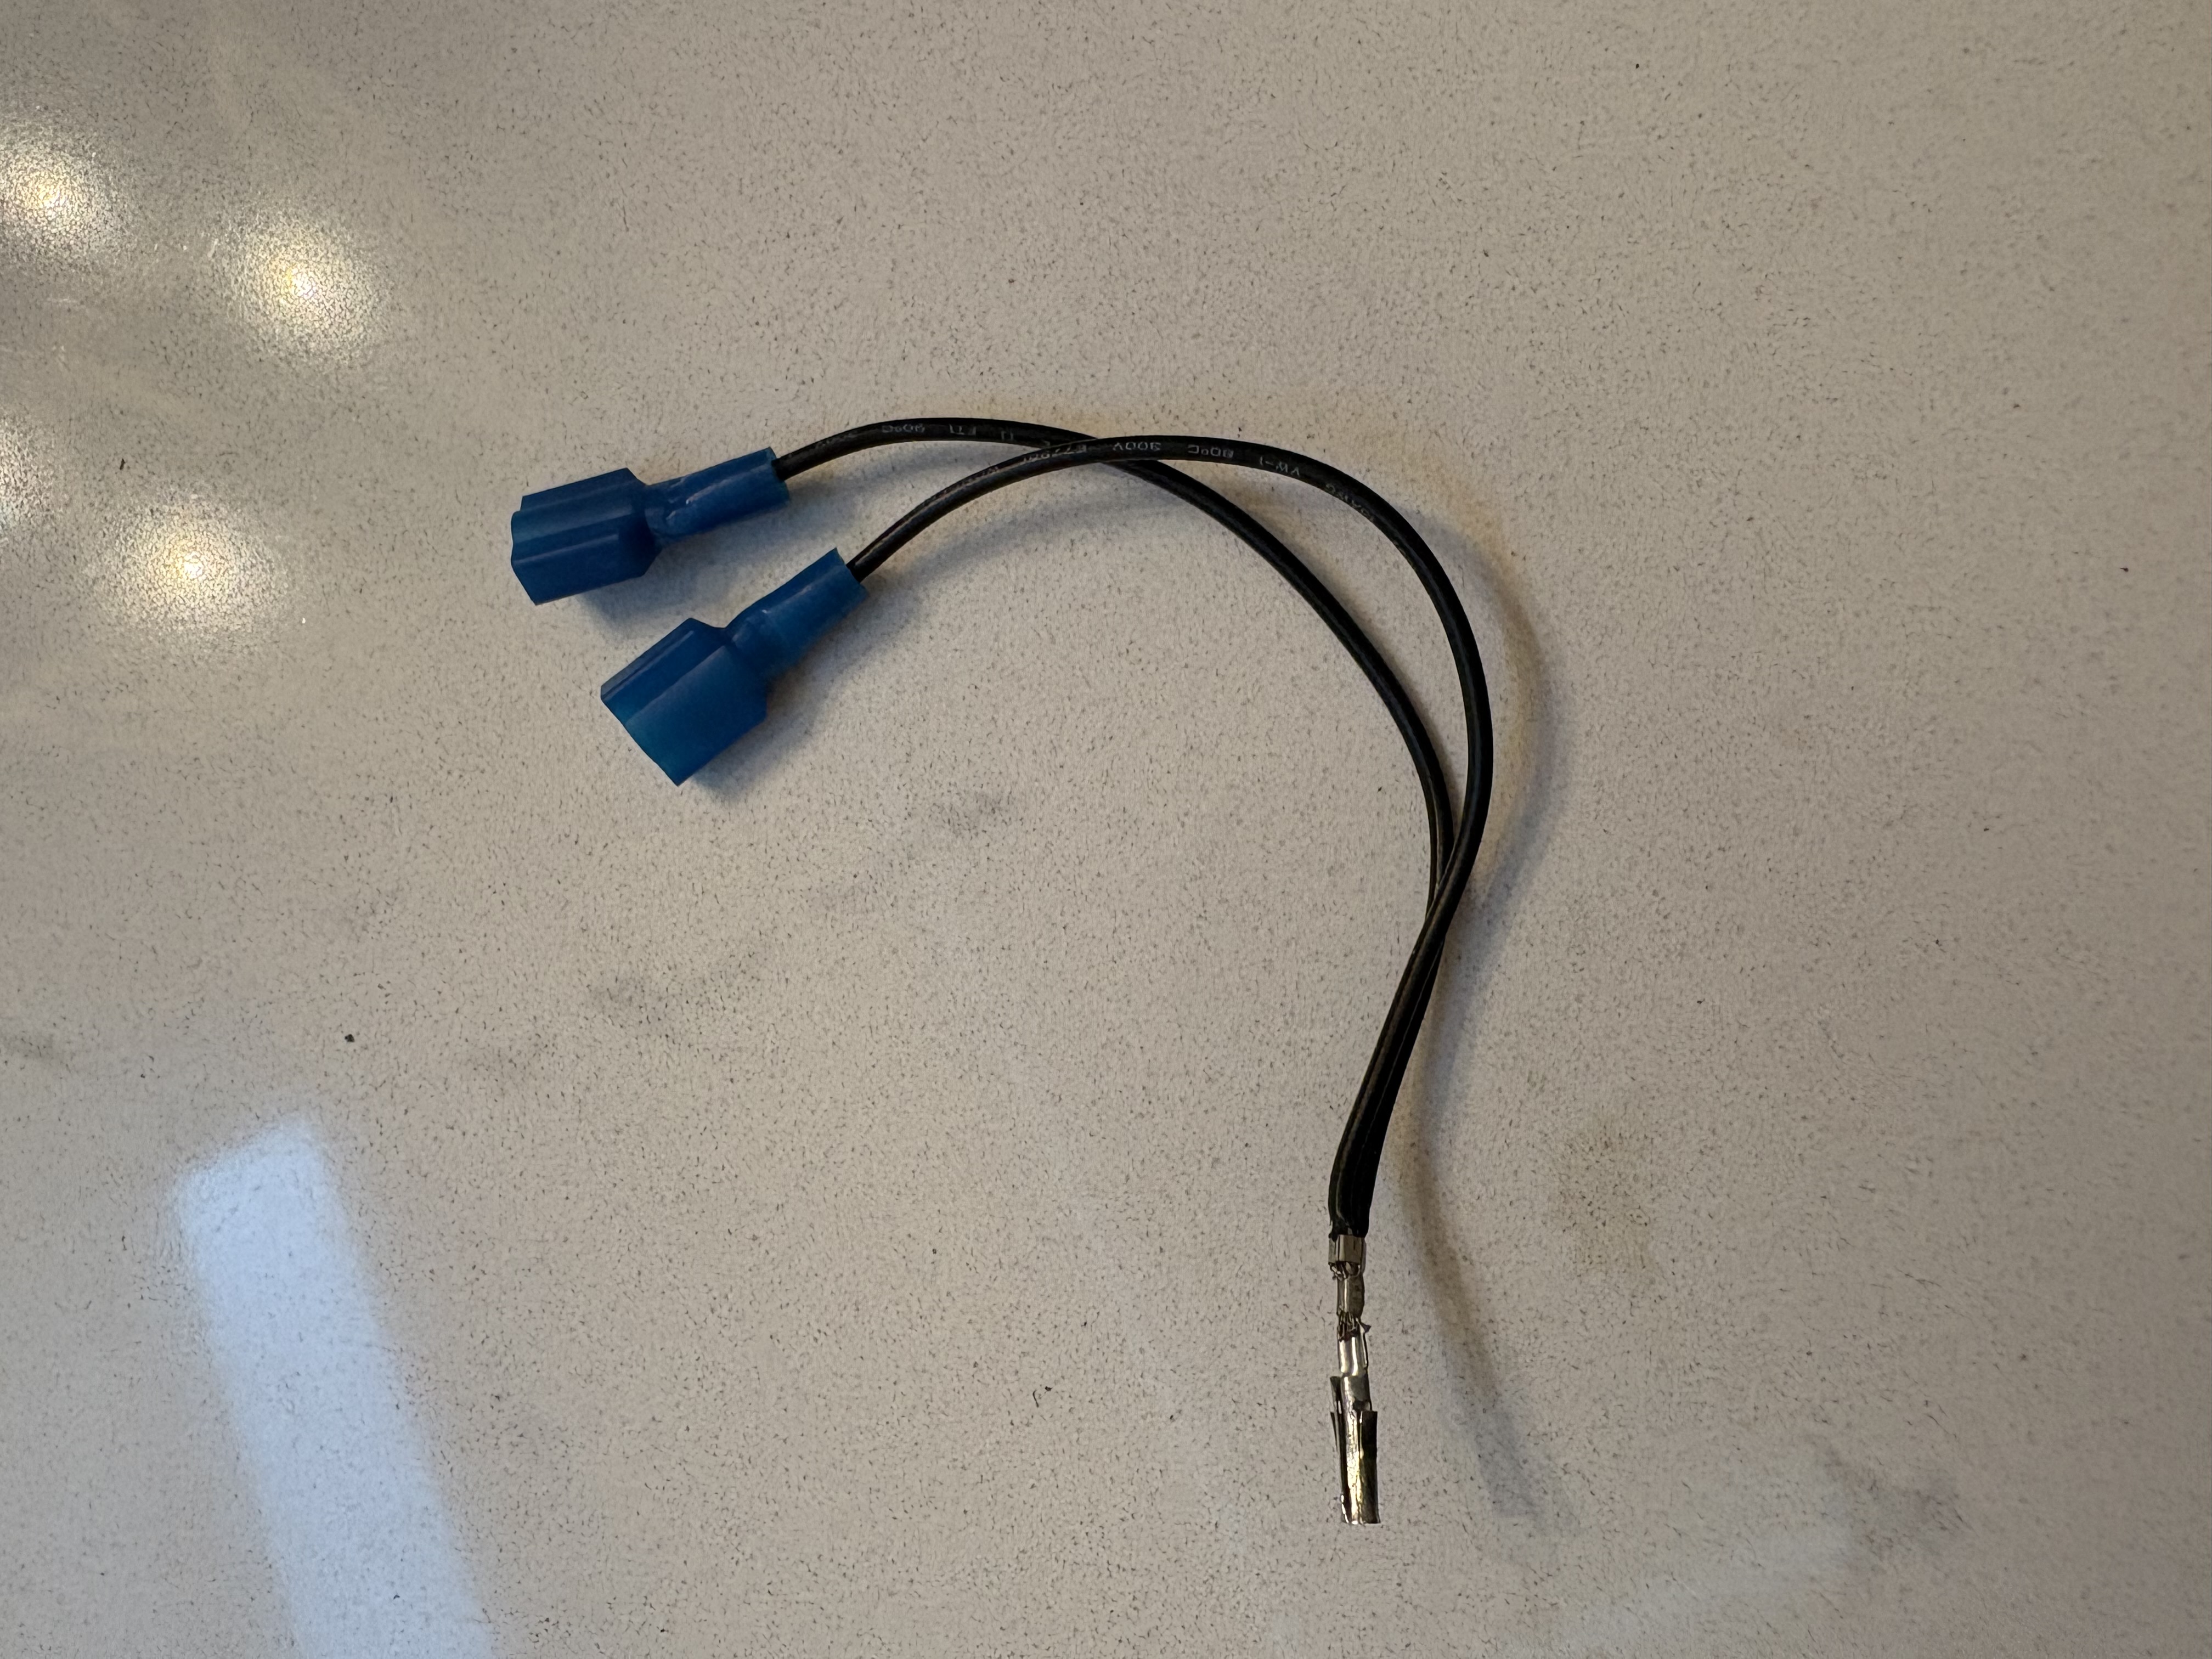
Got it out!
There’s another issue though. The old PSU also had an additional modification. On a standard 9-pin connector, the bottom wires are yellow, white and blue (+12VDC, -5DC, -12VDC). On the old PSU, the yellow cable was actually crimped for two connectors to power the J50 and JAMMA board. So I’ll need to get larger molex terminals ordered and make some crimp changes.
INFO
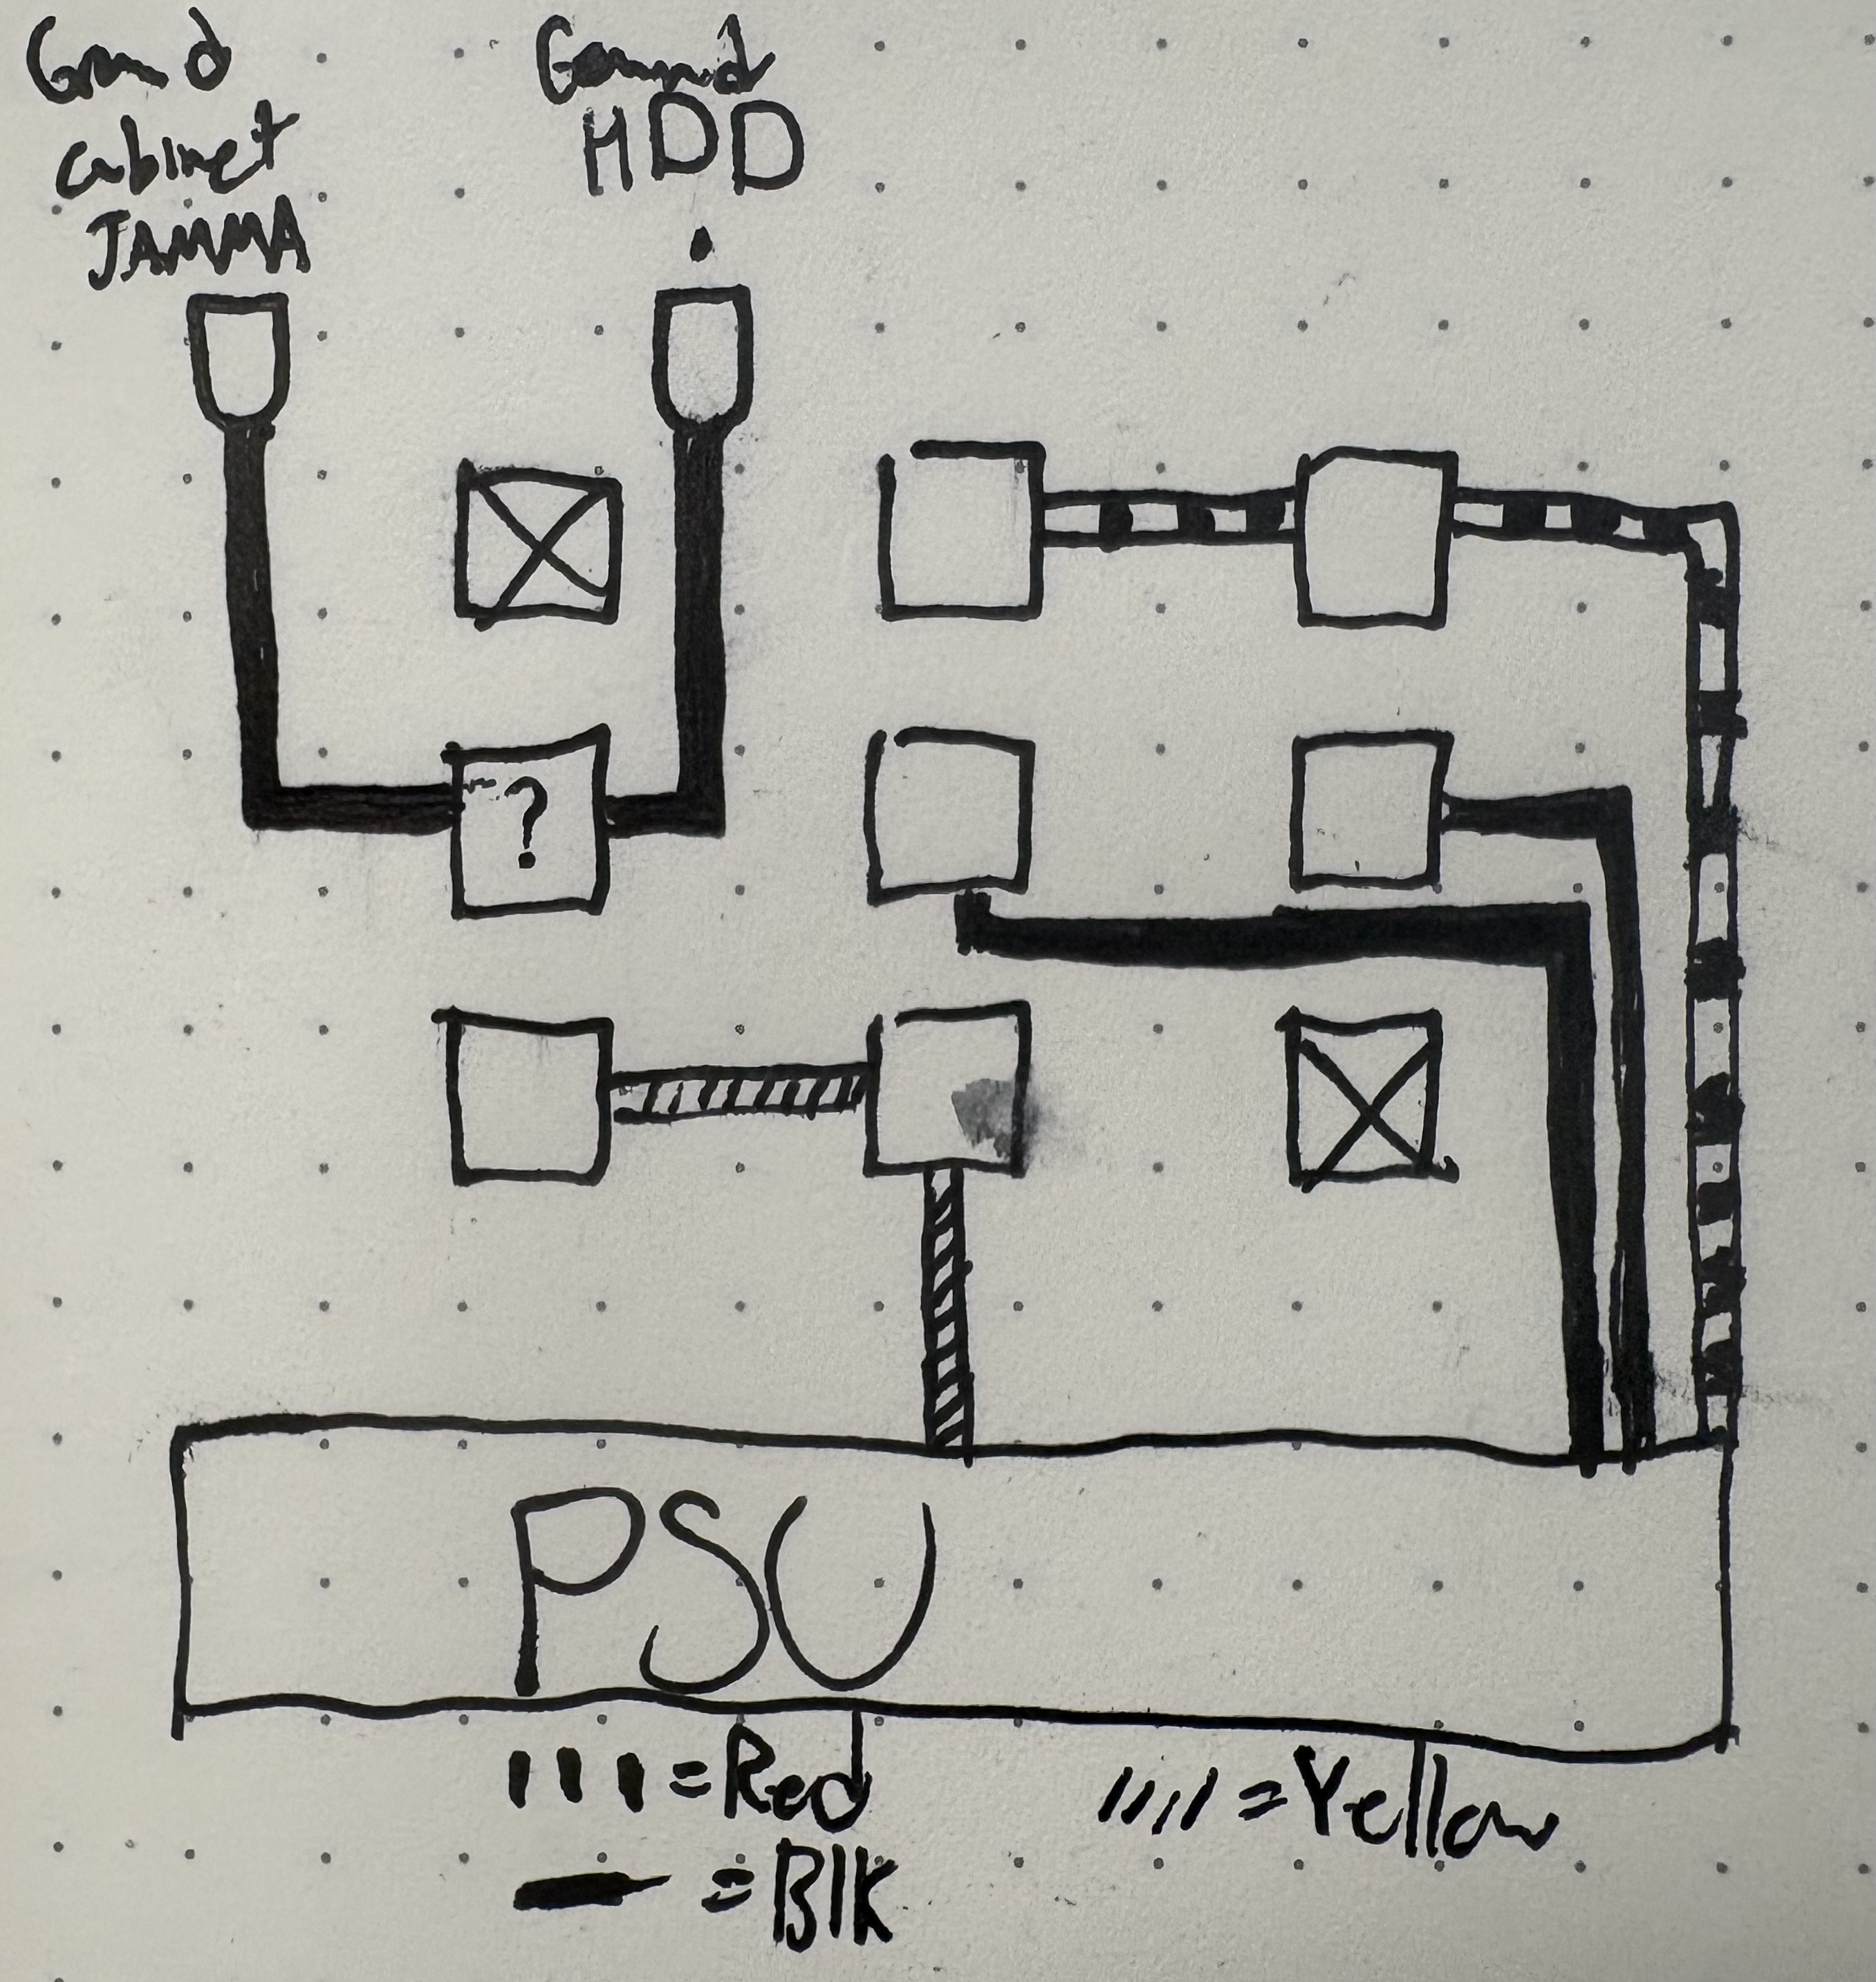
Pardon the smudge, I think it was sweat. Blood's in the cabinet and tears are too
I’ll be making sure to keep the other ground wires secured away to prevent serious issues. More updates soon!
Day 10: Another Step Forward
I received the additional terminal pins, and was able to get the PSU cable set up exactly like the previous one. And now, the board does power up…
But now it’s not completing boot up.
I’m seeing that status 2 flashes appropriately, while status 1 is full on. That indicates it’s not properly powering up. However, it’s better progress than the previous step. So now I’ll just need to figure out what the next steps are.
I tested connectors at the JAMMA pins and they seem to be working correctly. I’m seeing IDE activity, so nothing seems abnormal there. There’s a bunch of other things I can test, but I’ll need to do a bit of research and keep trying harder.
Day 11: Cleaning a Filthy, Dirty Board
I hope that you all had a very memorable Juneteenth!
Since I had the day off, I decided to take the opportunity to really dig into the arcade cabinet. The best thing that I could do for it is give it a nice deep cleaning.
So I took the board out completely and took it inside. I grabbed the 91% isopropyl alcohol, a toothbrush, some patch cloths, and put on some good music.
INFO
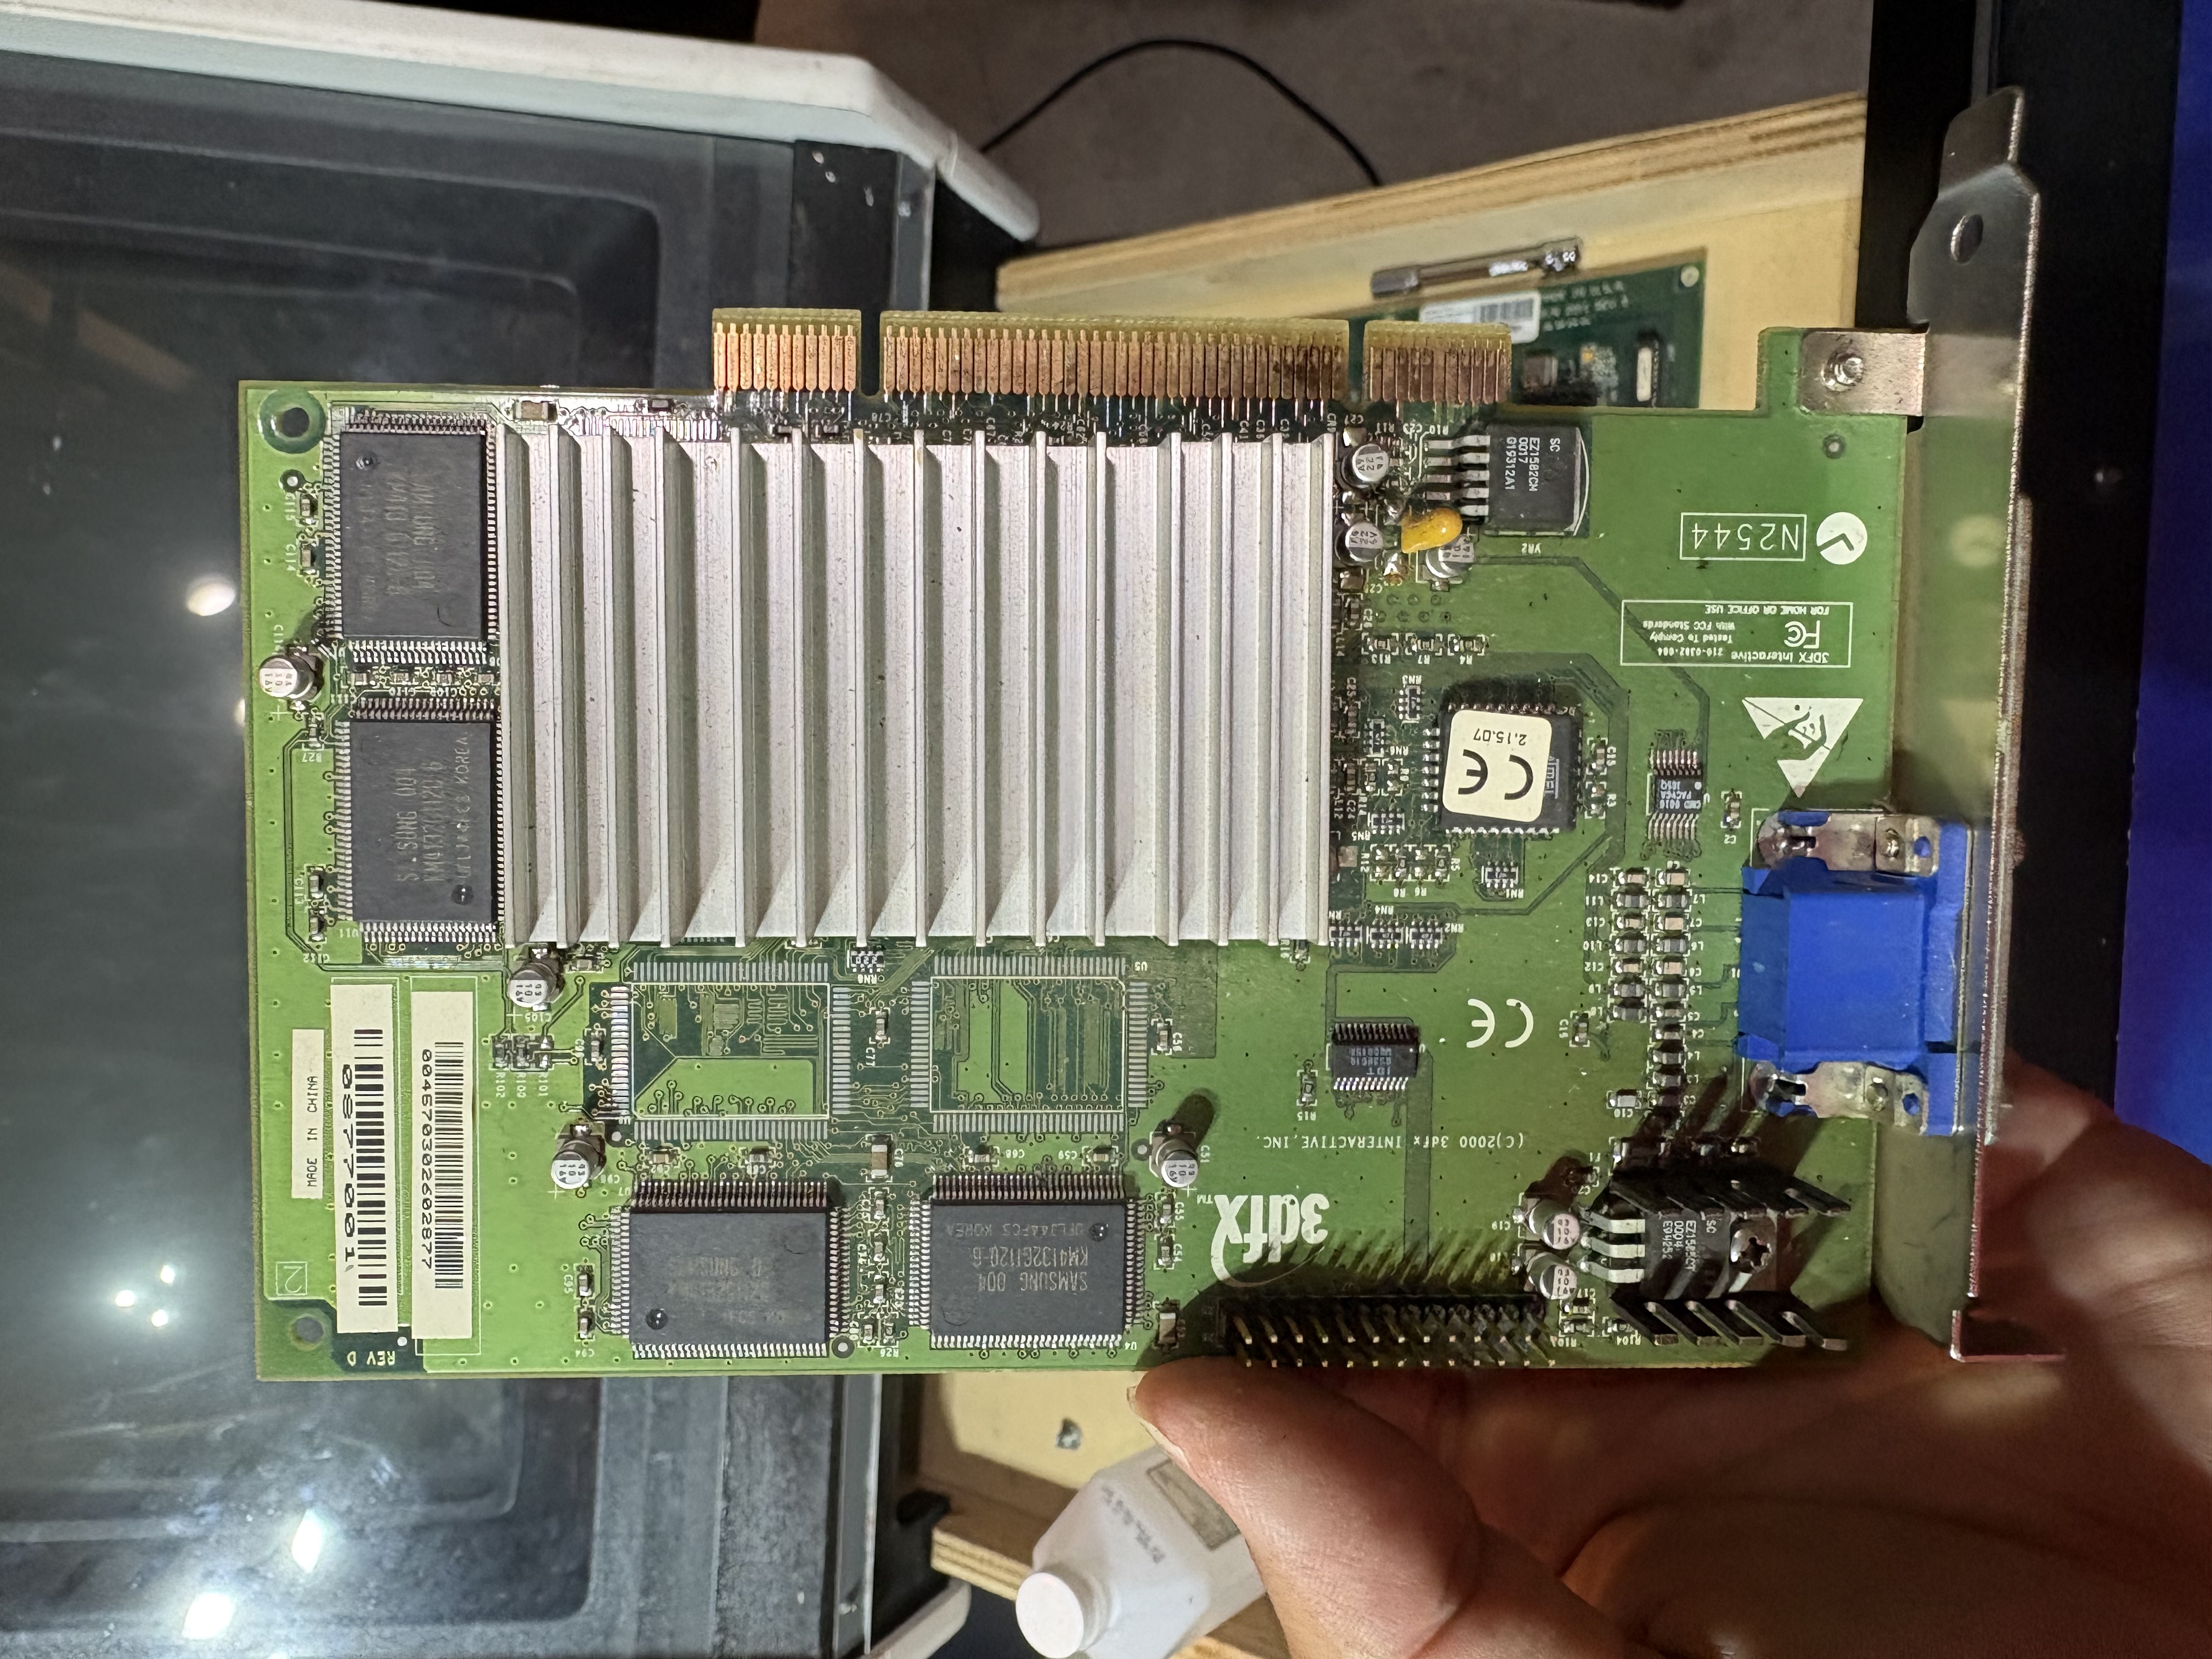
What a nice-looking video card.
After removing the video card, I noticed that it was surprisingly pretty good. It didn't look like there were any issues on the board itself, and it was a pretty easy clean. I made sure to take out the pink eraser as well to clean off the actual connectors.
INFO
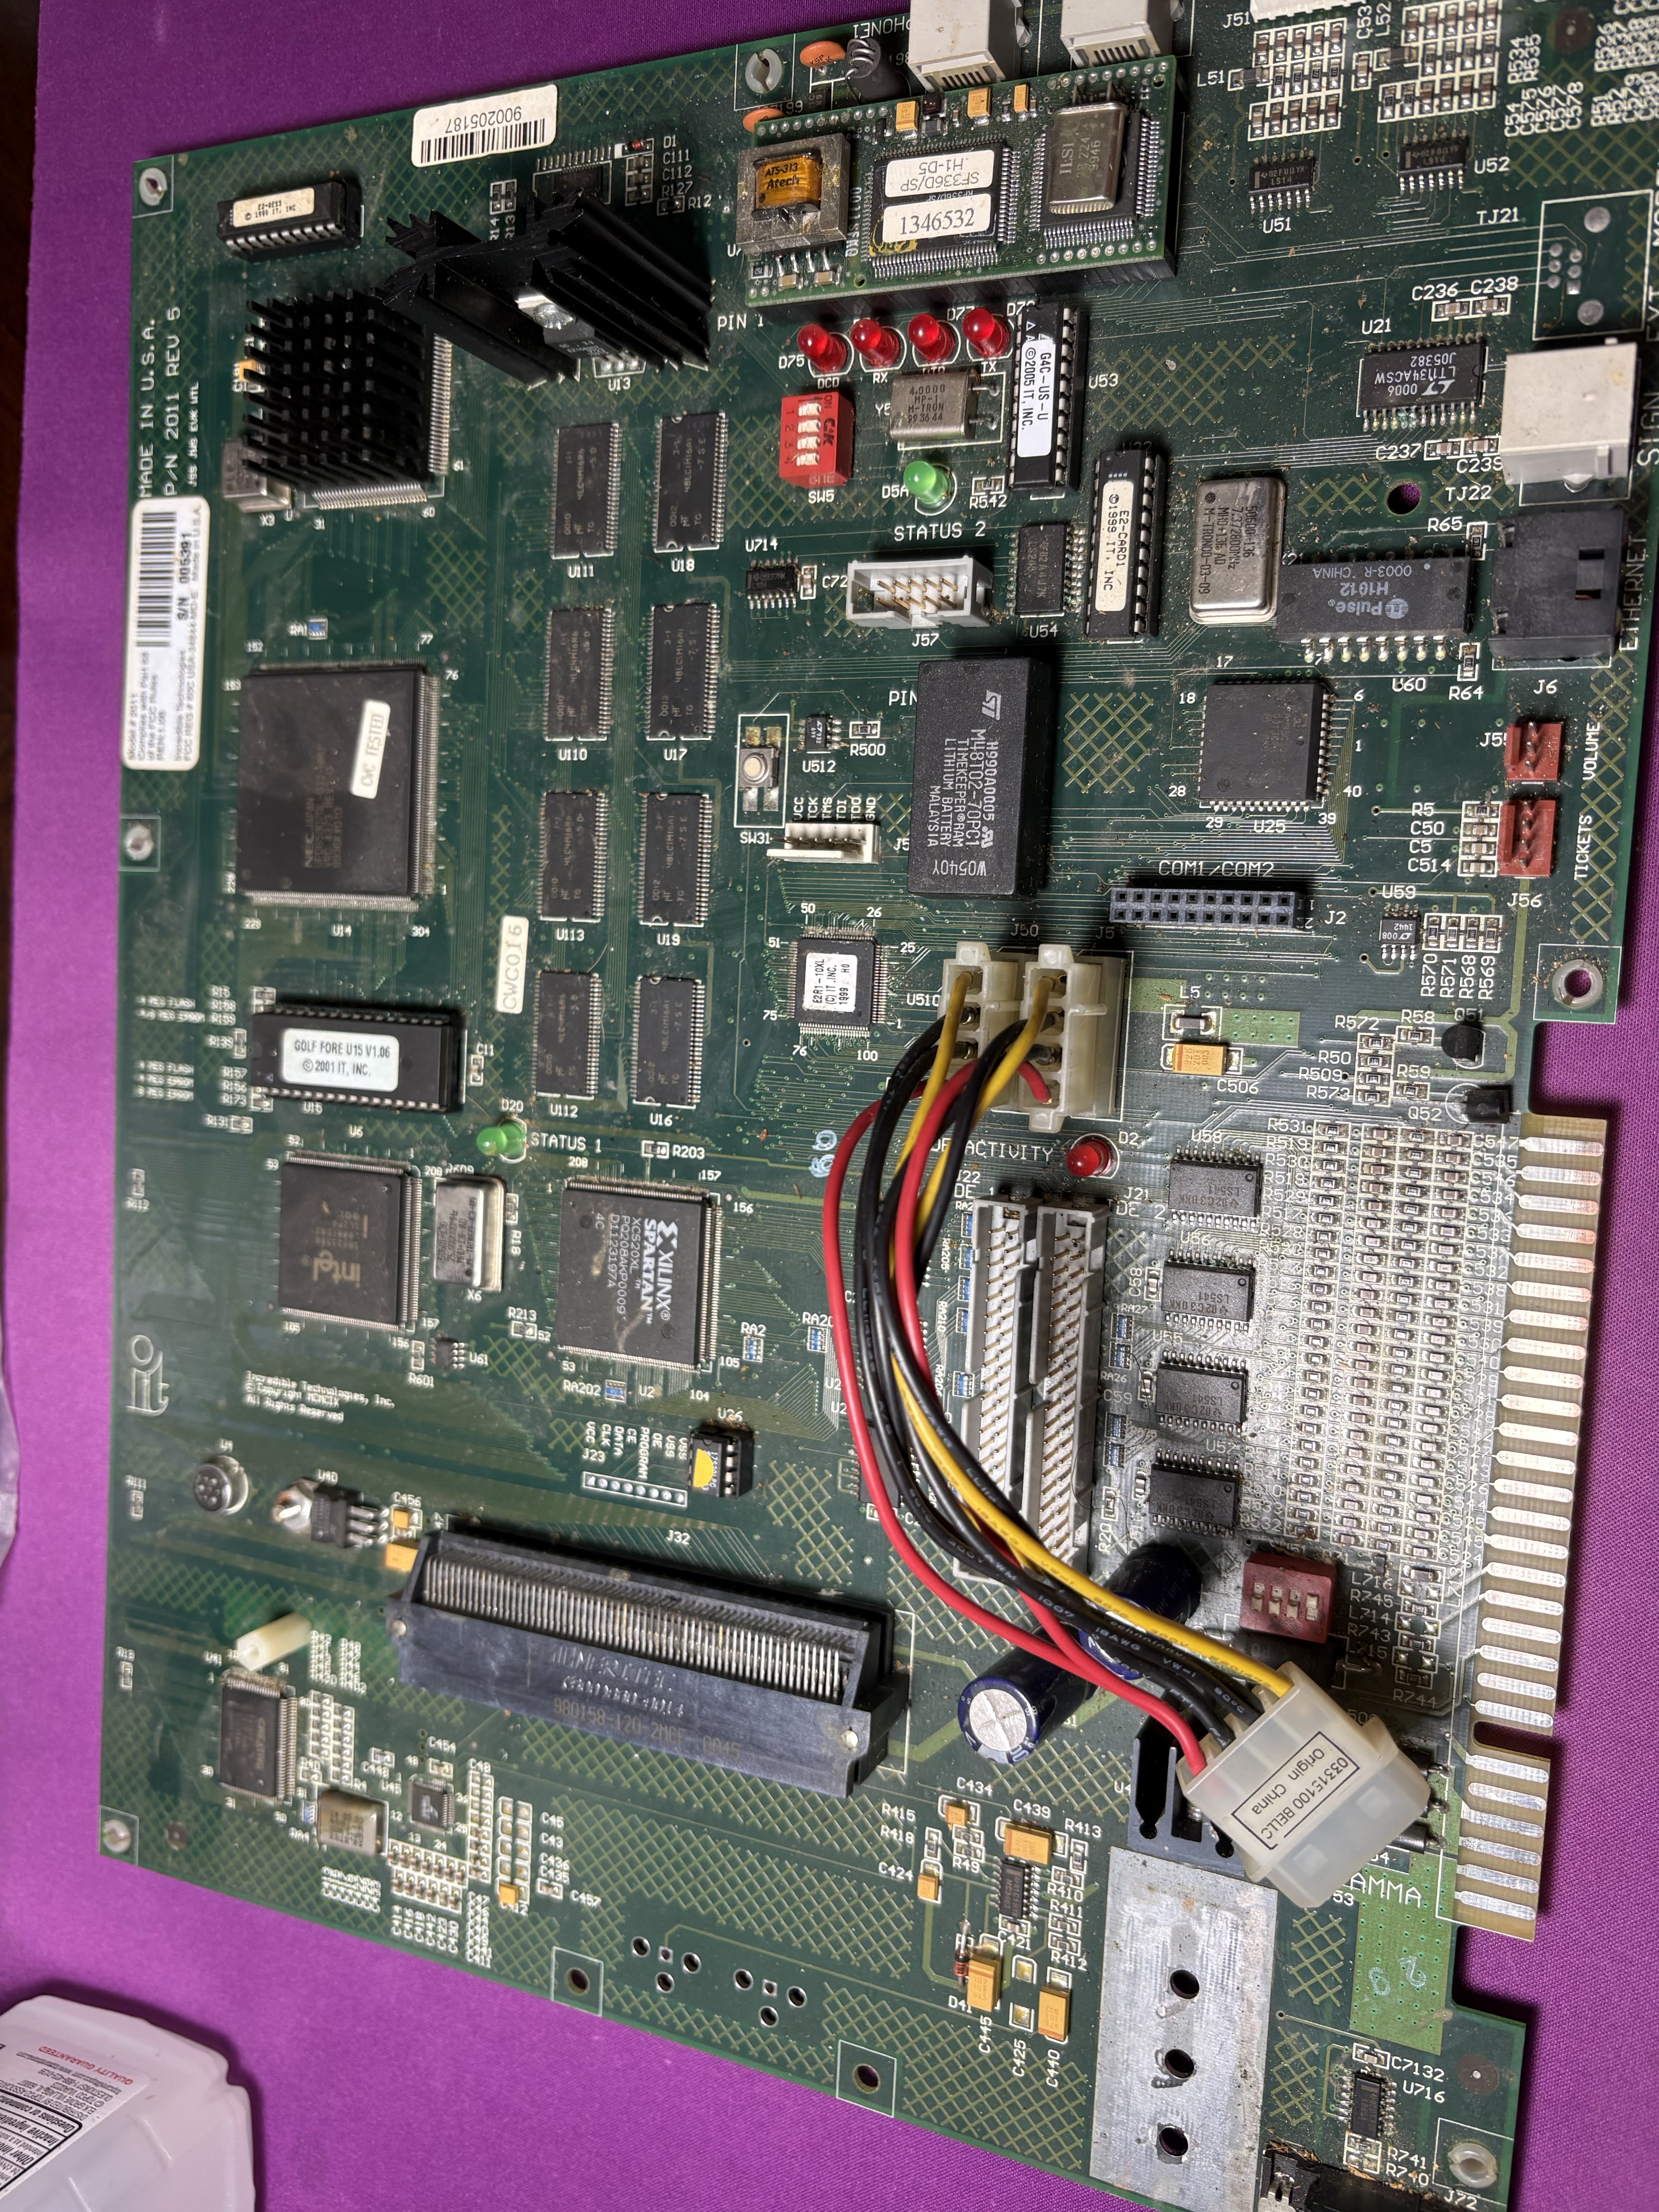
Are you sure you and the video card are connected?
The board itself was not as nice. This was a wonderful chance for me to learn more about these boards, because I really found out quite a lot. For starters, I noticed that most of the chips actually looked fine. There were a lot of little scraps and dust from years in a bar, but most things were easily cleanable.
What wasn't as easily cleanable was some of the copper corrosion I found. Specifically on one particular voltage regulator, I found a lot of potential corrosion and damage. In most locations, I was able to clean it off with a couple hard, toothbrush scrapes, but this area in particular looked more damaged.
INFO
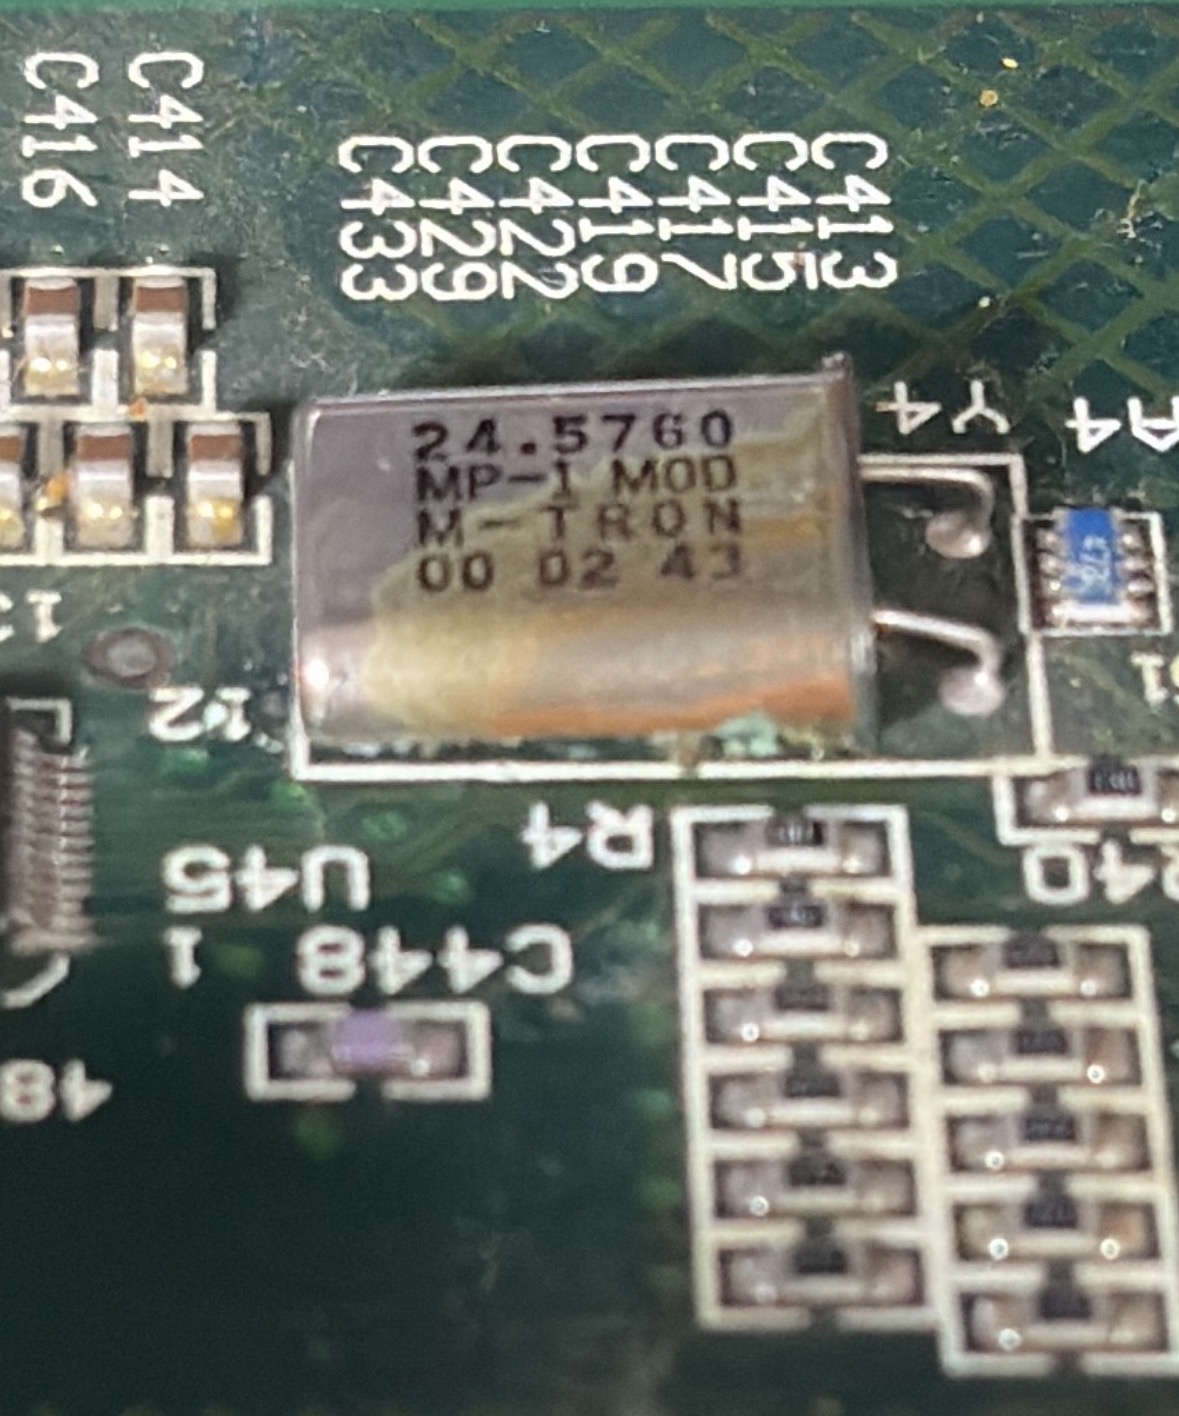
I think this is the issue, but I gotta confirm
Beyond that, I was able to learn more about IC chips and how to properly remove them. I found that the plastic spunger I have from iFixIt got the EEPROM Boot IC out quickly. The security chip required a small screwdriver, but being able to clean those areas and give them a nice connection will help!
INFO
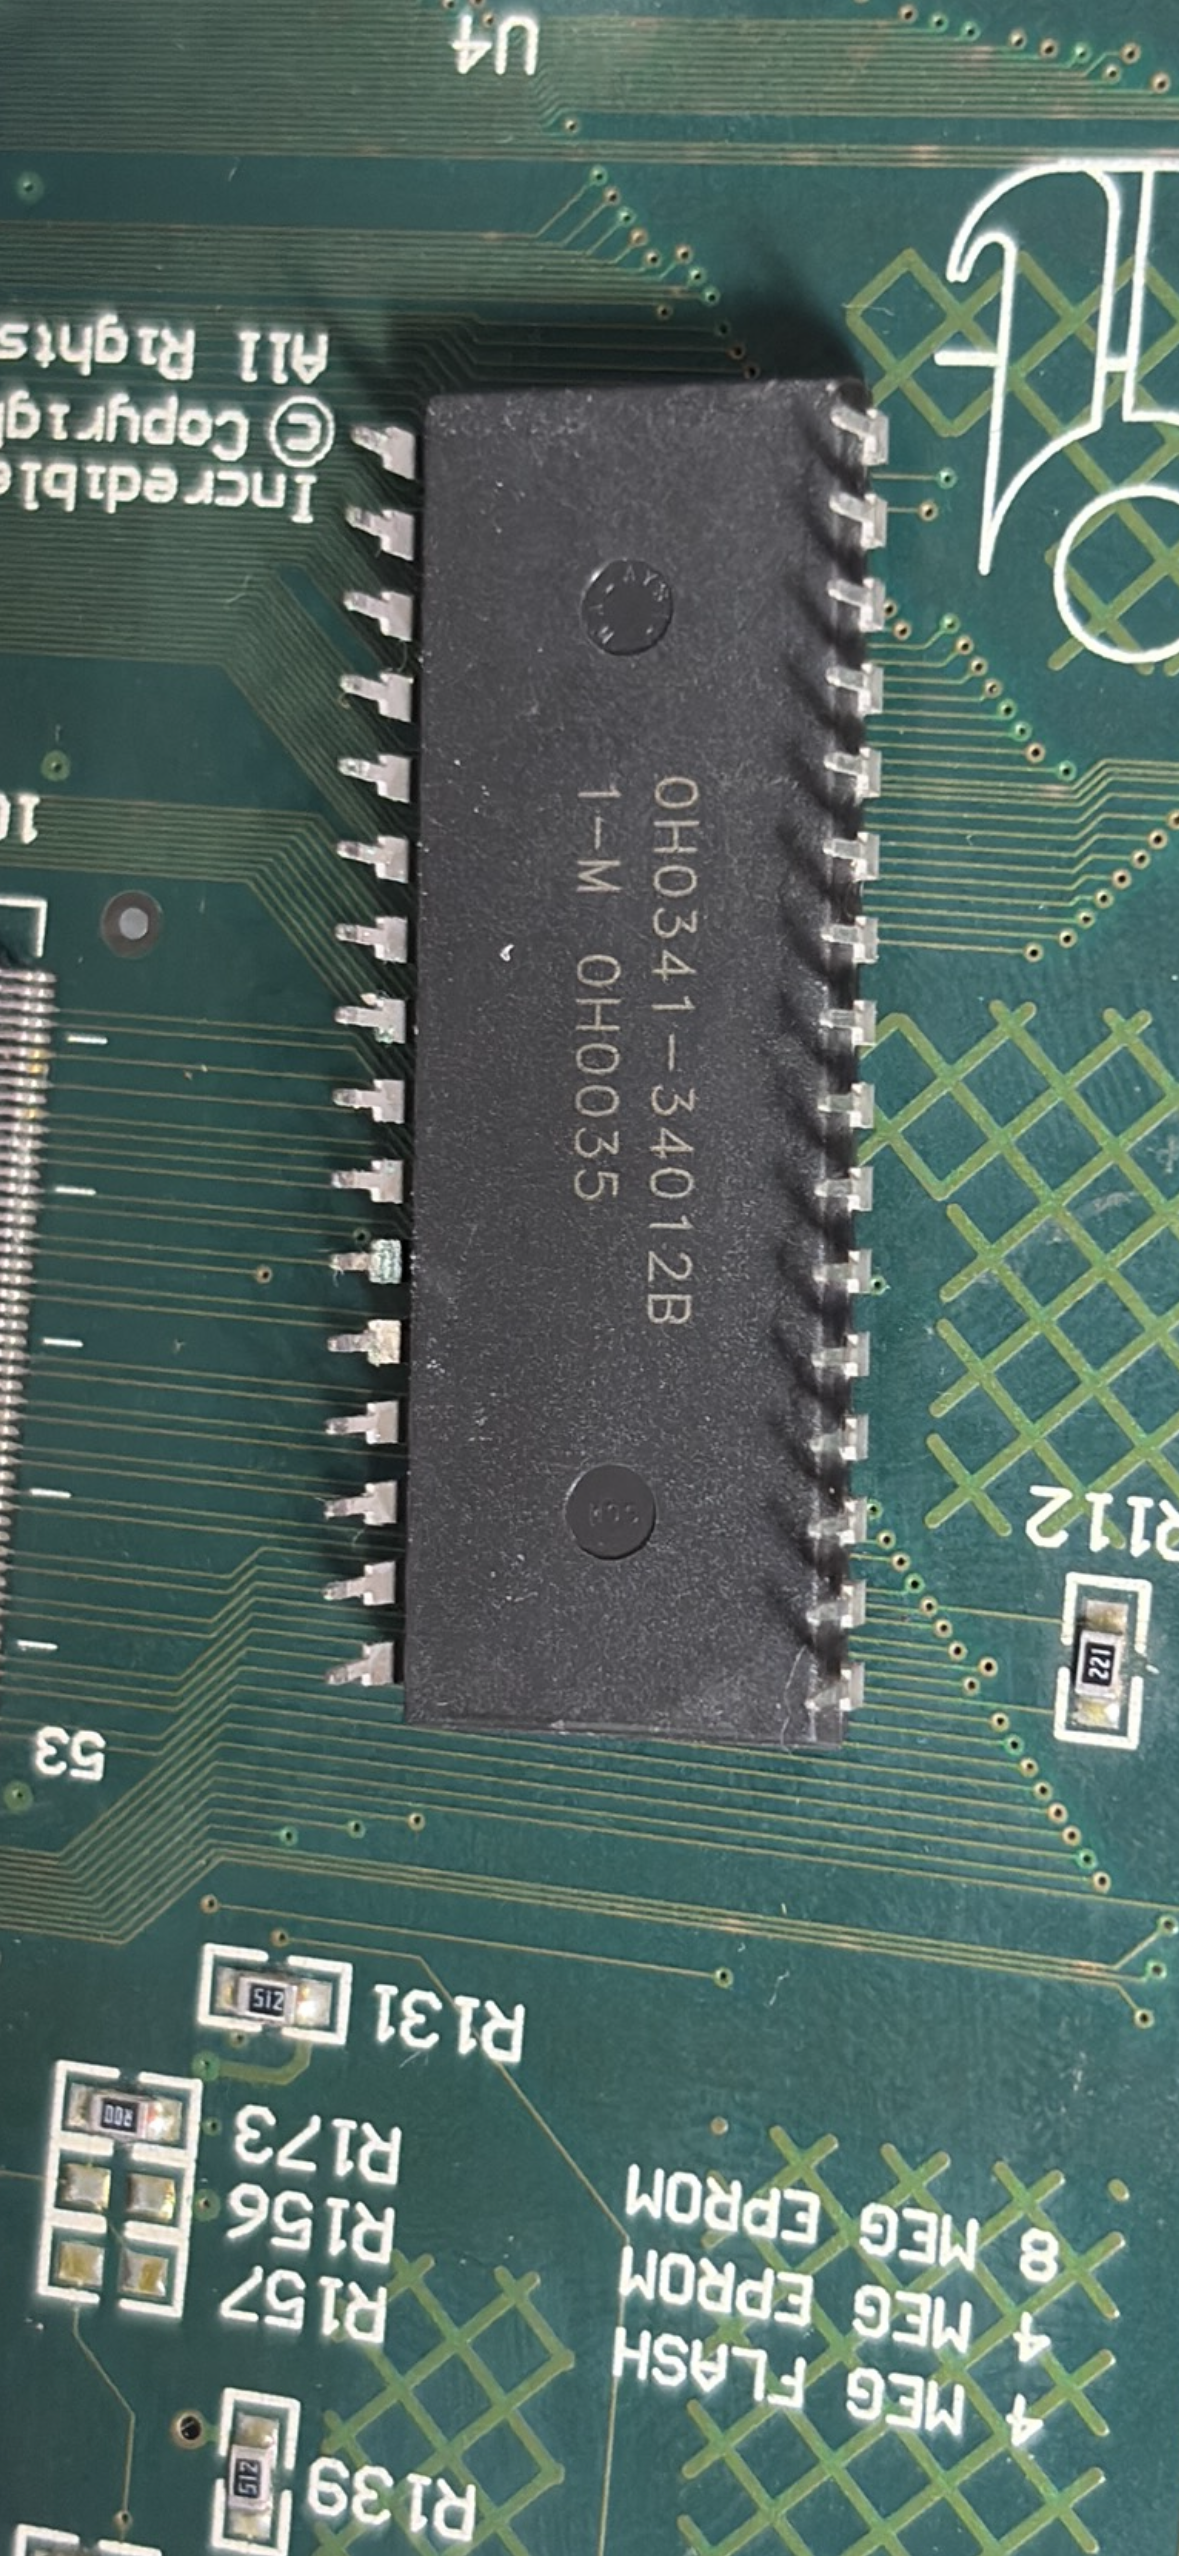
IC Chips... huh
I made sure to use compressed air and dry them off. I gave them a little extra time and got them connected back into the arcade cabinet.
Unfortunately, there still seems to be some issue. Remember the voltage regulator that I told you about earlier? I tested that with a multimeter and found that the voltage was considerably lower than it should be. I think that's the main culprit for our problem.
I will be testing the board even further under power, but I might need to de-solder that capacitor and test it with a 9 V battery. That might need a replacement to get this board back up and running.
This project is starting to feel more like a puzzle. I'm starting to have more fun with it. As much as I love it to just work right away, it really will make a difference, knowing how everything works. And once it works, I will be so excited.
Day 12: Treasure Trove
Initially, I thought this would be a short update. I've ordered the part that I need to hopefully fix the arcade cabinet board. I decided I would also grab measurements on the locks so that I could just order them at the same time.
However, as I opened up the second cabinet, I found that there were a bunch of extra papers stashed away in the coin drawer. So I took a bit of a side quest today and drilled that lock out entirely.
INFO
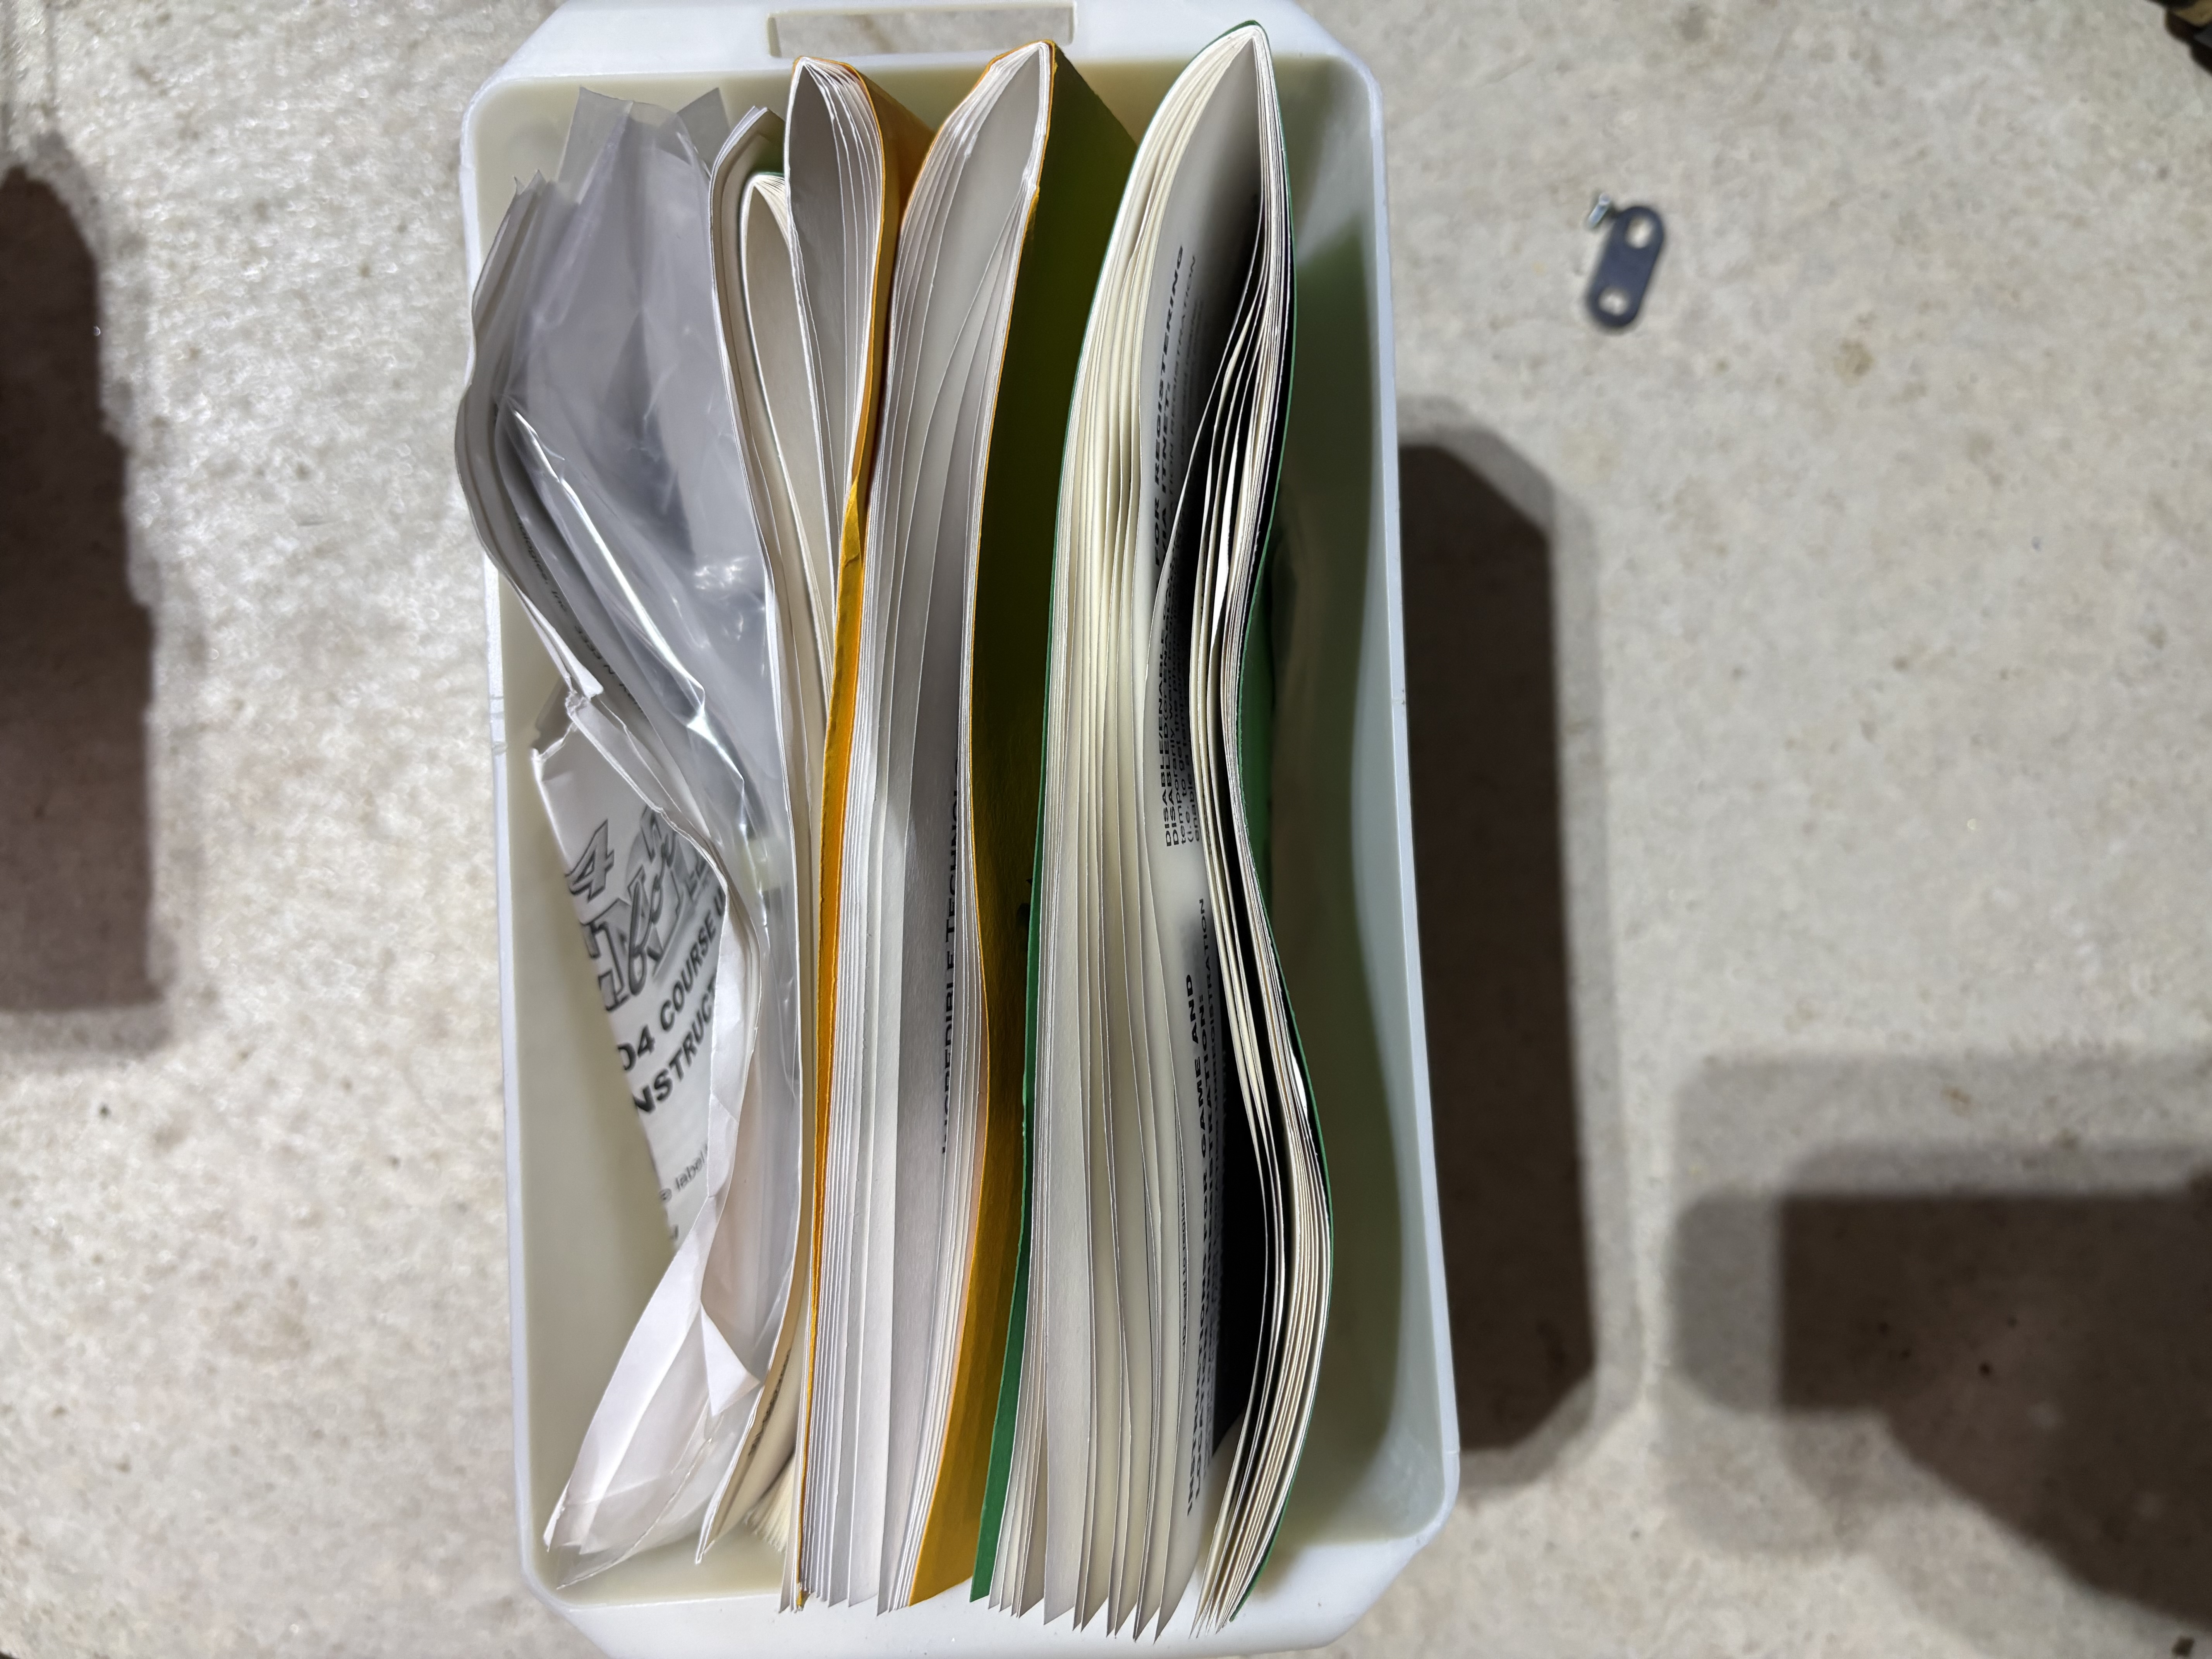
New shinies
Upon opening the second cabinet coin drawer, I found a treasure trove of document specifically for Golden Tee Fore! Arcade cabinets. Here's a brief list of all the things I found:
- Arcade installation guide
- itNet procedures manual
- Replaceable parts schematic
- security bracket assembly for bottom cabinet
- Bill acceptor installation guide
- Digital tech telephone line connector
- Golden Tee Fore! course update installation guides
- Additional arcade cabinet feet
And, for the final find……
- Three Quarters
INFO
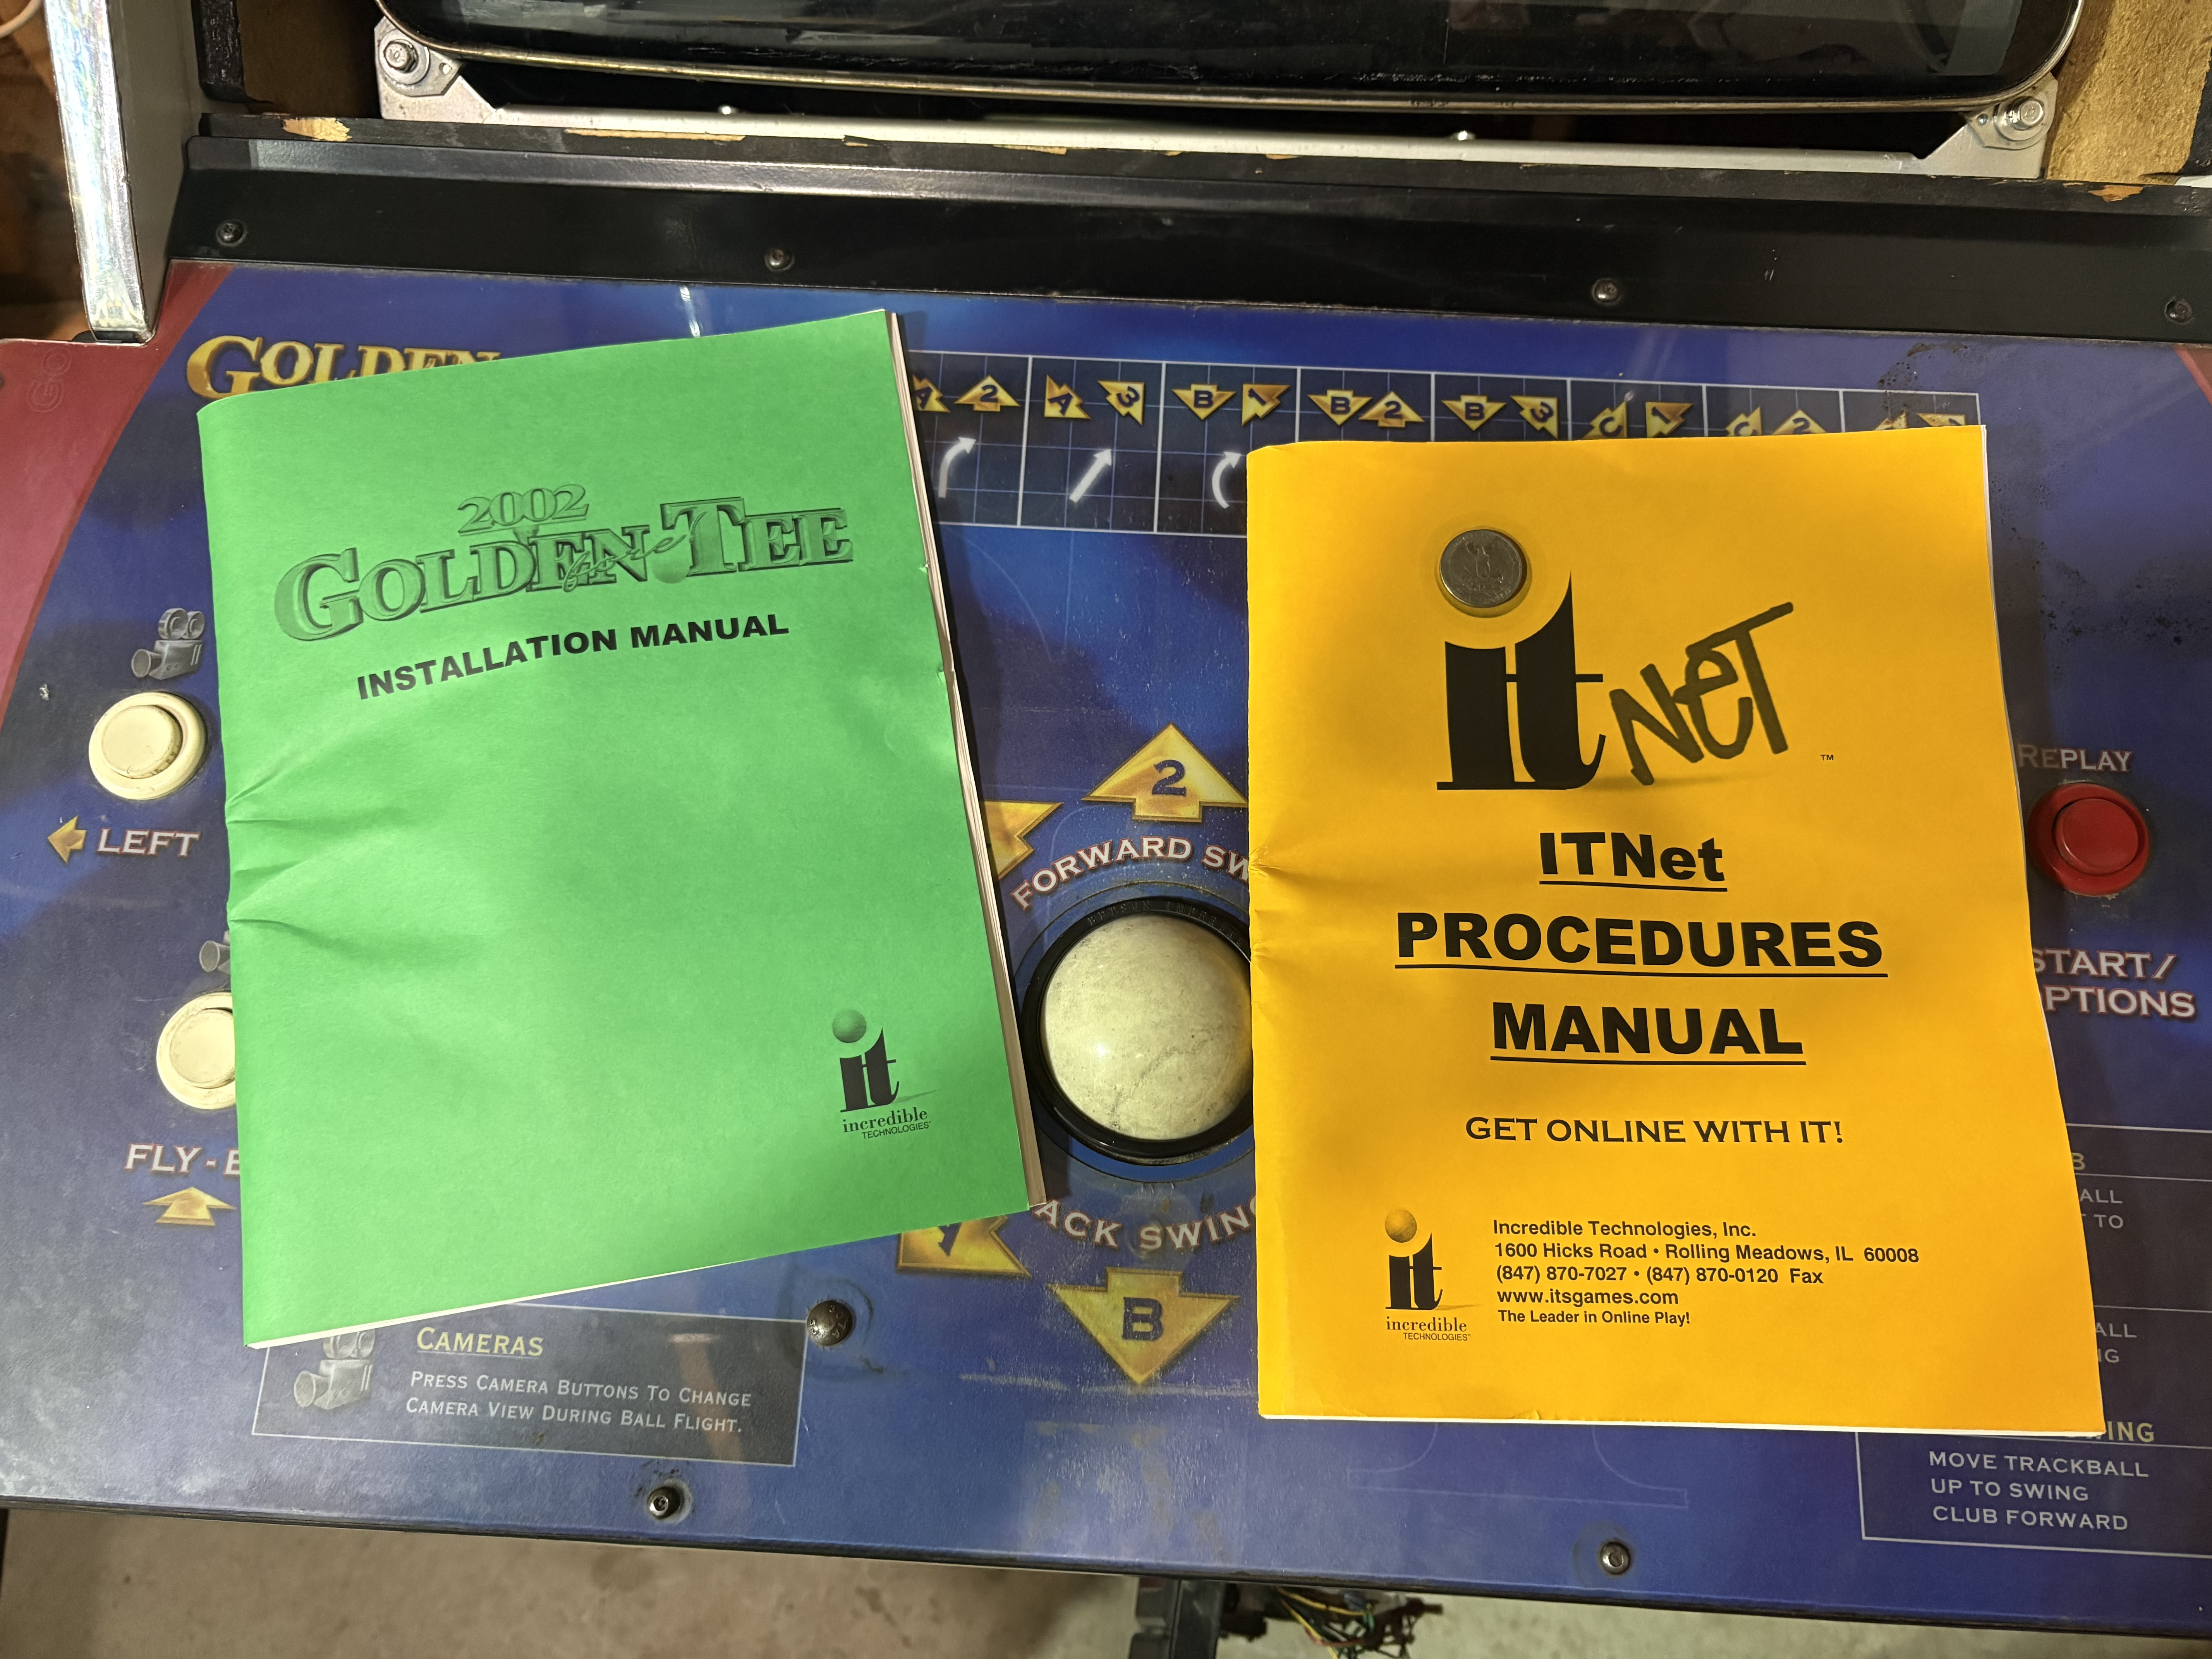
Installation Manuals
INFO
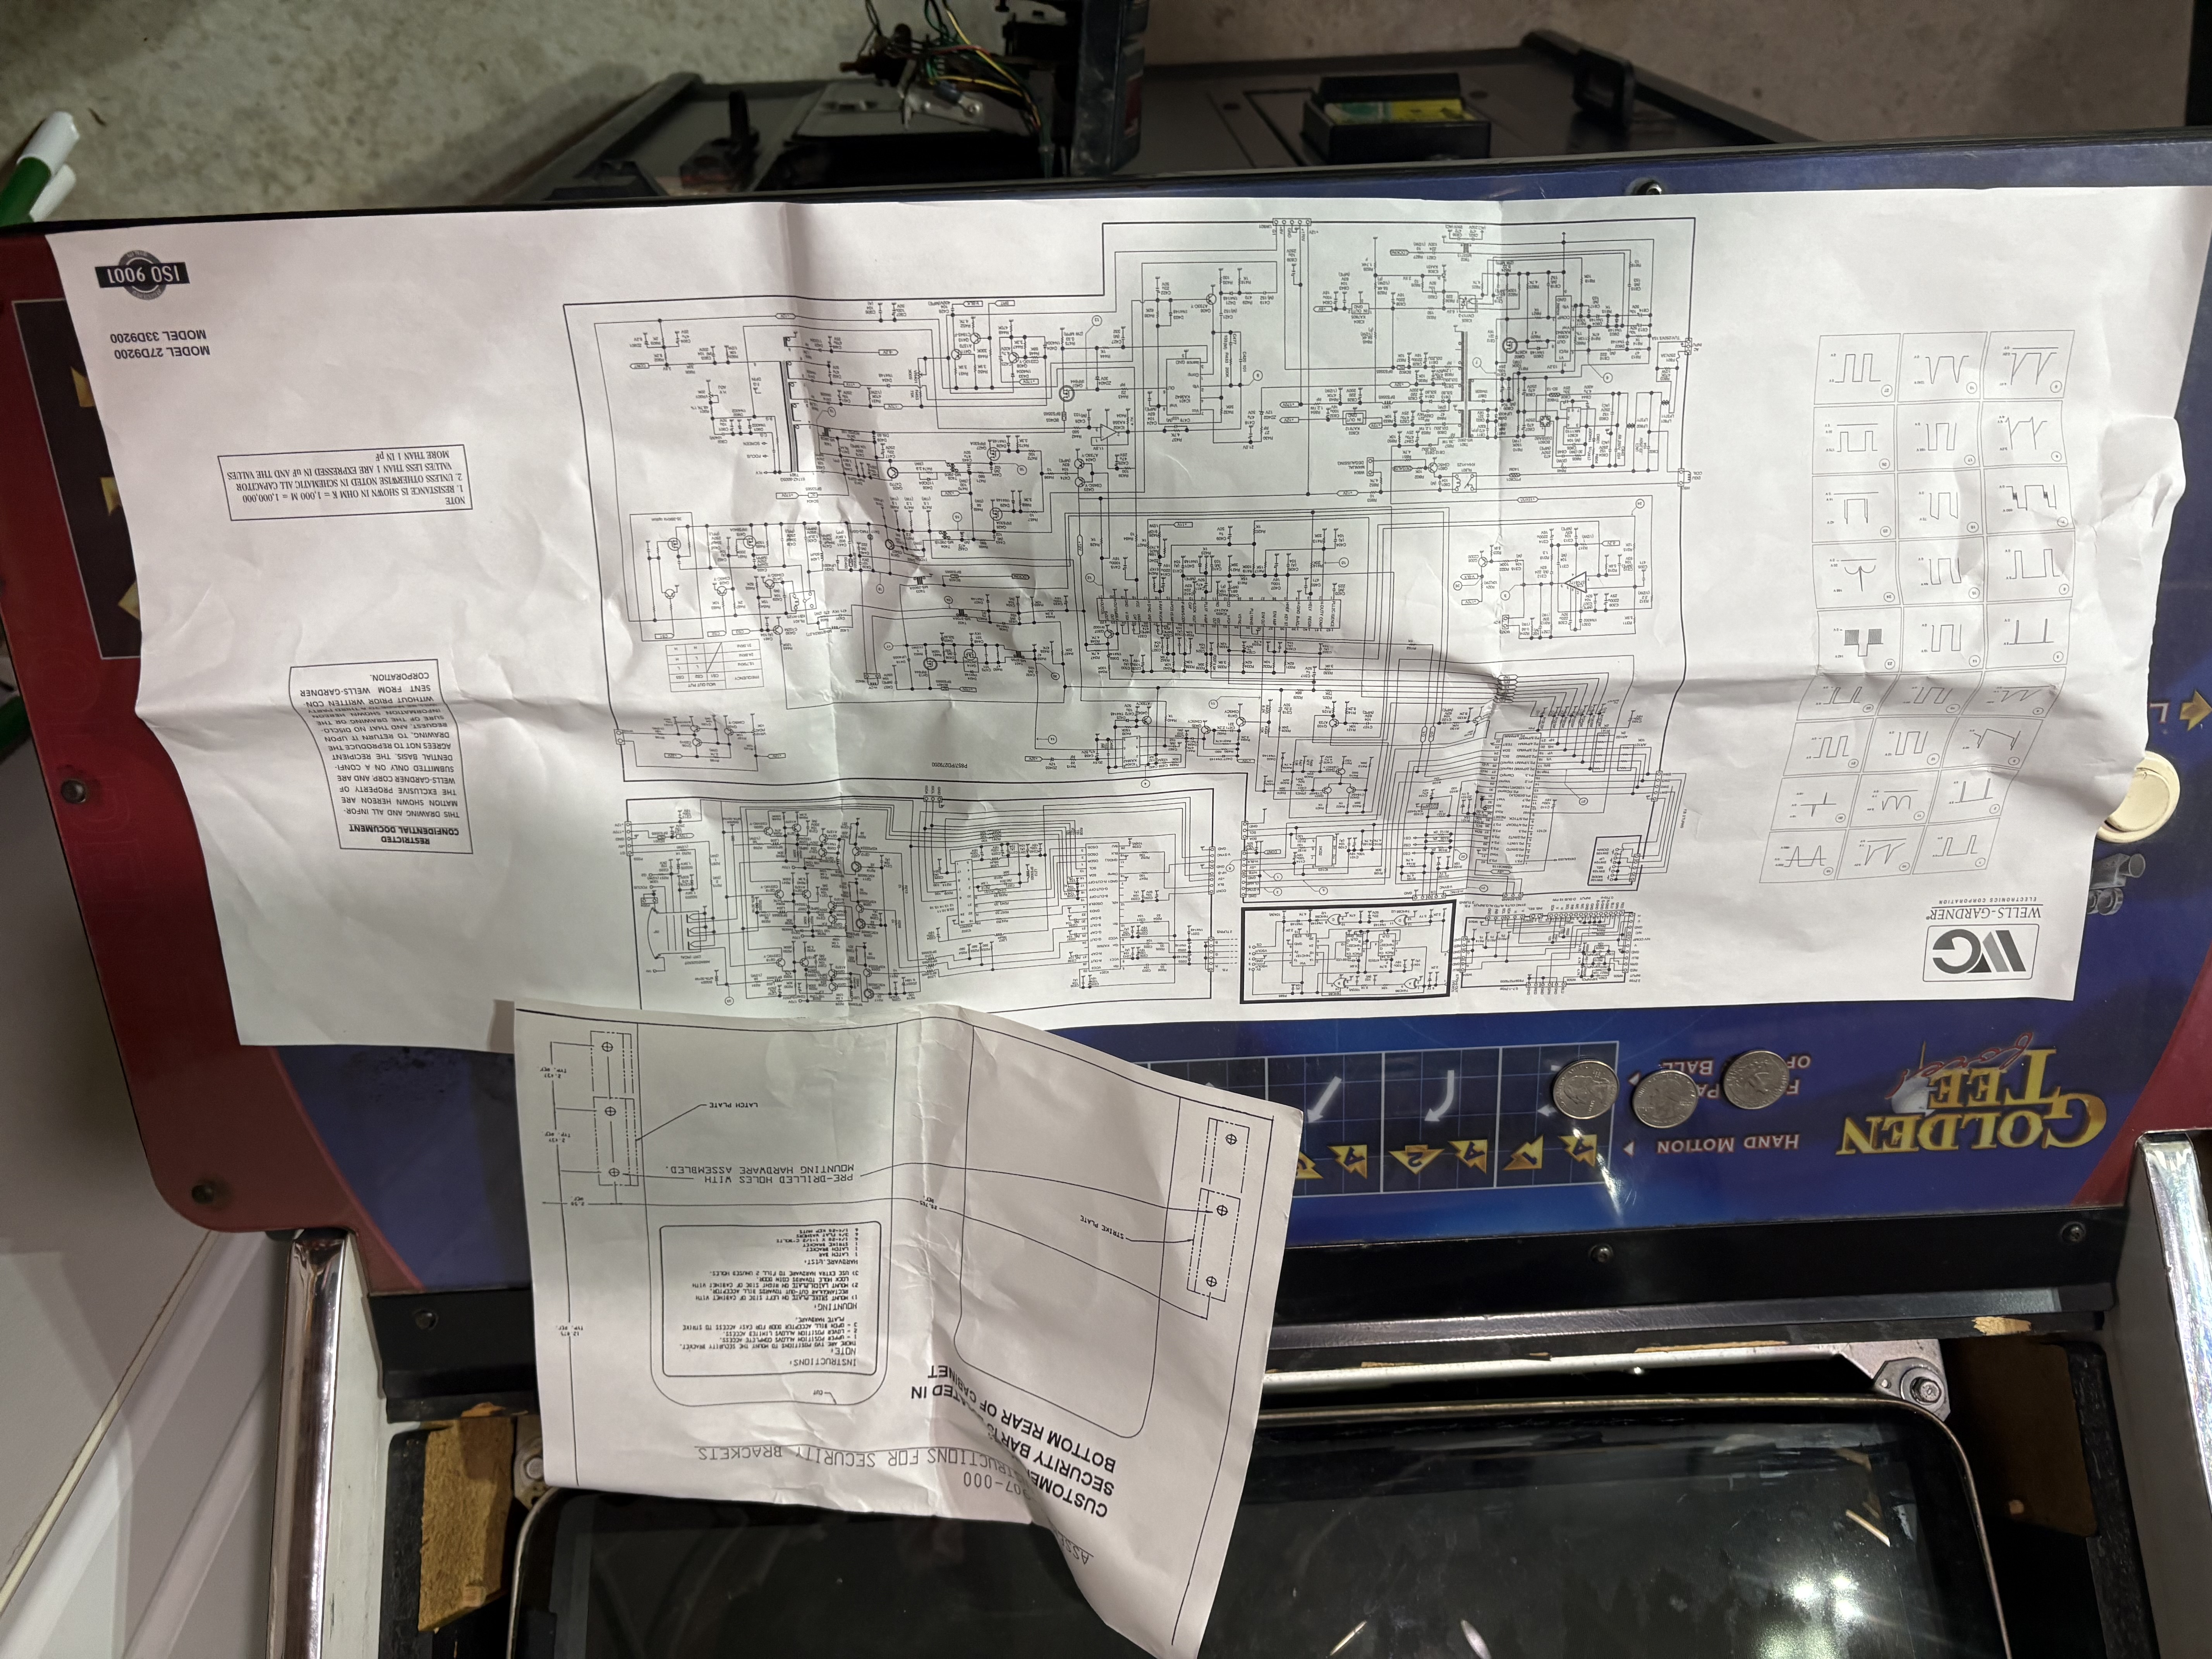
Schematics
INFO
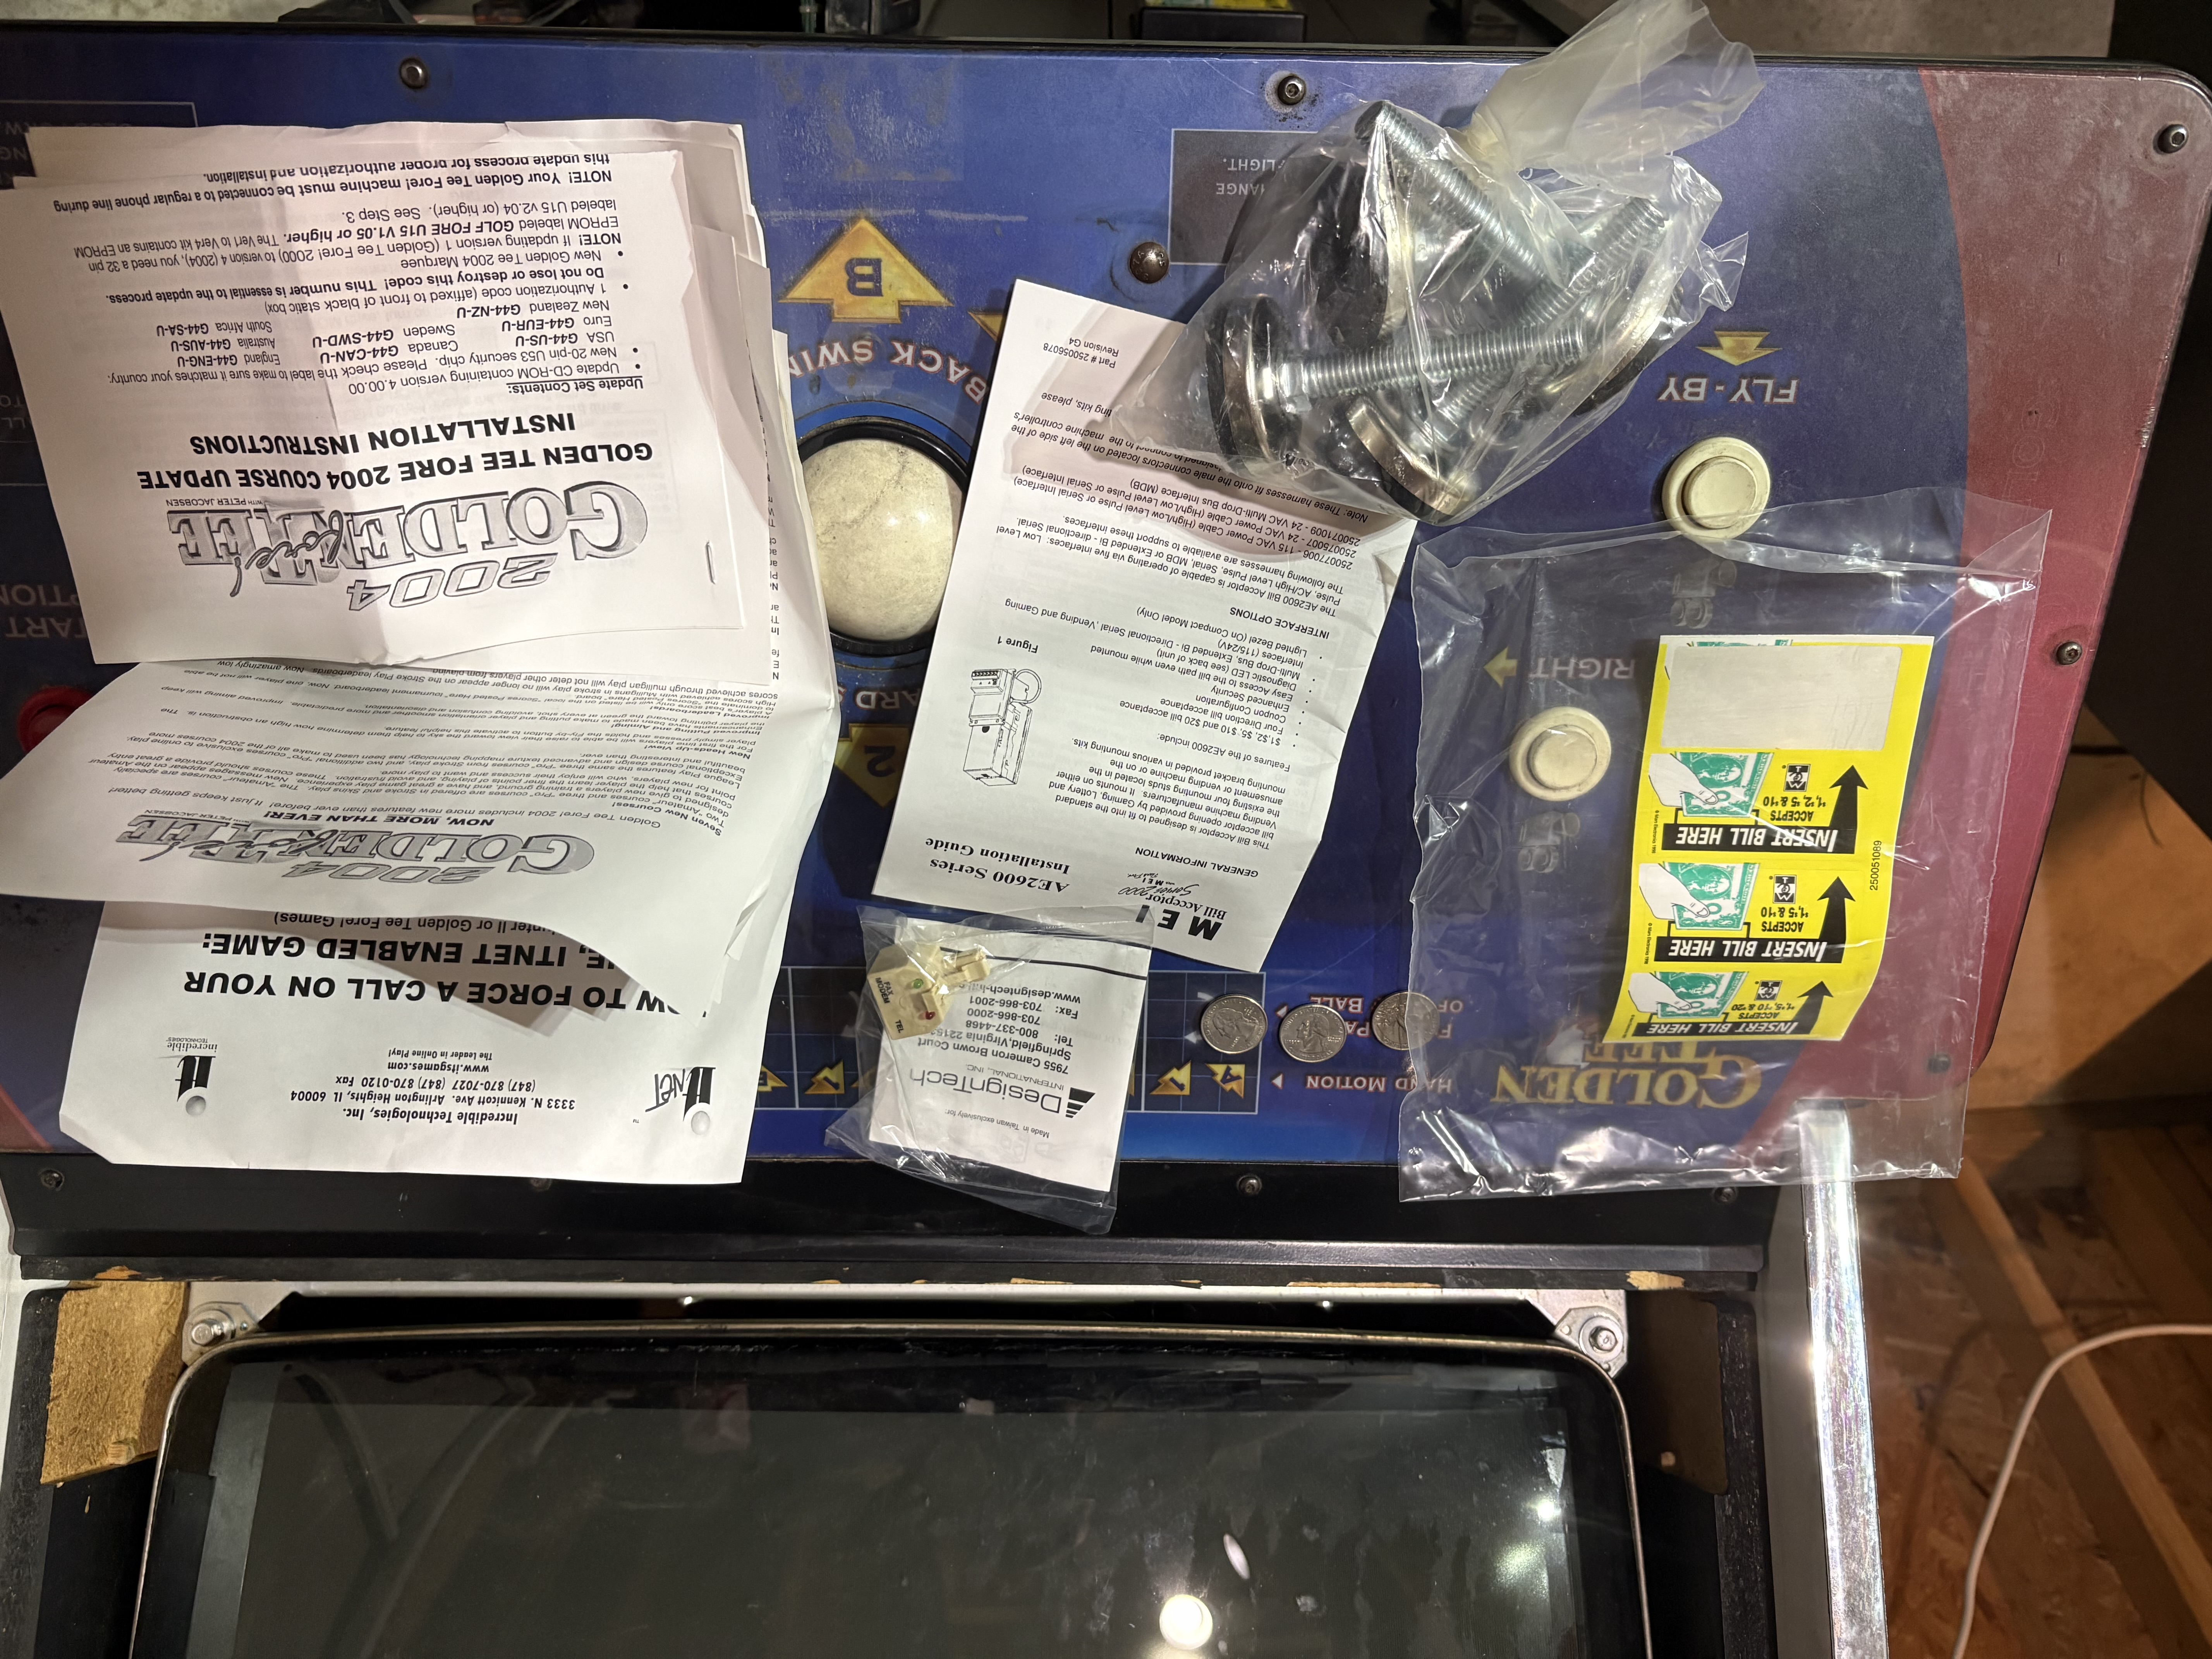
Goofy things and QUARTERS!!!
I’M ALREADY EARNING MONEY AND I HAVEN’T EVEN FINISHED THE JOB!
Over the next week or two, I will explore if these documents are already online. If they aren’t, I will be uploading them on this website.
Day 13: Lock it Down
A few days ago I ordered replacement locks for the arcade cabinets. When I purchased the cabinets they did not come with keys, so I would already need to destroy the locks on it.
INFO
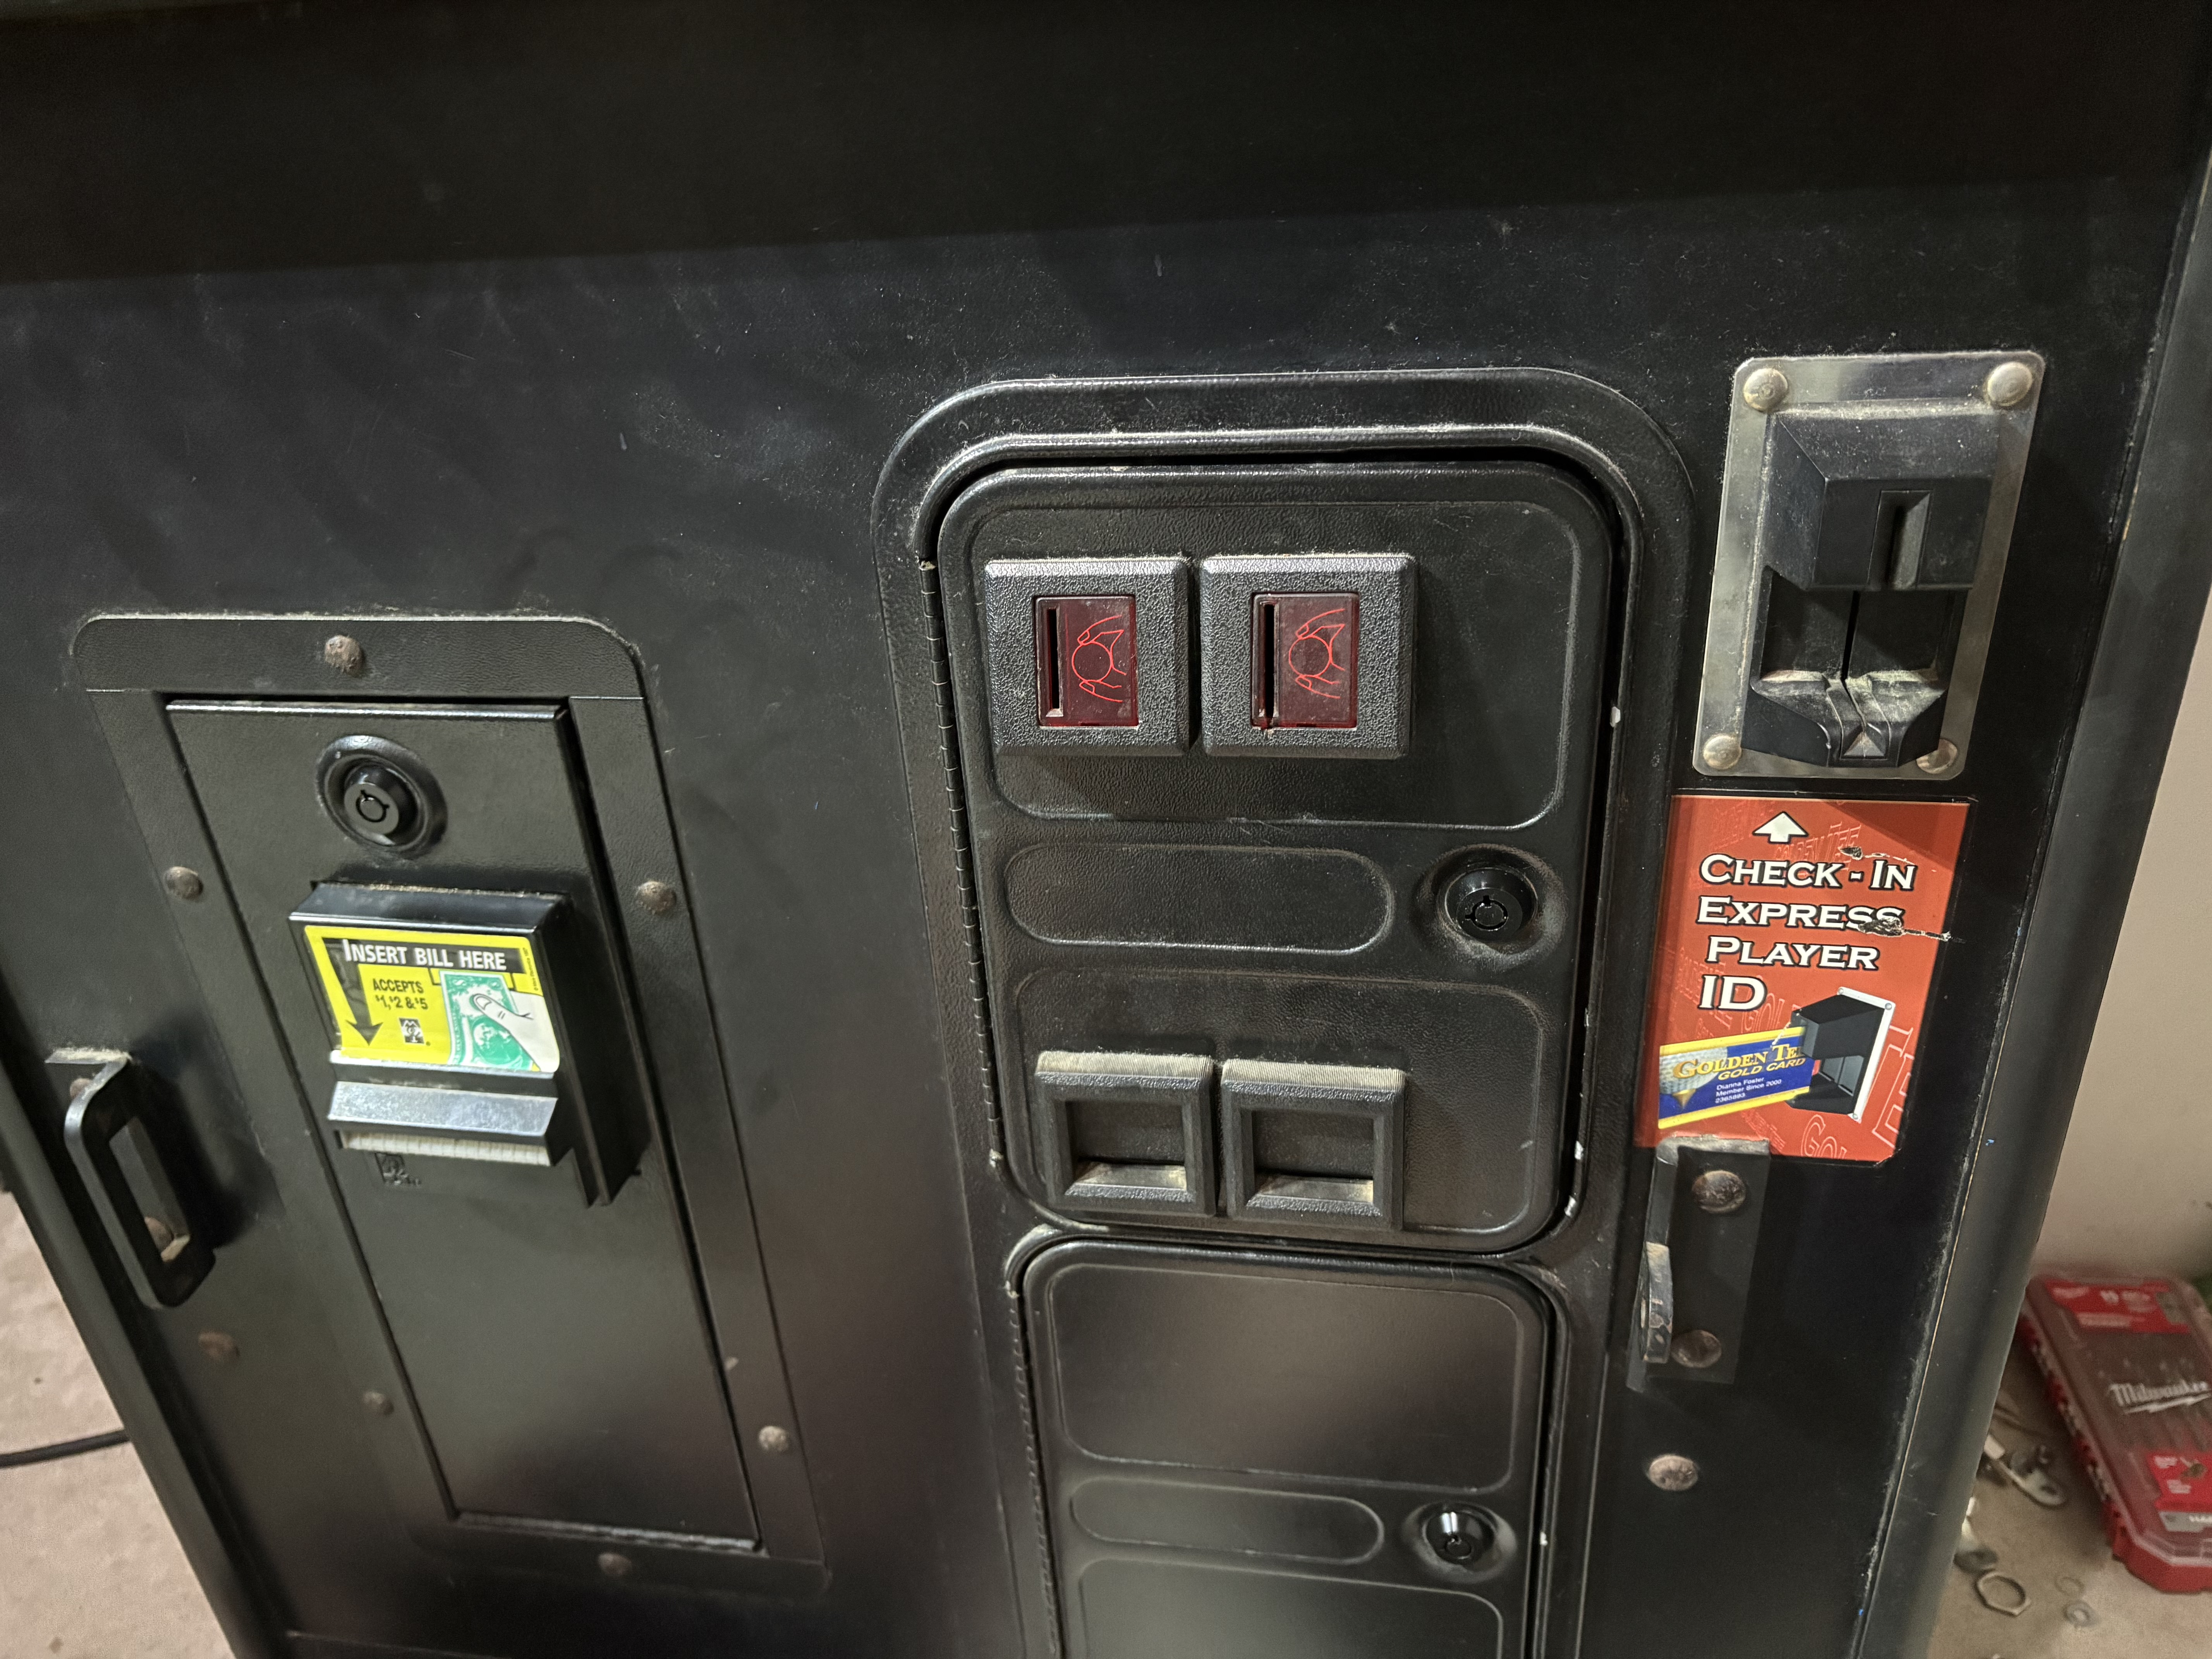
Matching Locks
I decided to go with tubular locks, all black. I ordered a 10-pack in case any didn’t work, and got them all to work with the same key. I also wanted them to match the current color.
This was also my first look into the other arcade cabinet from the back… and quite frankly, I’m not sure what I was expecting. It’s fairly empty, but I will need to grab all of the connectors and get them repaired.
INFO
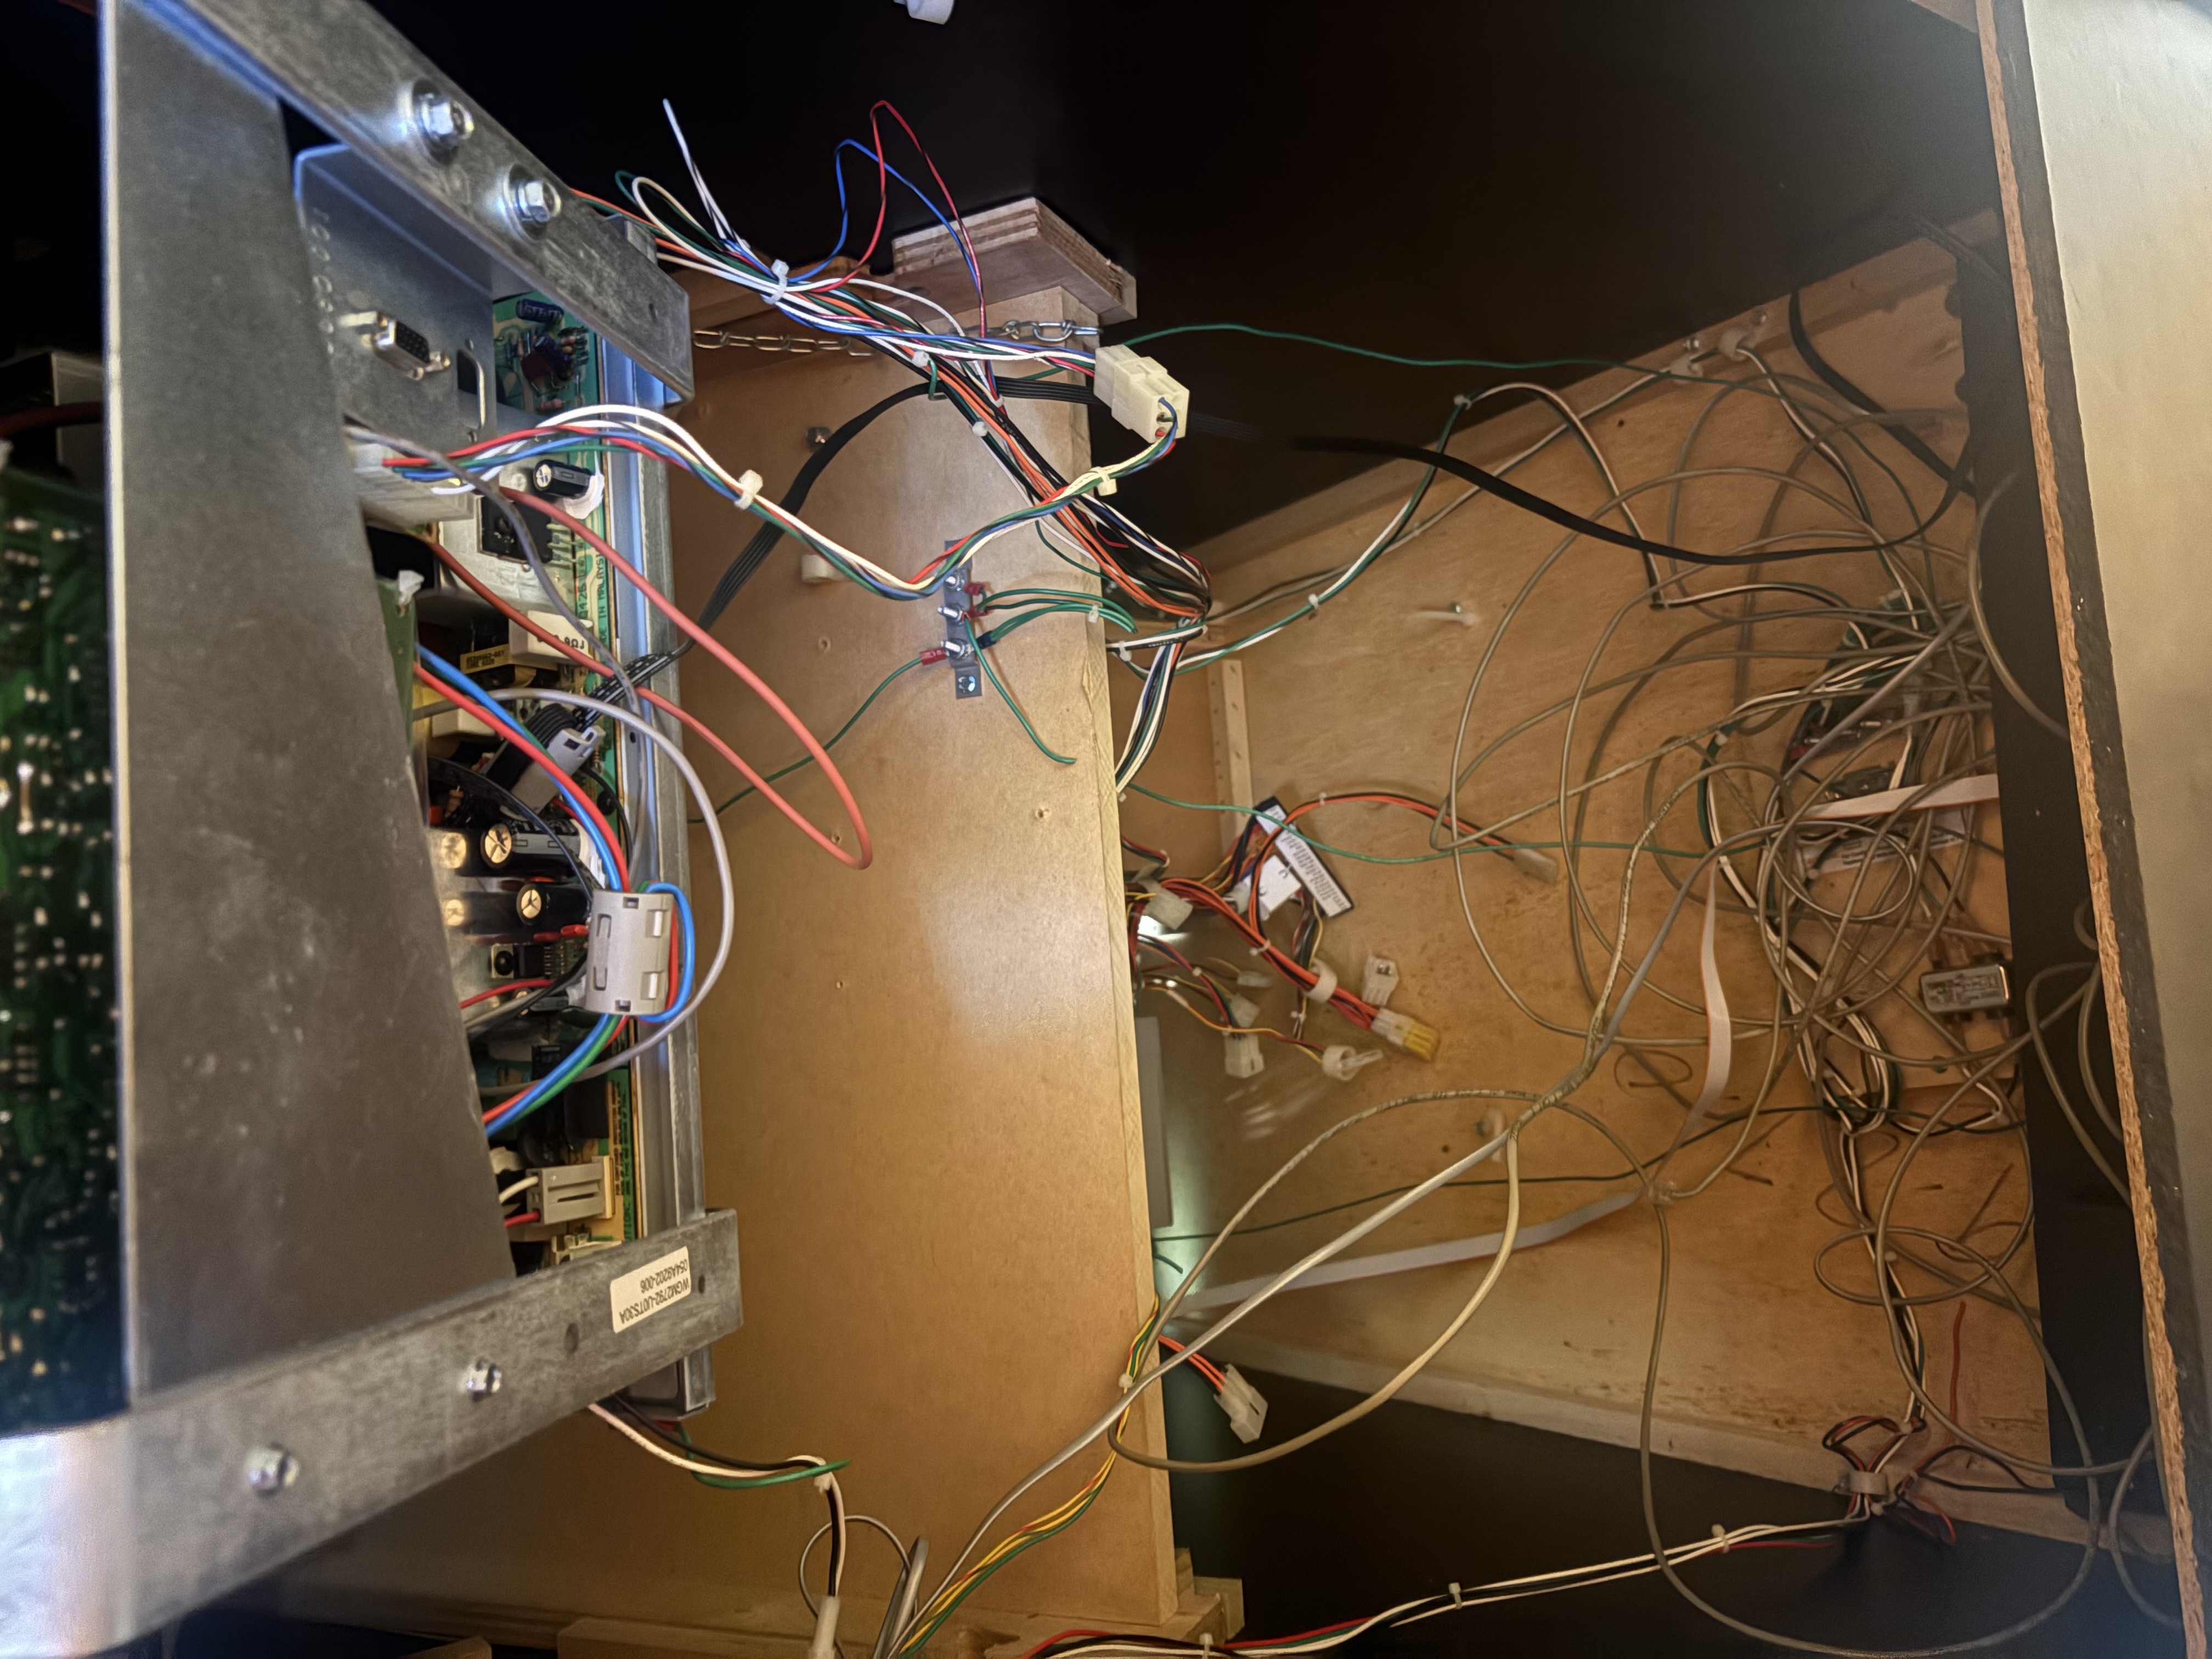
Viewer Discretion Advised
Day 14: Diagnosing the Problem
On Day 11, I had shown a picture of the part that I think was damaged on the motherboard. I didn't have enough information on it, and so I erroneously called it a "Voltage Regulator." I didn't know a lot about this part, so I decided to research and discover more.
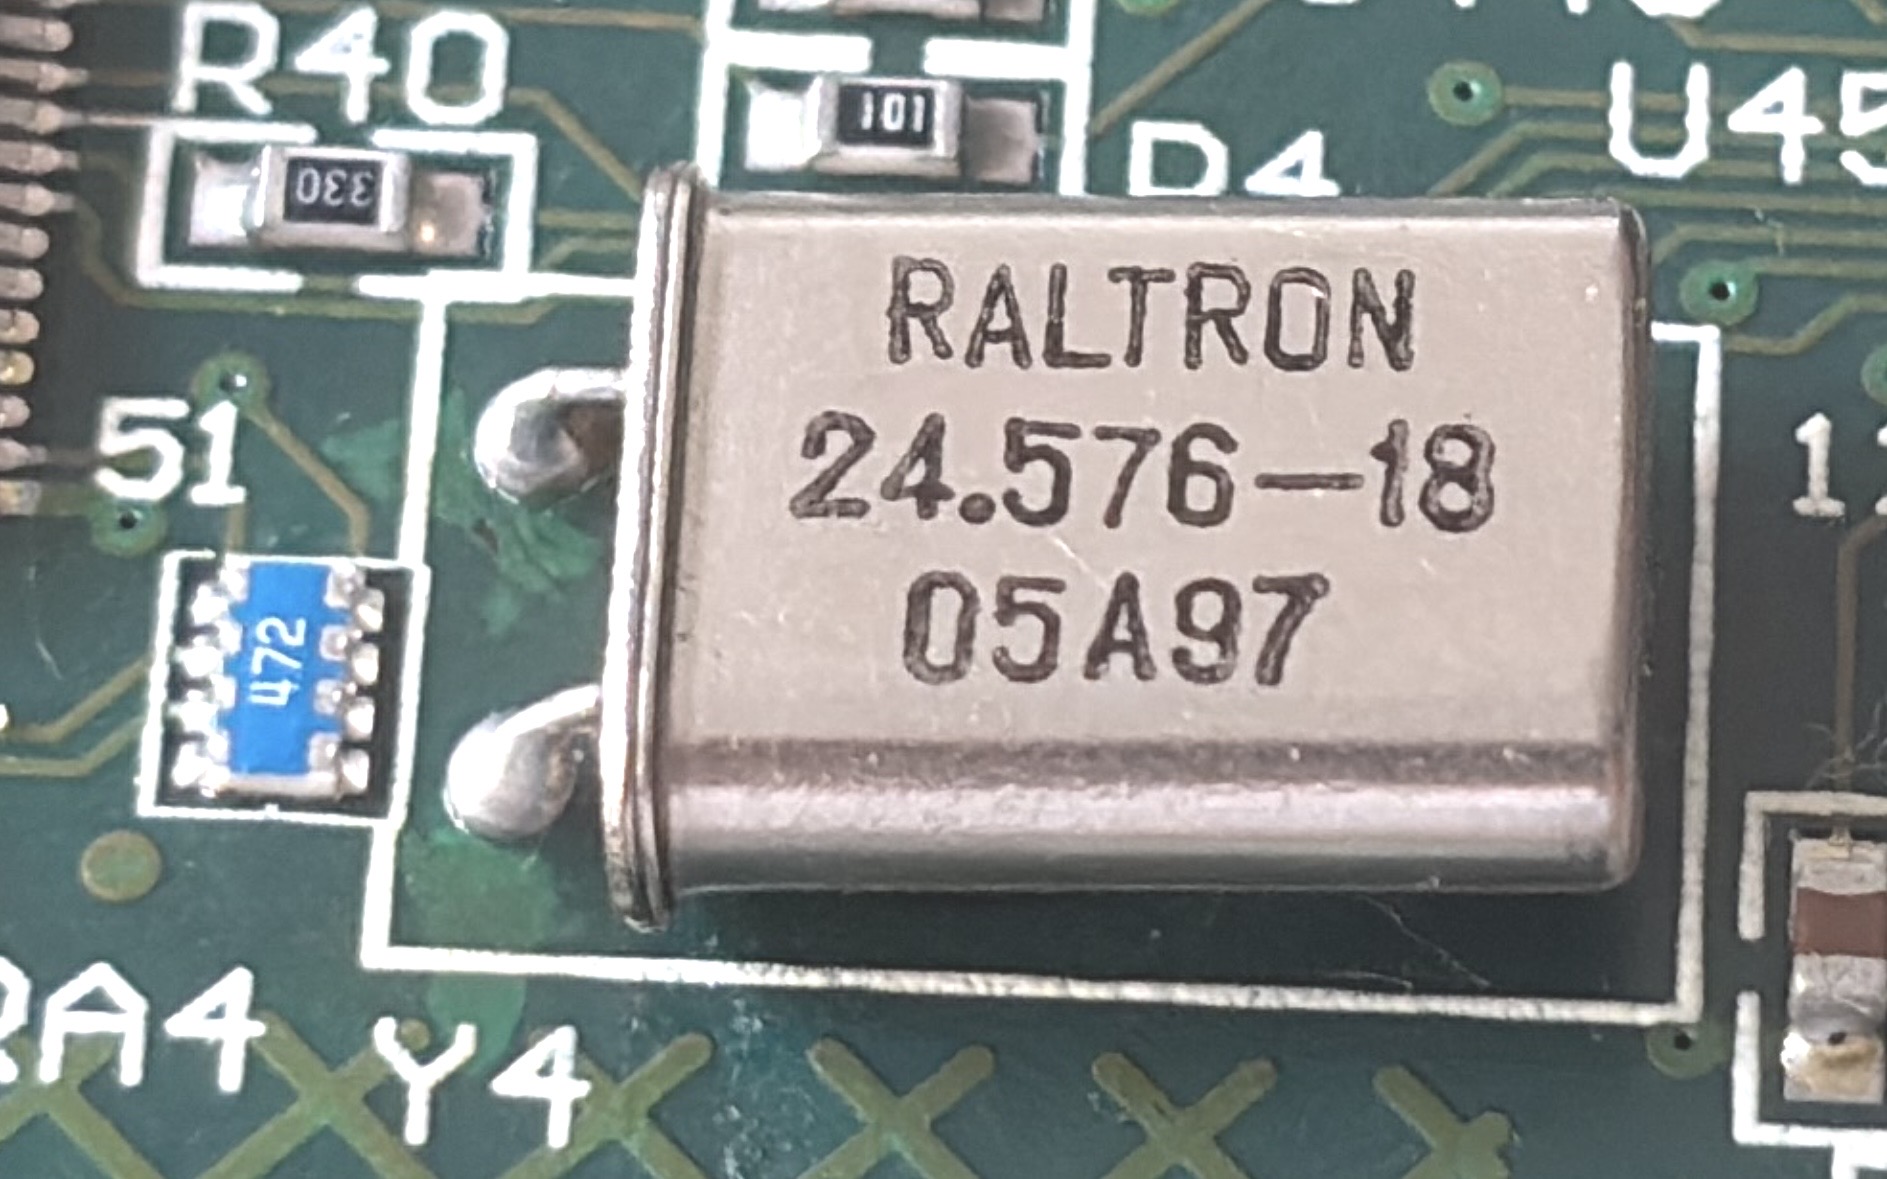
The part is an oscillator, which modifies an input signal. They have a specific Hertz rating and load capacitance (measured in pF). Even though I hadn't verified this was the issue, I ordered some additional oscillators that matched those specifications and just received them.
With a multimeter, you should be able to test Oscillation. The reading on the multimeter should read "0F". Good news, the new oscillators show that perfectly.
INFO
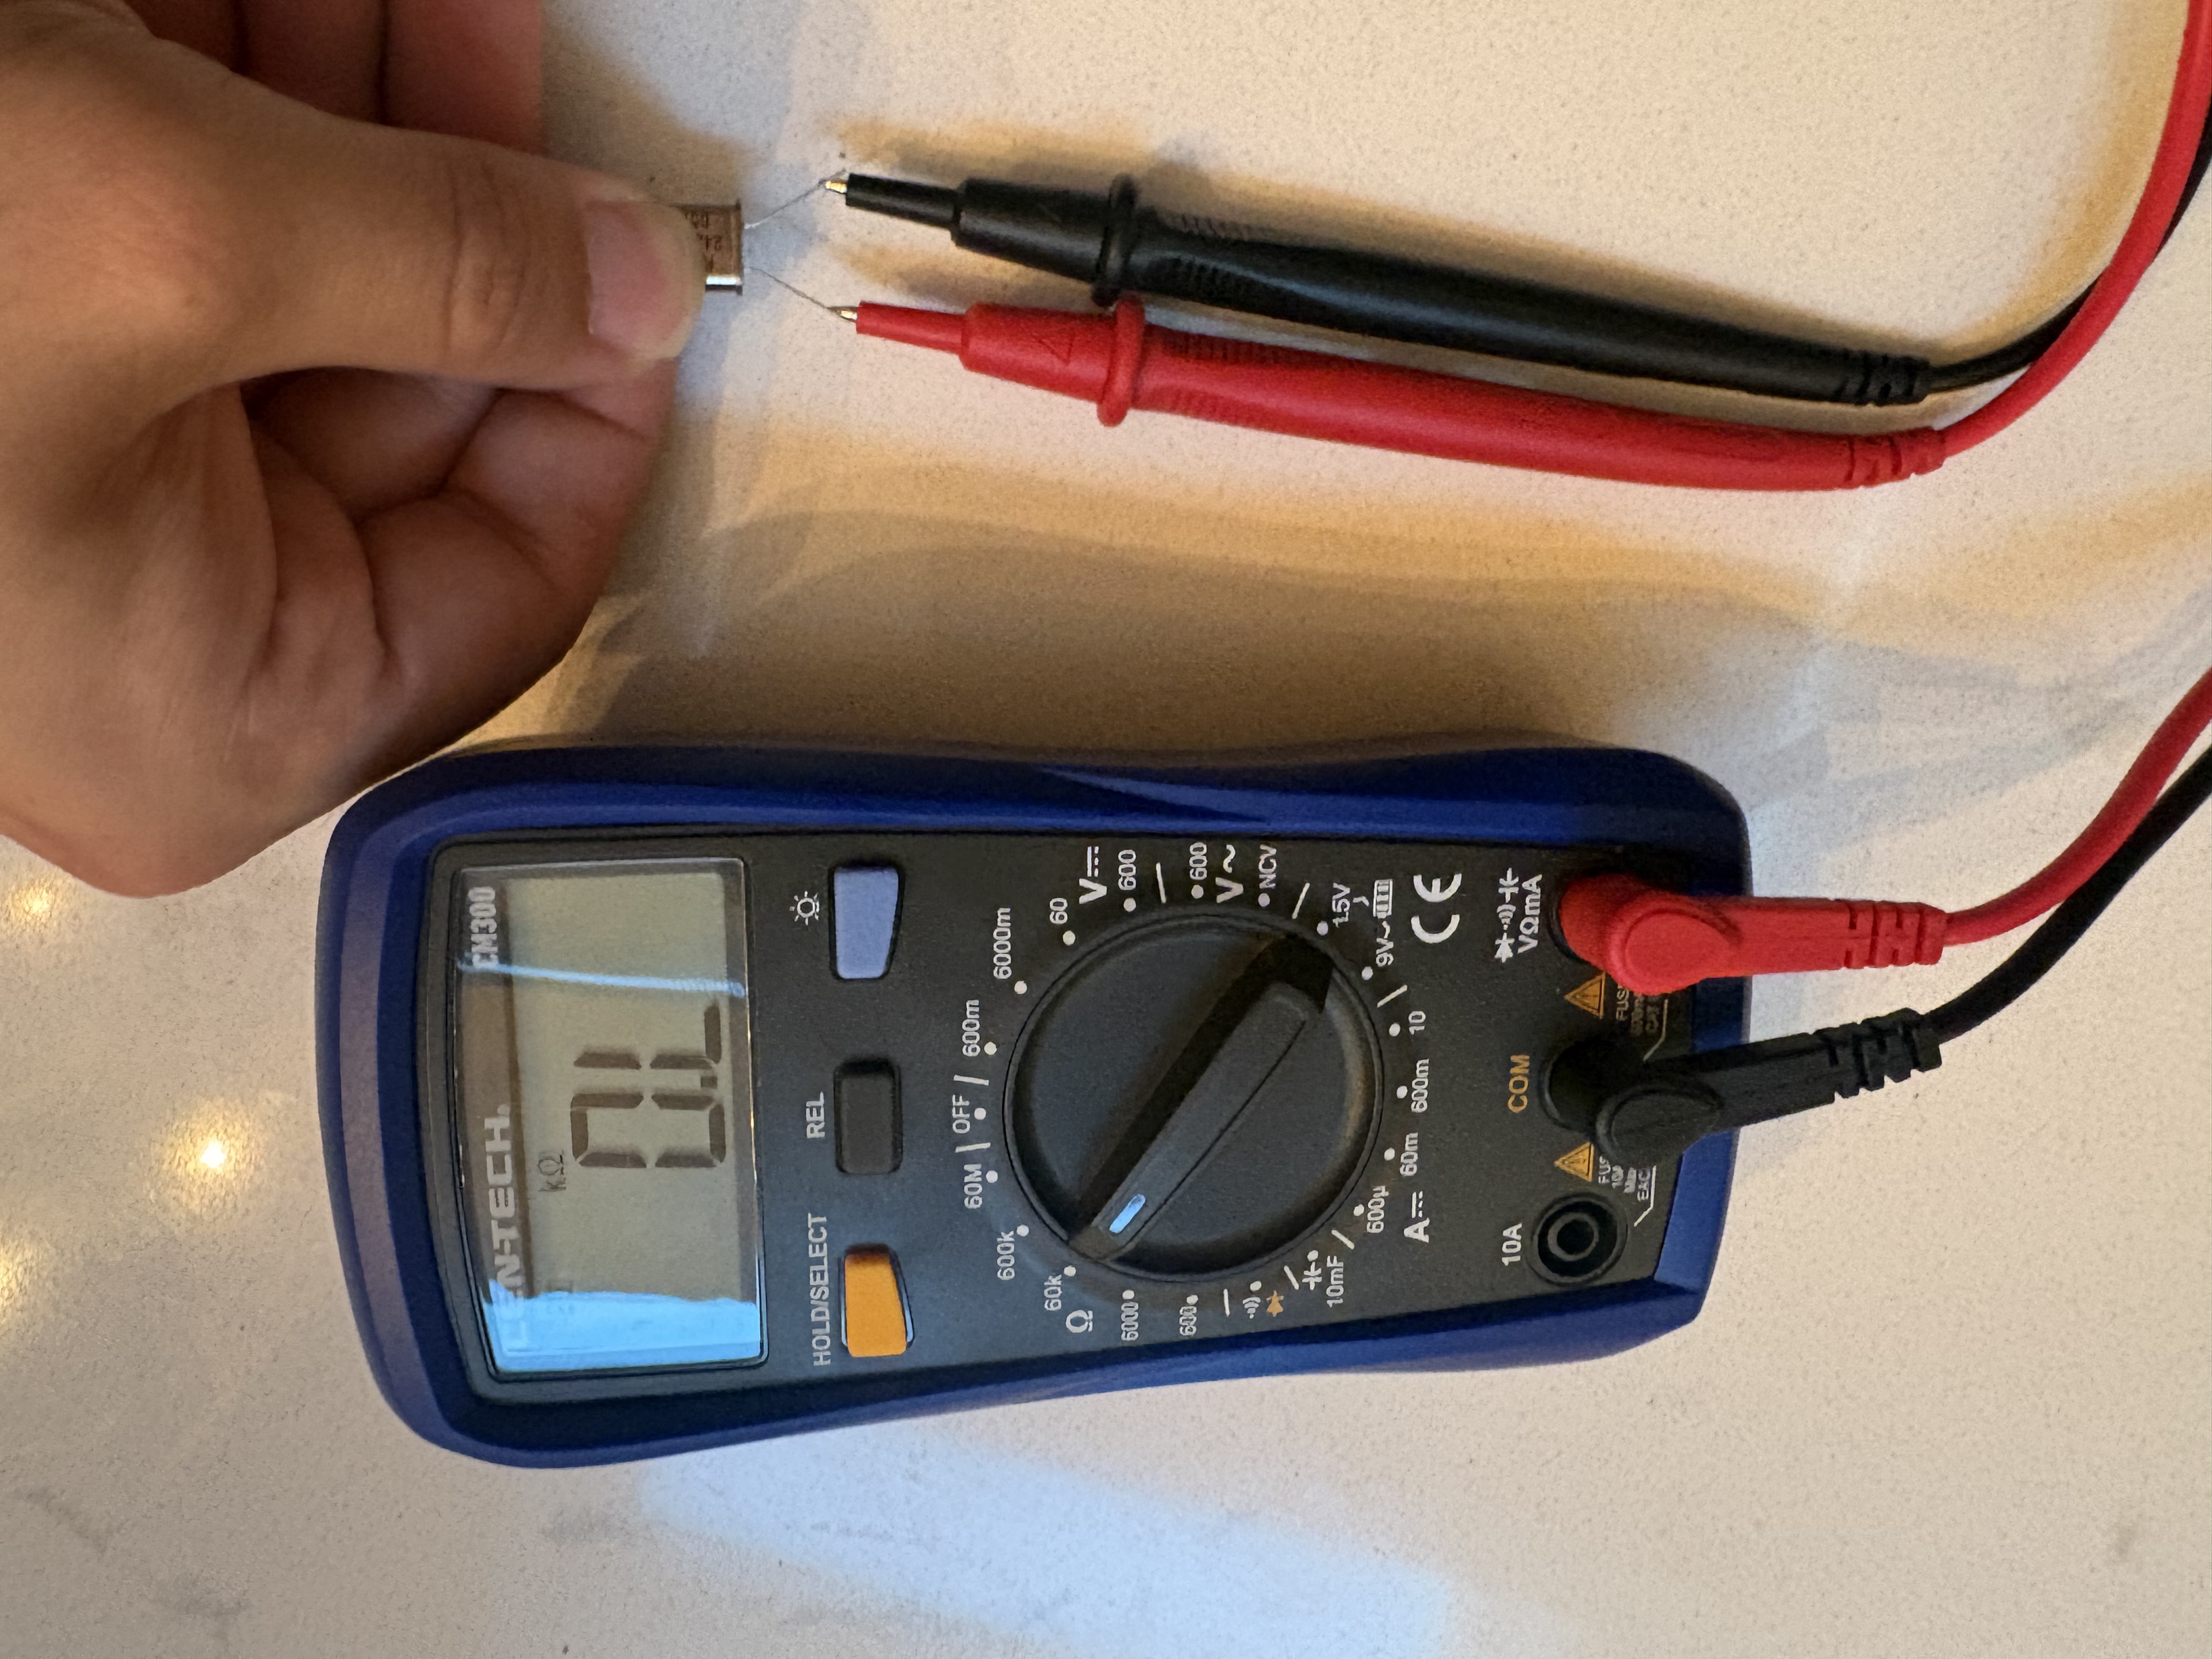
Happy, healthy oscillator
The old one, however, does not.
INFO
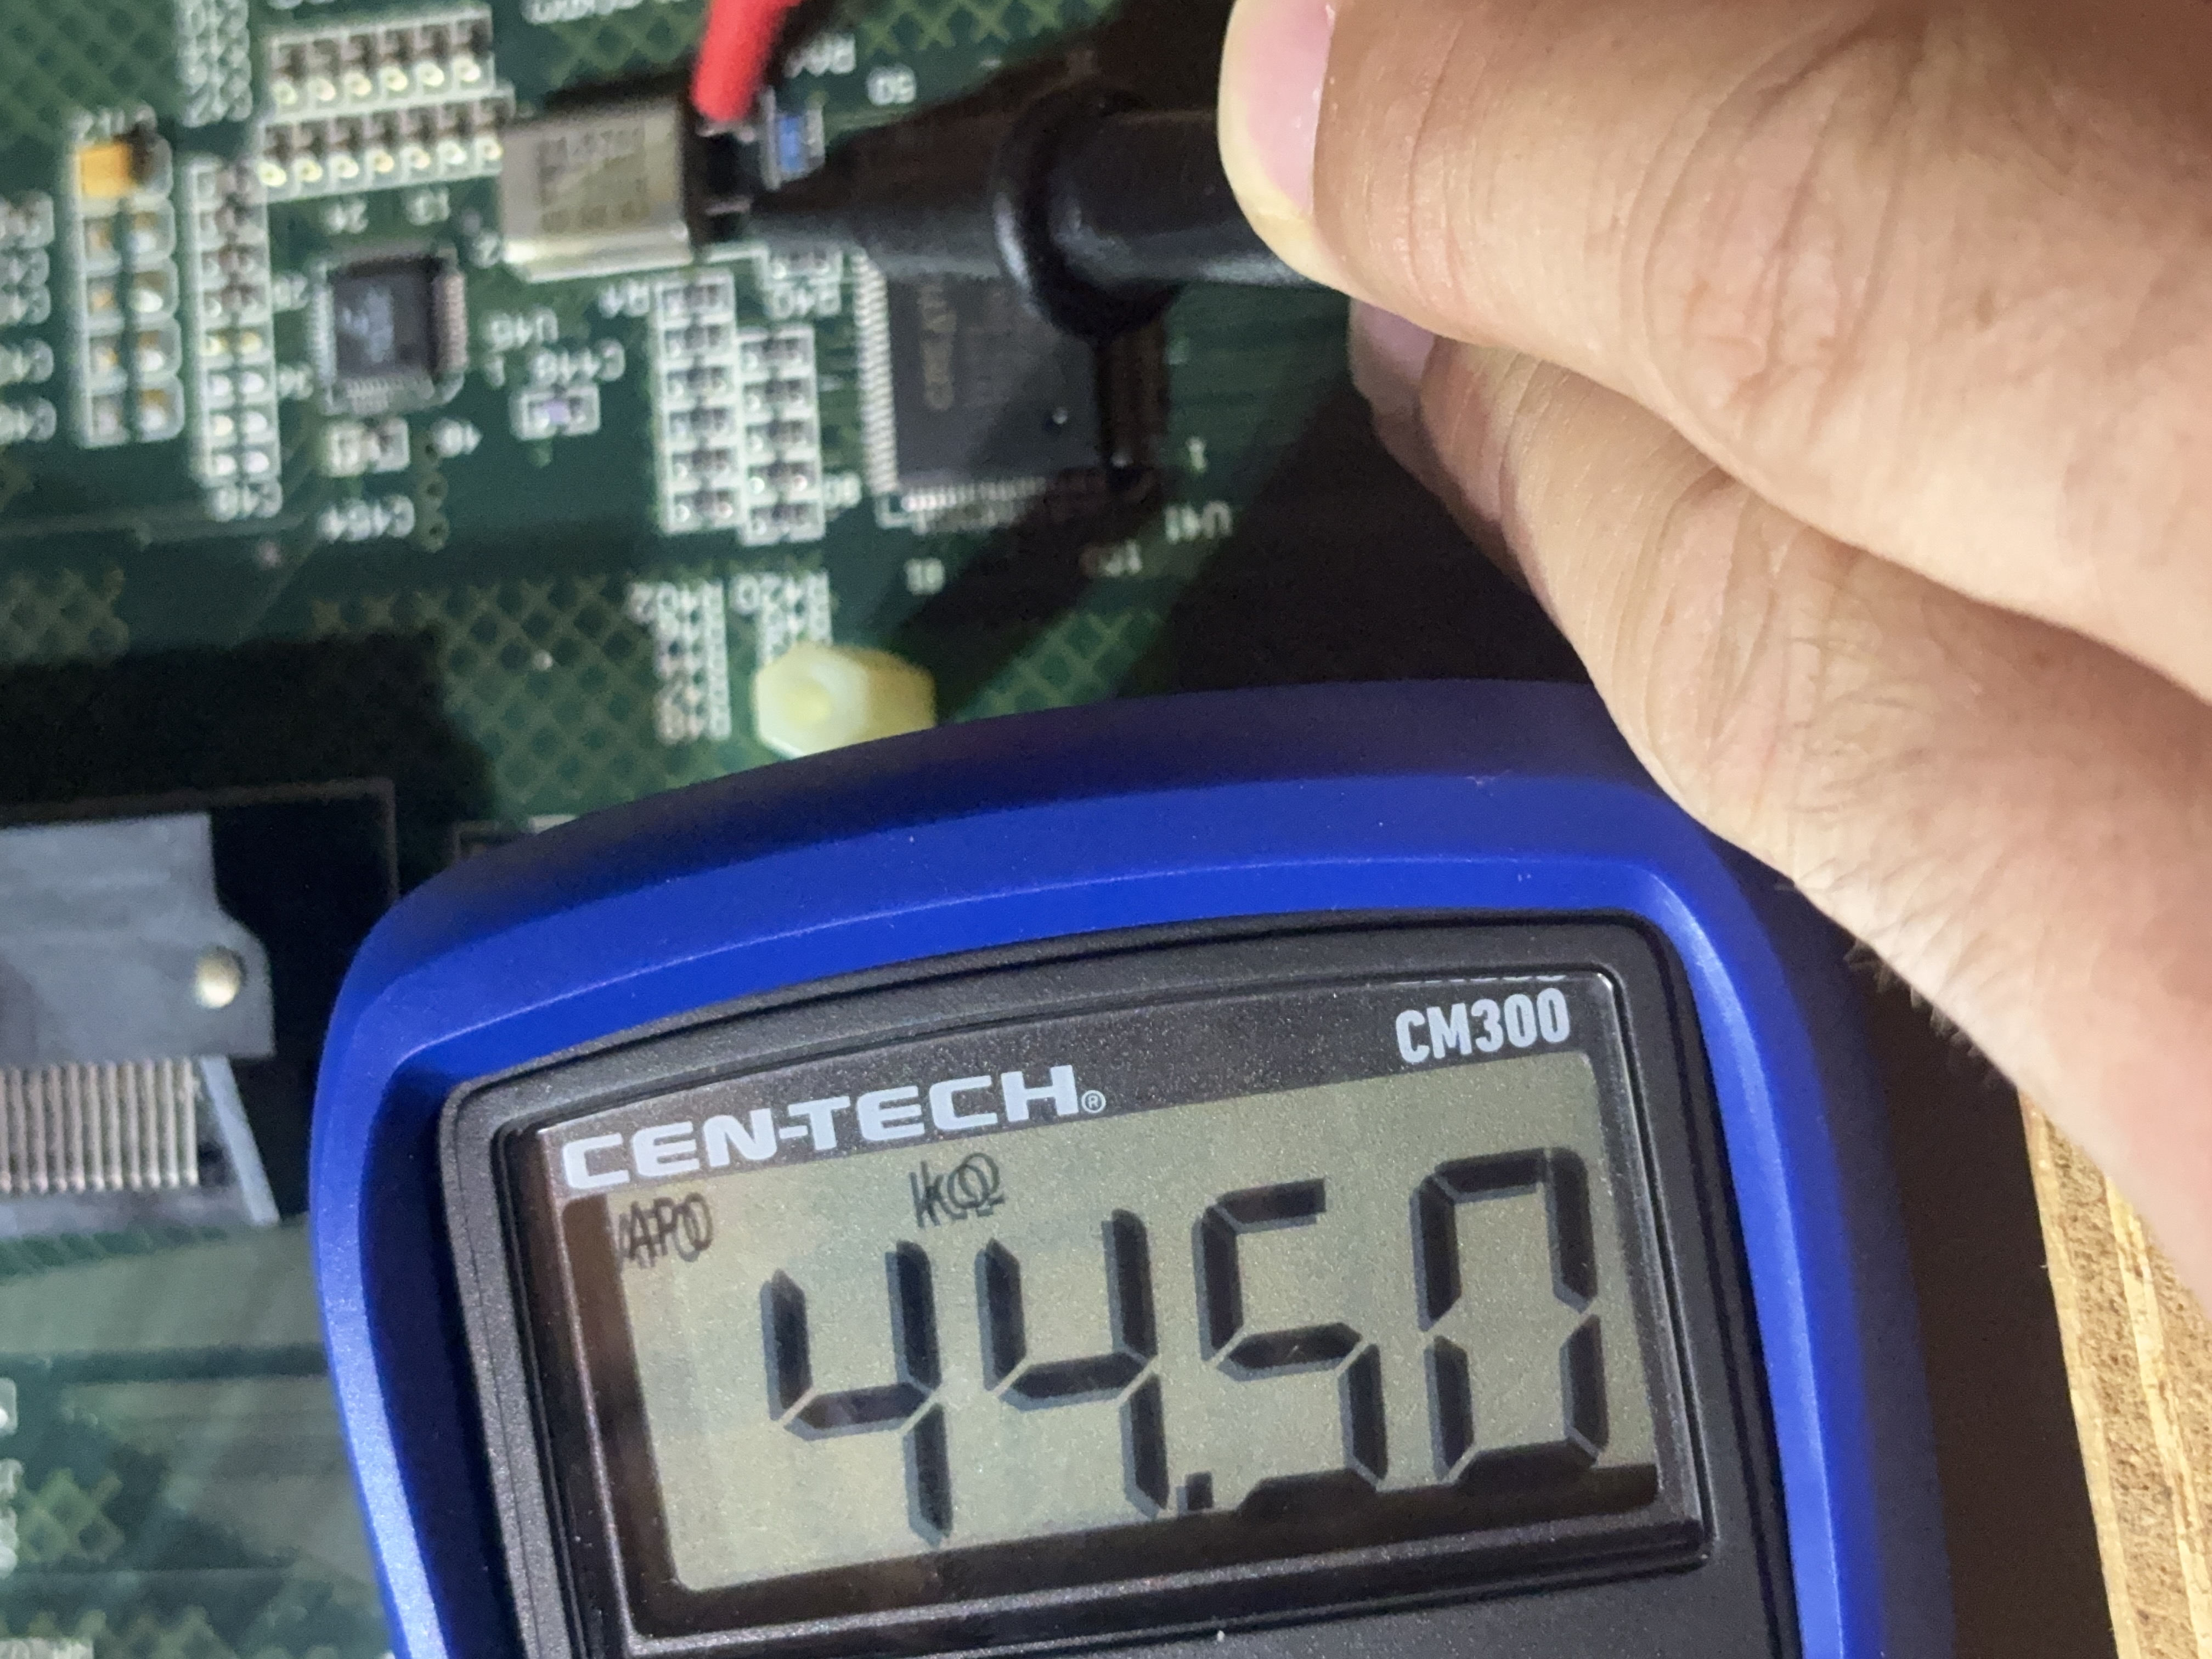
Oh gosh.
INFO
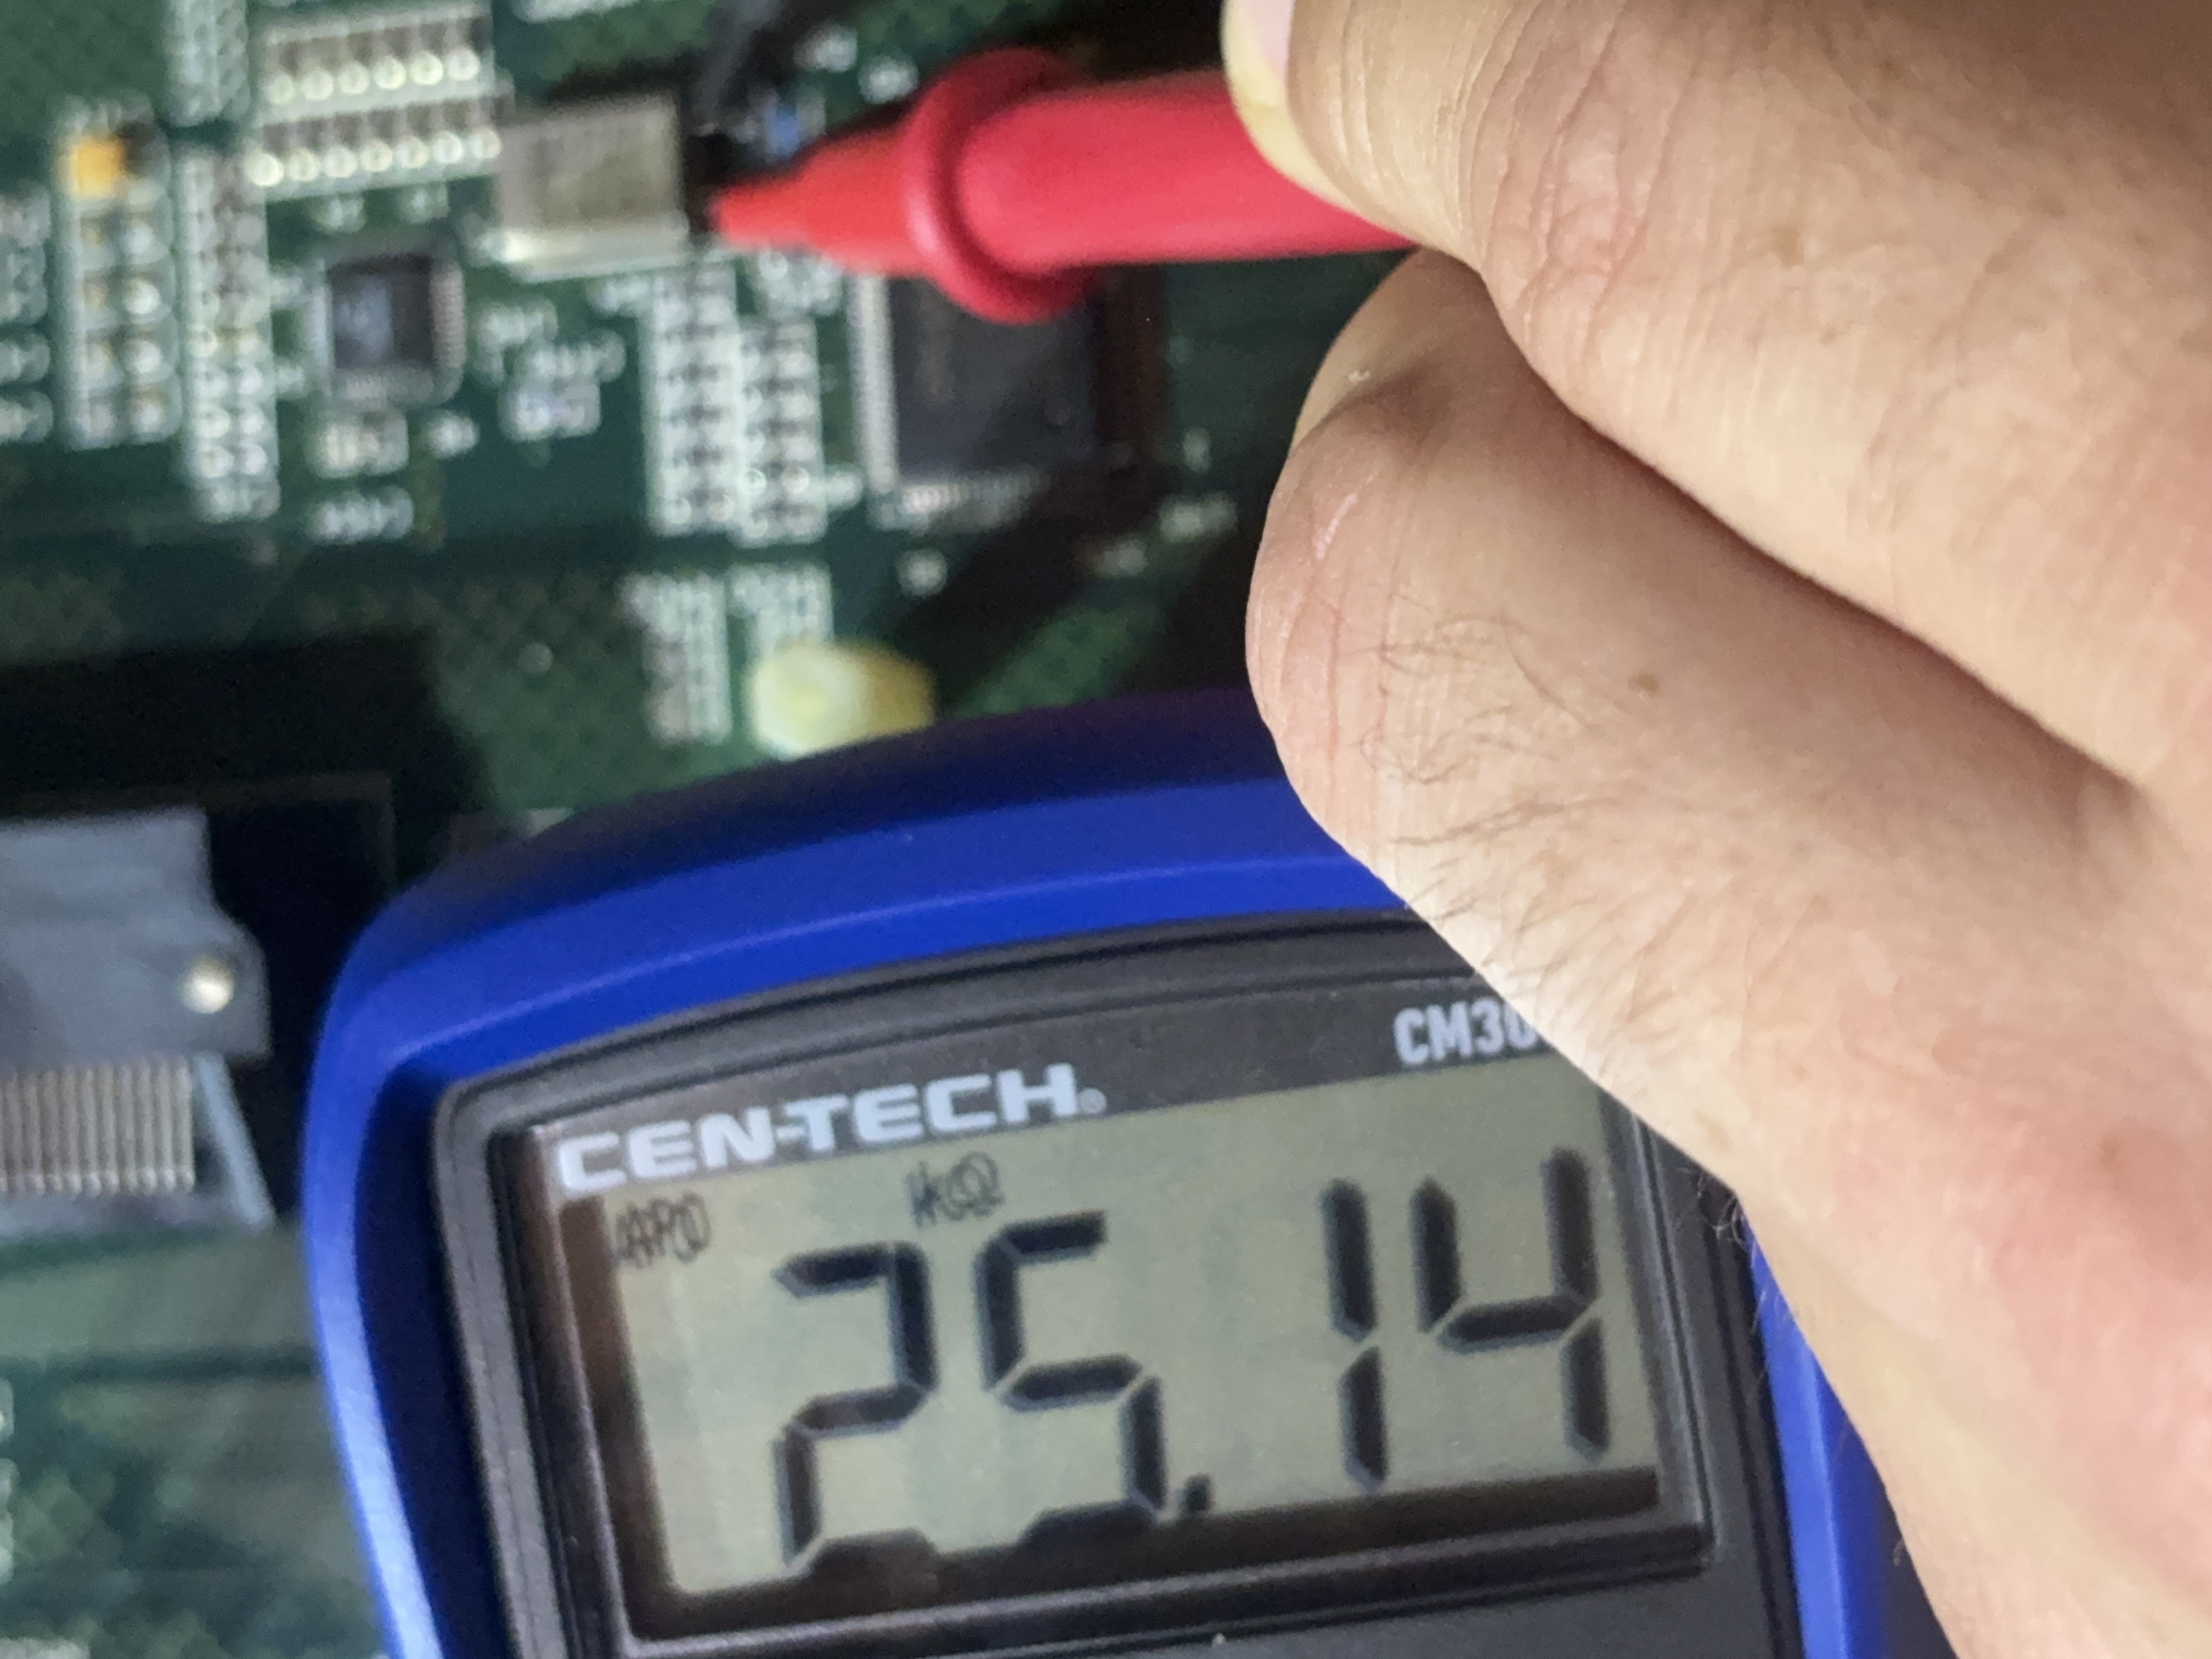
OH GOSH!!!
So now what I need to do is pretty simple: Desolder the old one, solder the new one, clean and test. To be frank, I'm still new to soldering so I'll take some time to practice before doing this.
Day 15: Detour to Arcade Cabinet Two
While I’ve been practicing soldering, I’ve decided to take some time in order to work on the second arcade cabinet. The goal there is to throw a computer inside, install the components for connecting the buttons/coin ops, and getting the monitor either set up or install another CRT.
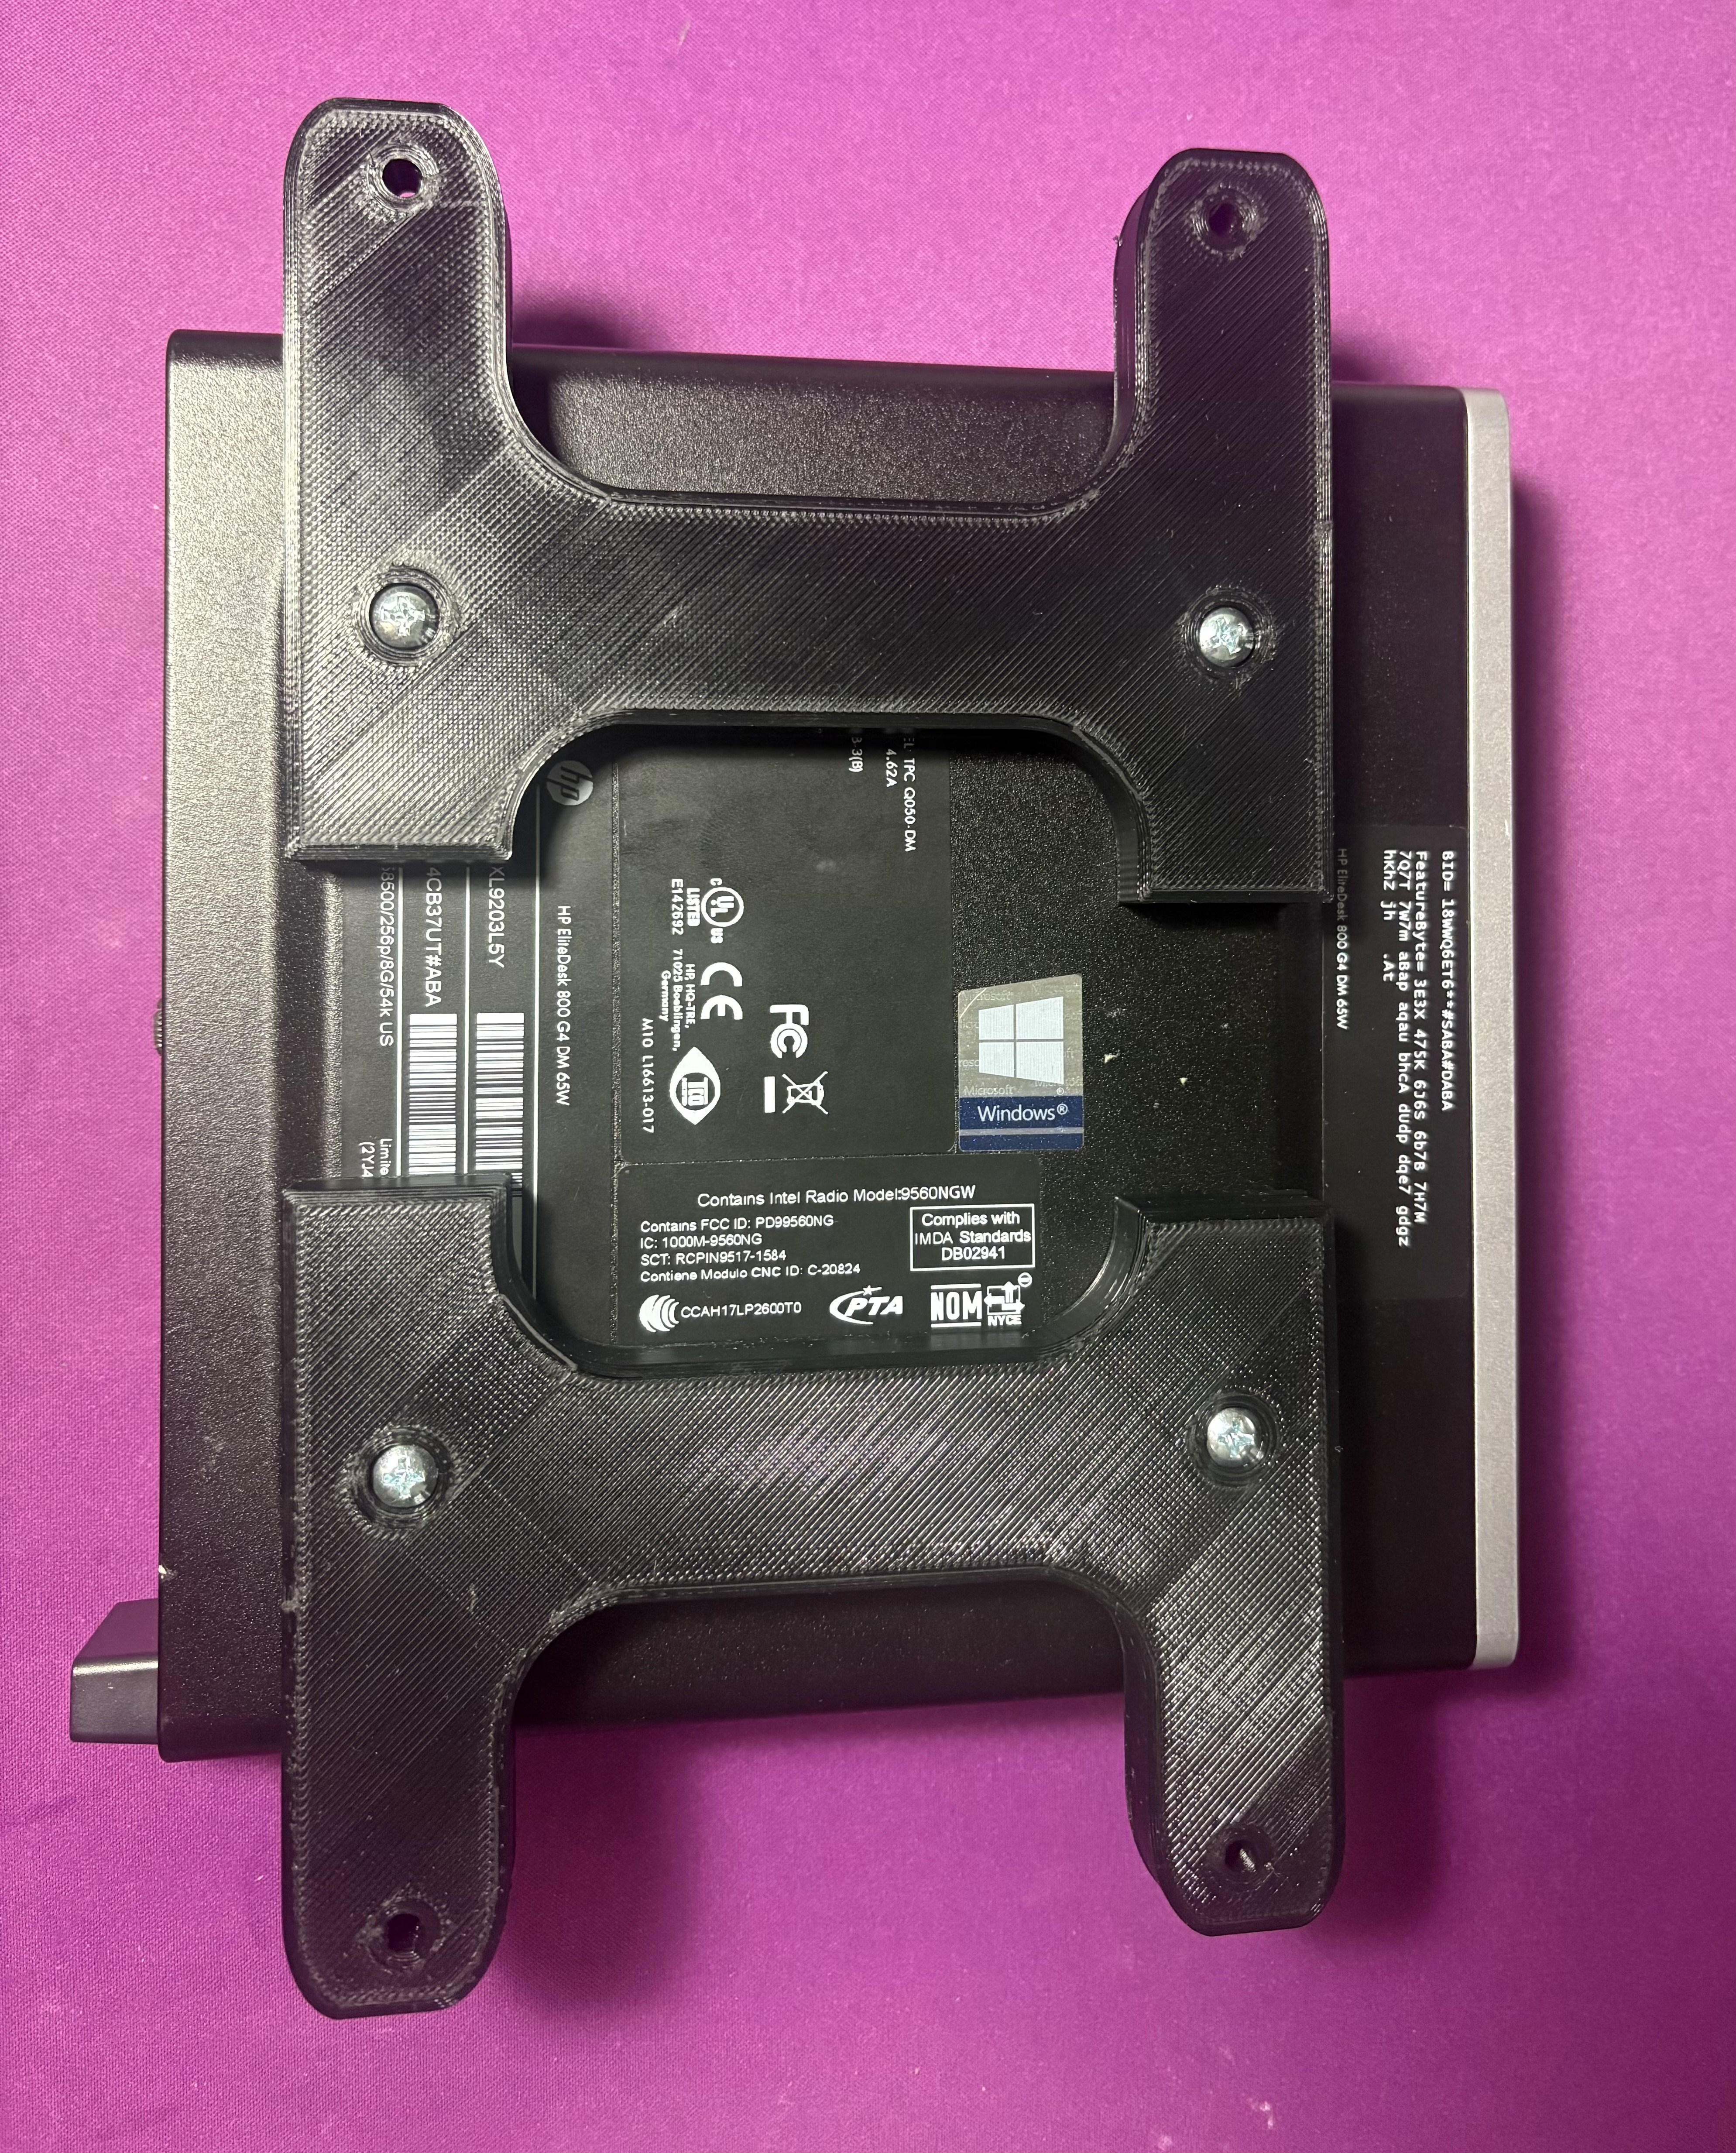
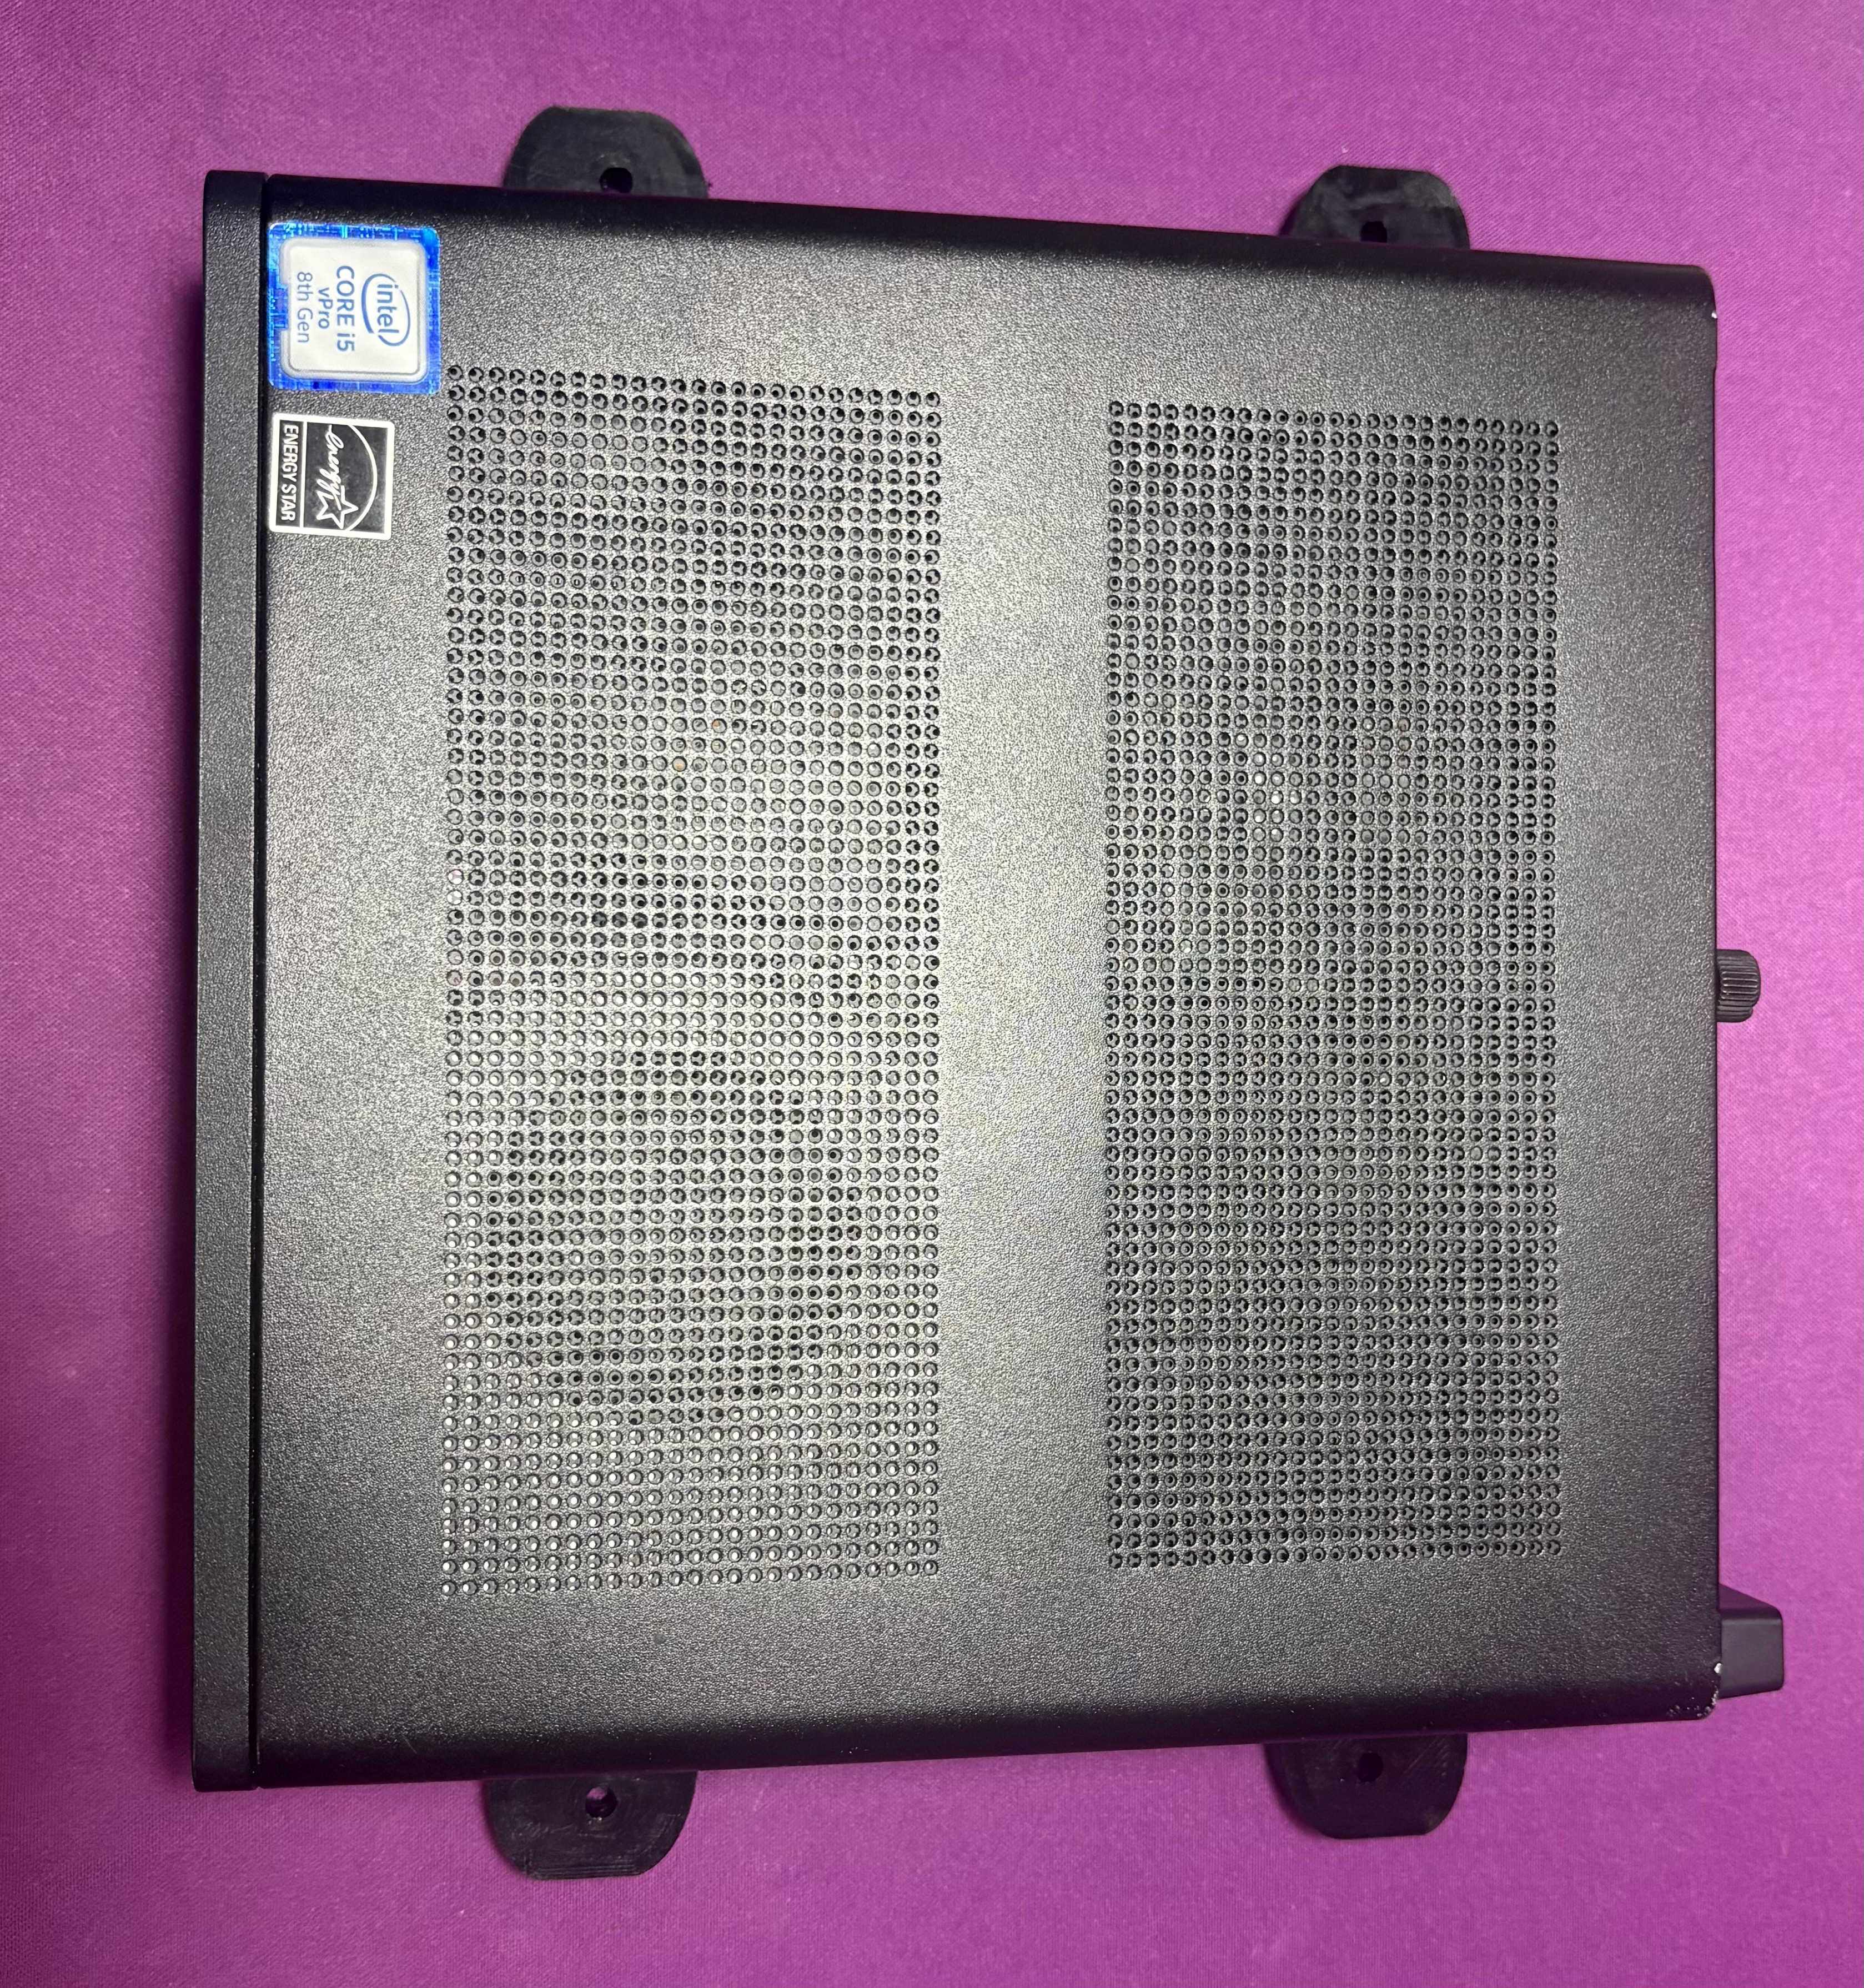
I’ve installed a massive MAME library (I’ll need to go through it with a fine-tooth comb to figure out what games I actually care about) and will use MAME and Attract Mode as the wrapper. This is running on an HP EliteDesk G4 with Windows 10. (I chose this PC because it’s small and powerful enough for a bunch of 80s-90s arcade games)
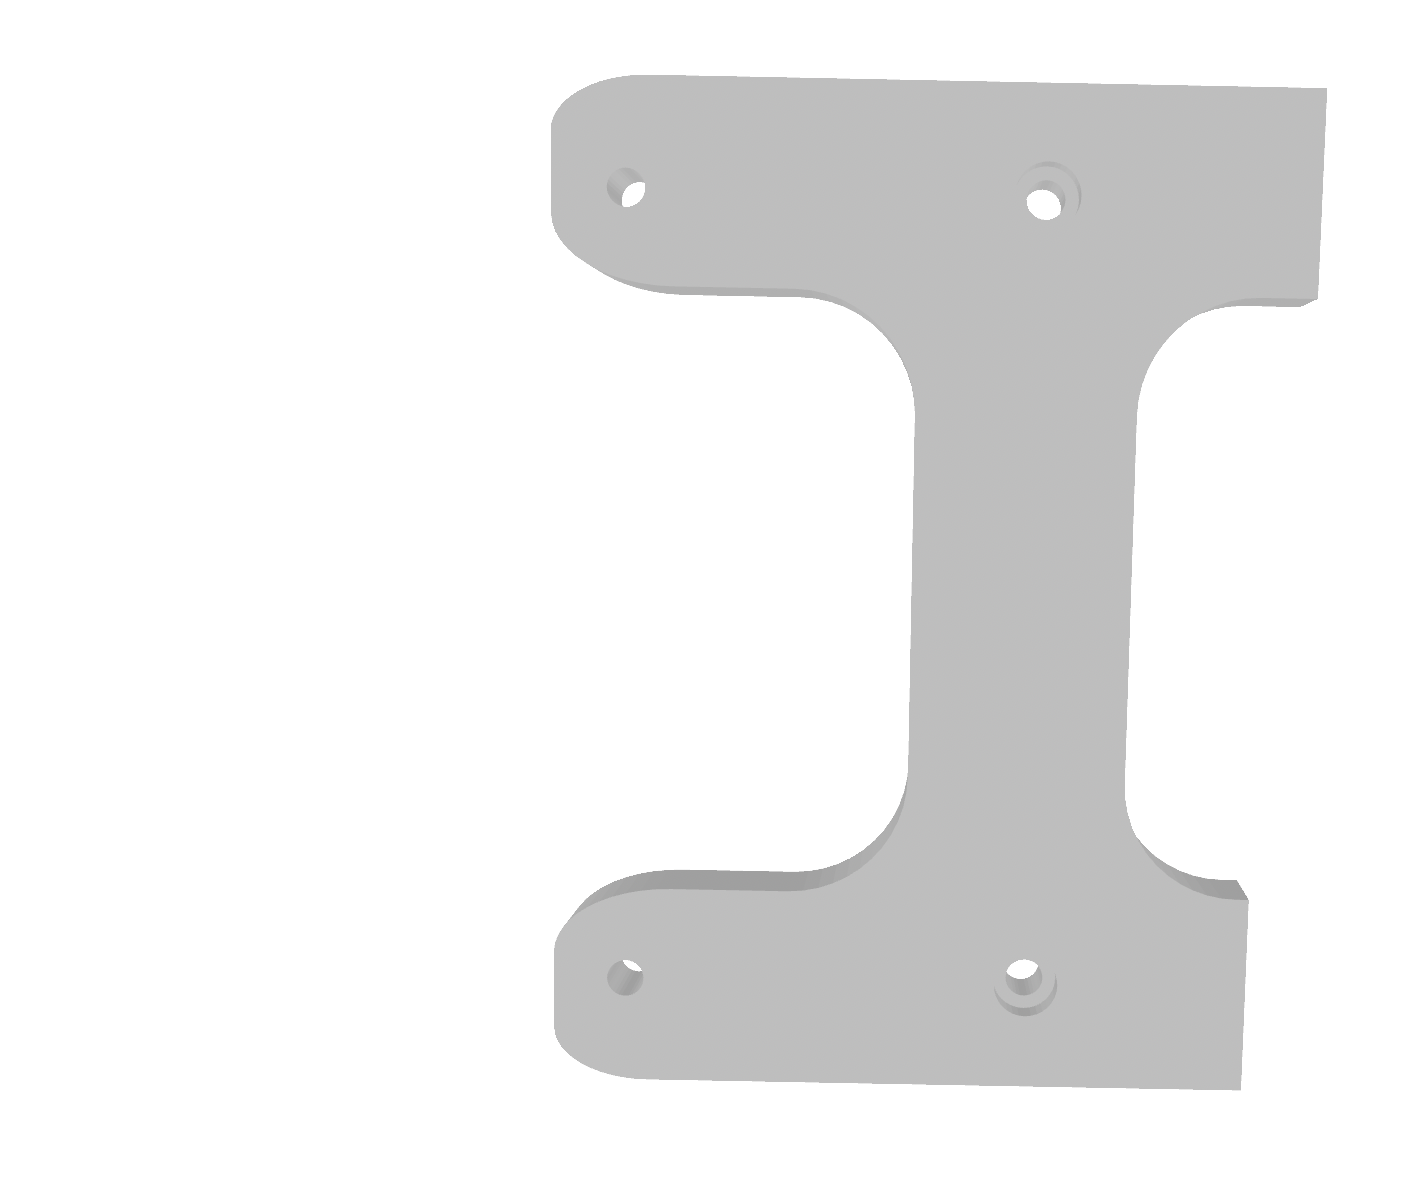
The first big task is the physical installation. The EliteDesk has four M4 screw holes for mounting behind monitors. I grabbed some screws and modeled a frame in Blender.
INFO
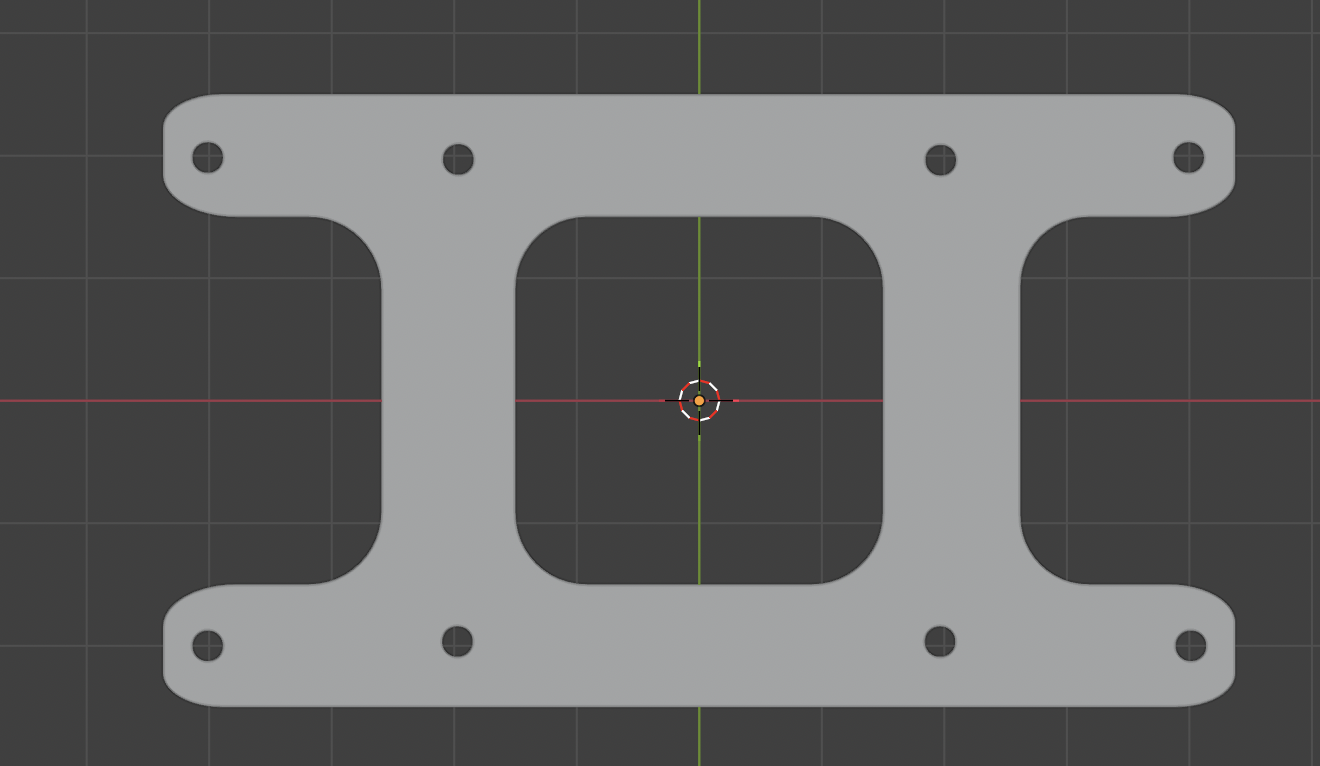
I liked this...
INFO
But this is better, actually.
The goal was simple: Create a PETG mount for behind the control panel that I can put four screws into. It needed a countersink so the screws holding the computer would be flush. Originally the frame was one longer piece, but it was too big for my 3D Printer. I separated it in half and just did two prints.
INFO
Exposed belly, makes me wanna pet it
INFO
Cute li'l computer.
Honestly, I was impressed with how it came out. Everything fits perfectly. This single mount is the best print I’ve ever had. Now I’ll just need to physically mount it!
Day 16: Losing the Battle to Win the War
After finally learning how to solder parts, I was able to successfully replace the oscillator. I was incredibly proud of being able to solder on this oscillator. It felt like the first major successful soldering project.
INFO
I'm really proud of this
Then I tried turning the board on and it still didn’t work.
I felt defeated. What I thought was the problem still wasn’t the problem, and this issue could be far deeper. I might need to consider taking this board in to a repair technician.
But then I had a thought: why do I care?
I literally planned on having the second arcade cabinet be my emulator, why don’t I just do the same for the first? I can emulate Golden Tee Fore! Complete with one of the spare computers I have here. And then I’ll be able to troubleshoot any monitor issues and consider selling it. Plus, I don’t have to spend $200+ dollars trying to get a board fixed.
In fact, I’m gonna be even more capitalist. I’m going to sell the parts of this arcade cabinet together as a package deal for someone else to try and fix. If they would like the video card board and memory they can have it. I’ll see if I can recuperate the cost of the arcade cabinets in general and then just put a computer in.
Soon I will be ordering the specific part I need to get these computers connected. This week is an especially busy week, so this project may be slightly delayed. I will attempt to get the emulators set up so I can really hammer this home next week part replacement.
Day 17: Computers, Computers Everywhere, but Which of Them Will Work?
It’s been a little longer than I wanted to get an update on this, so I’ll be working to both condense the information while also giving you the full story.
At first I wanted to use a mini-PC: An HP EliteDesk 800 G4 (yes, the one I spent making such a lovely 3D Printed frame for) so I could mount it in the pull-out area. Unfortunately, DisplayPort doesn’t connect well to CRTs. I may eventually just replace one of the monitors if there’s a serious issue and use this instead… but this won’t work.
Then I had a brilliant idea: I’ll use a (considerably bulkier) Lenovo ThinkCentre M700 standard form factor. I didn’t want to sell it because I replaced the disk drive with an old laptop one (so it looks odd), so I thought I could repurpose it here. However, I learned something really important…
INFO
No kidding.
You can’t just use the default video card on your PC. You actually need a separate video card that is able to transmit signals to the CRT (specifically, 15kHz). I can’t just plug and play, try as I might. And the drivers won’t work on your regular video card, it’s not powerful enough.
So it’s a good thing I just so happen to have a Radeon HD 5450 that wasn’t doing anything.
So now, my greatest warrior is… some other PC (I don’t currently remember what the model is, I’ll update this later). I installed the video card, added the ROMs, set up CRT Emulator, soft-bricked the PC…
INFO

Mental note: Don’t “Enable EDID” when you’re connected directly to the video card
…factory reset the PC and complete the same steps over again. Now, this should be all set to test on the CRT, I will be doing that soon.
There’s a few things left that I will need to grab. The first one is a connector for the Trackball. I found the Opti-Wiz 3, which works well with Happ Trackballs and should connect directly to USB.
Once I confirm everything is properly working, I have a few more things left to do (so long as the monitor works):
- Mount the smaller devices in the cabinet
- Set up a location for the Computer in the back
- Set up the PC so it automatically boots into MAME
- Connect the trackball, test and program
- Close everything back up and list it
I also have some bad news… The other arcade cabinet has a lot more issues with it. Previous owner cut a lot of the lines for the control panel, speakers, and trackball. I’ll deep dive into that in a future update, but for now I will focus solely on Arcade Cabinet 1. Cross your fingers and wish me luck.
Day 18: Let There Be Light
I felt incredibly productive last night and wanted to share some of the little fixes I've done. I've been putting off the computer a bit, but I did manage to reinstall all the drivers and I'm gonna give it another go tonight.
First, I want to remove all of the unnecessary cables that I won't be using. Since I'm using the Ultimarc J-PAC, I don't need any of the power cables that would've been used on the board. I removed them from the JAMMA harness, and I will keep them in a separate box in case the owner wants to reuse that later.
Next, I removed the speakers. The big reason why is because I don't want to get an amplifier in order to power the speakers. I have a couple of USB speakers that I will be installing into the arcade cabinet. That way, I can keep my lines clean simple and I won't be relying so much on the J-PAC. I'm going to print a small mount so that I can use the current bolts that held the previous speakers.
INFO
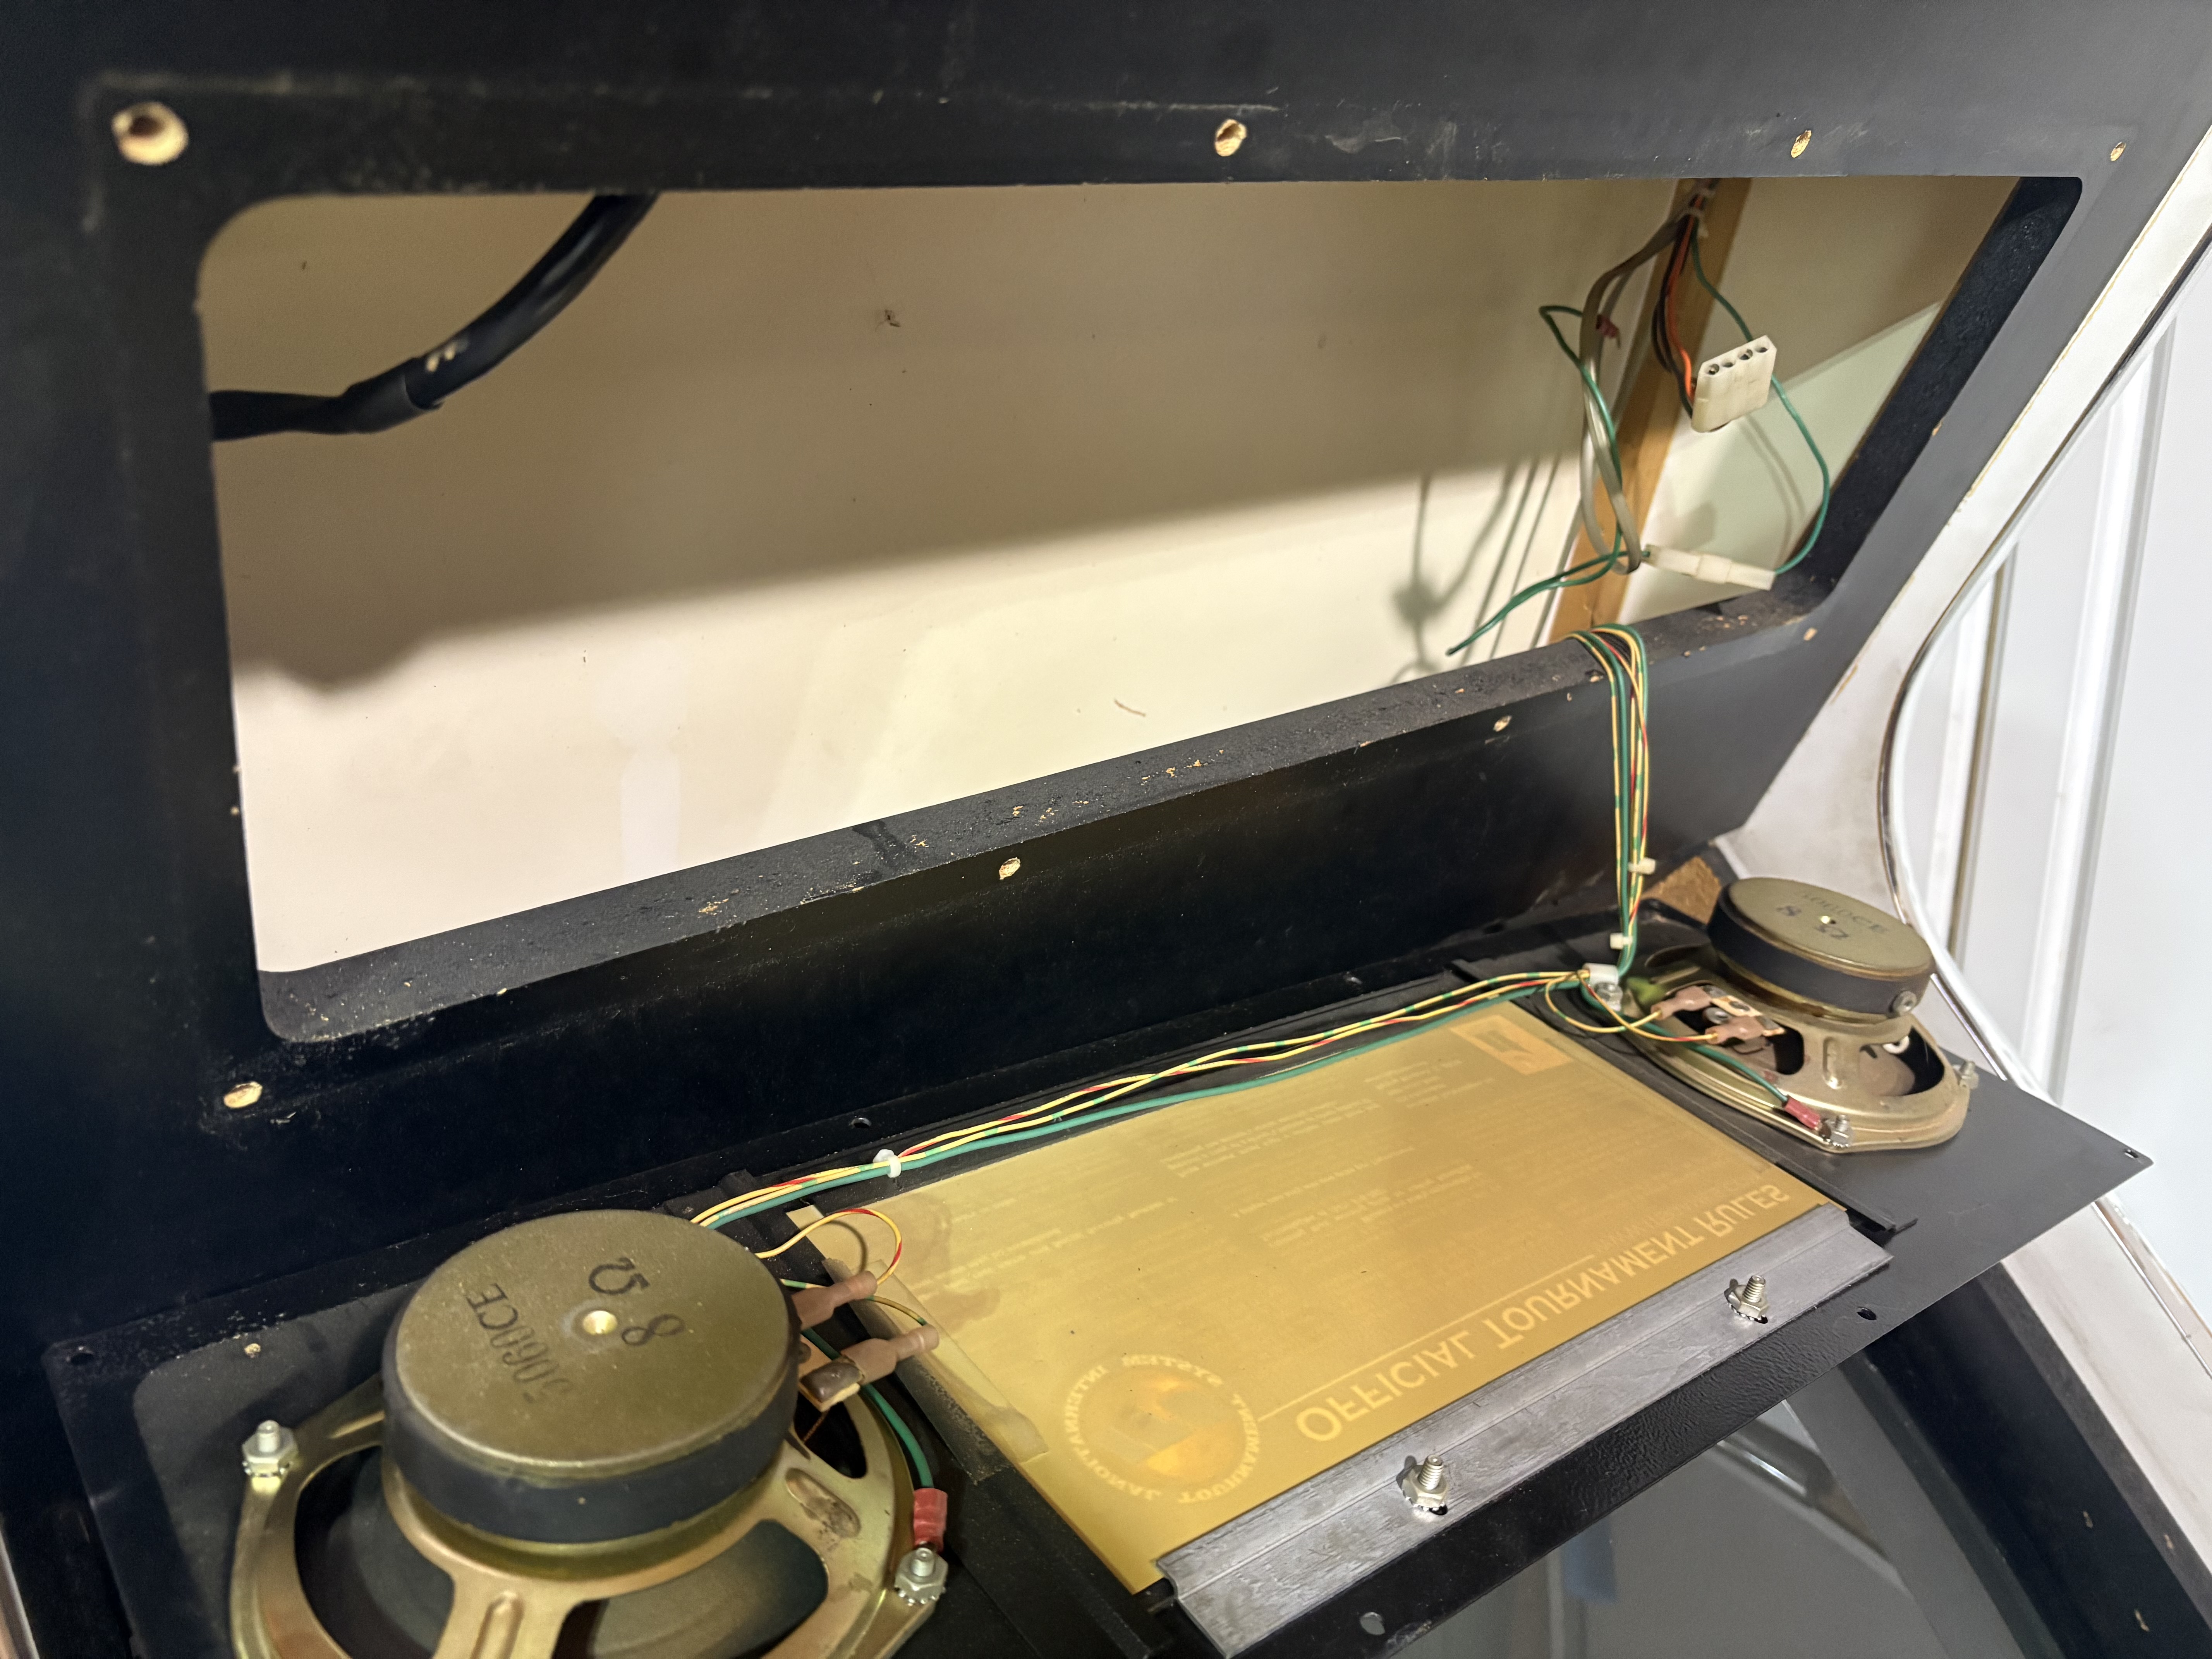
USB Speakers are just going to make more sense in the long run.
After that, I was able to get the marquee light working. Thankfully, it was just a replacement bulb. The light is pretty strong though, I can see it through the speakers.
INFO
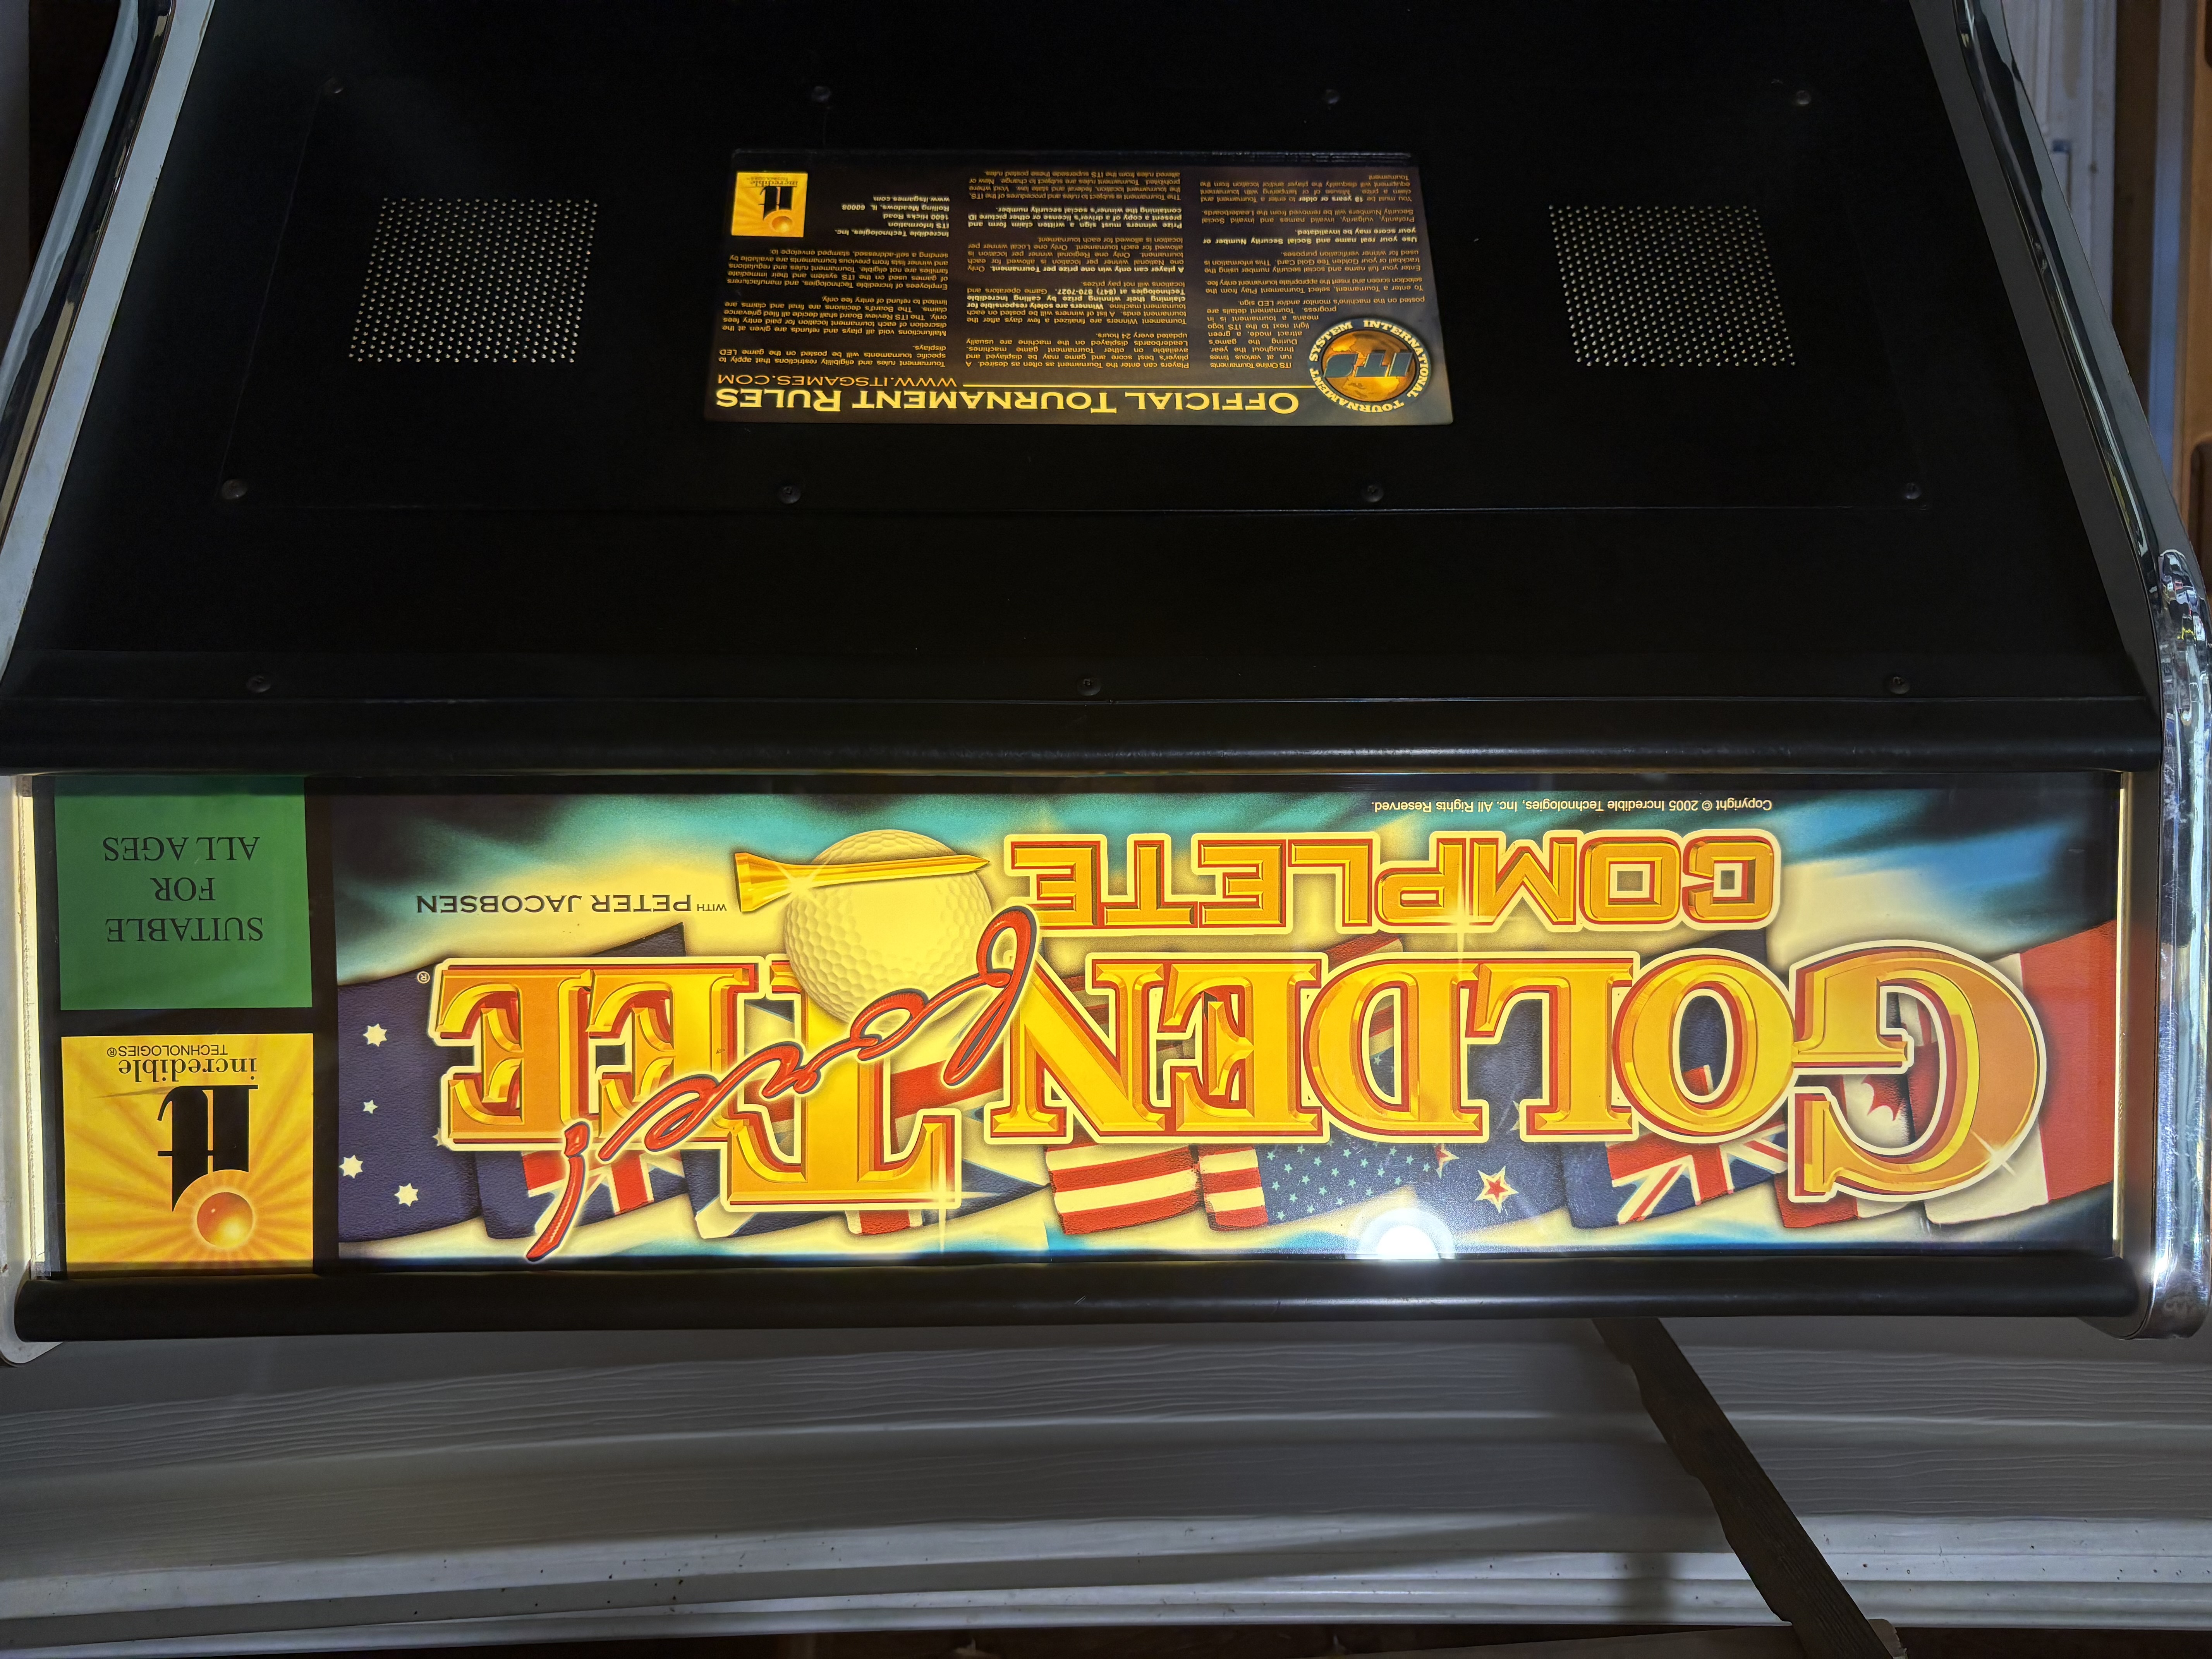
And It Was Good.
And like I said, I did a full refresh on the drivers. I had not installed the legacy drivers for my Radeon 5450, and I think installing those will make a difference. I then reinstalled CRT EmuDriver, set up an auto login, and removed unnecessary programs.
Ideally, I would like people to only need the power supply to turn the game on and off. So I want the computer to come on and autoload into the game. I don't want them to have to mess with any settings or make any adjustments beforehand. So I'm gonna run a quick batch file when the computer boots up.
I'm really happy with how things are coming out thus far, and I'm feeling way more confident in making all of these changes. Keep your fingers crossed that the CRT will connect!
Day 19: So Much Progress, And Yet…
There has been so much progress on this machine! I was able to take my sweet time last Sunday to get a lot more done, and then I even did a few things on another day (but they’re all the same day because it’s my blog and I make the rules
First, the monitor is working… better. The Wells-Gardner K7500 requires a 25kHz resolution, and I was able to adjust the J-PAC and CRT Emudriver to effectively emulate that! However, there are raster lines across the screen, so I will need to make adjustments to the controls on the front and back to get that sorted out.
INFO
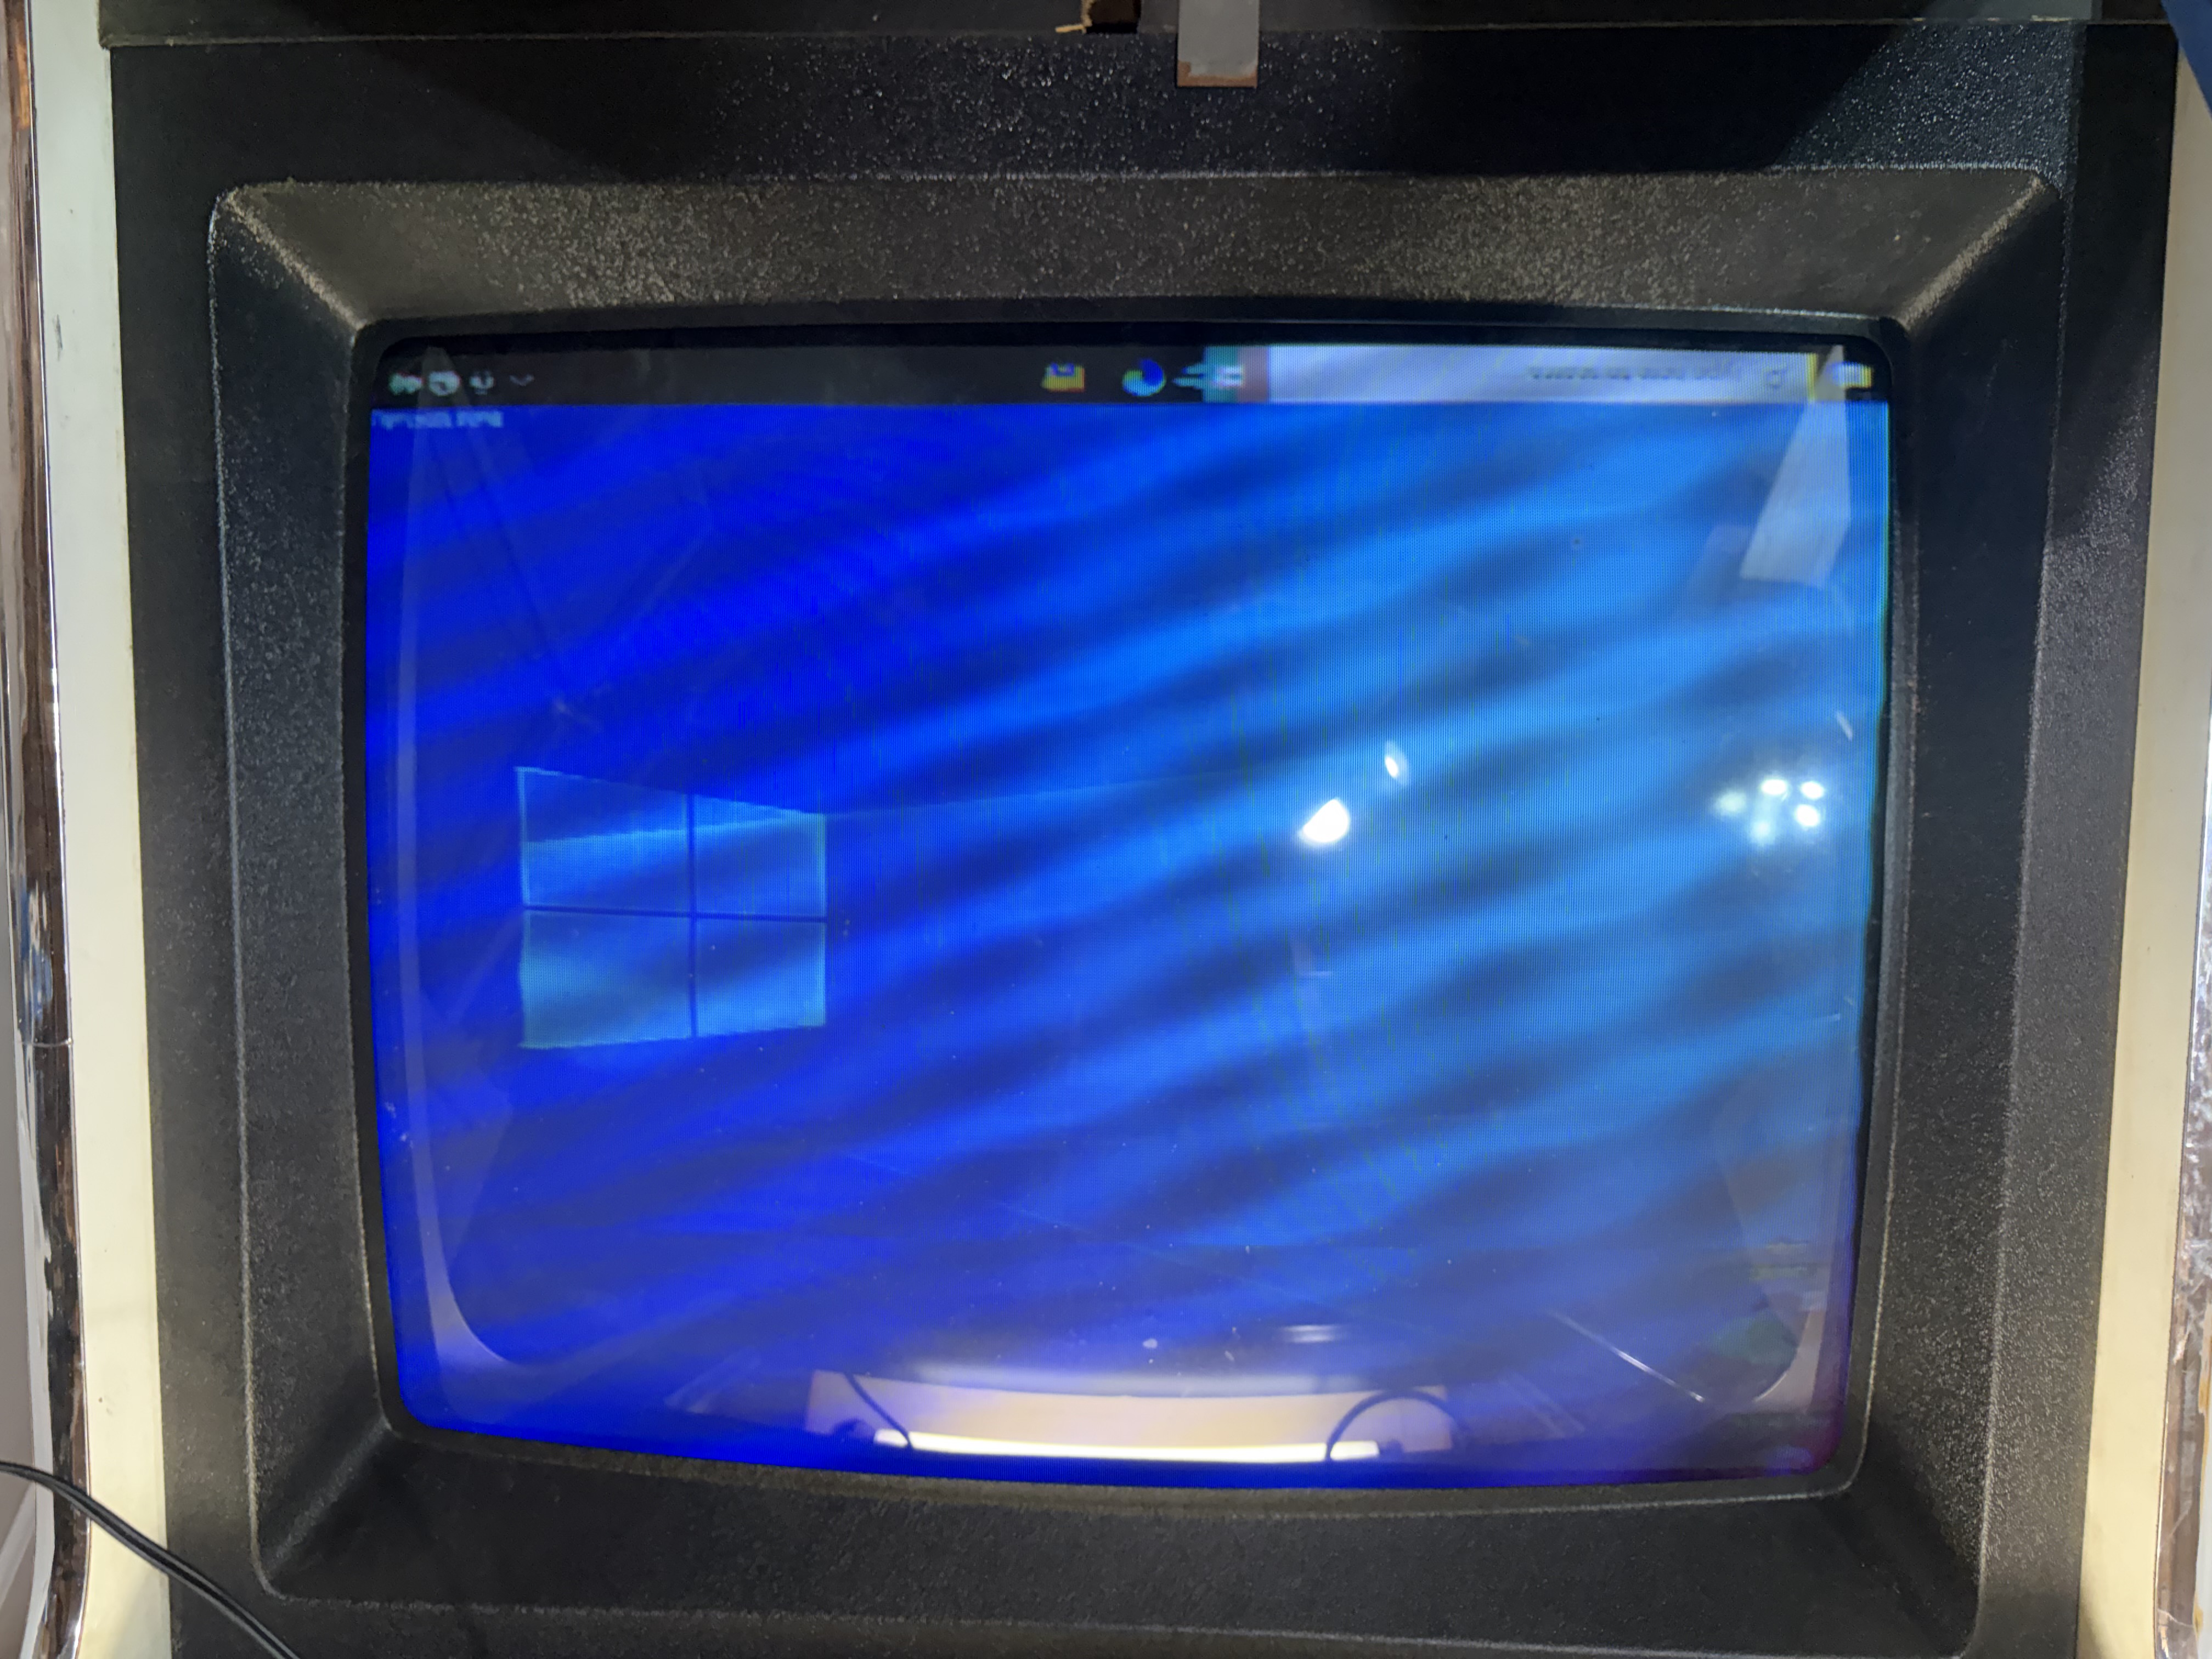
So close... Almost there
The tournament sign has been taken from the second cabinet and placed in the first one! Great news - that works! I have it wired up and it shows the default messages! What I’ll need to do next is connect it to the computer and try to send a signal to it.
INFO
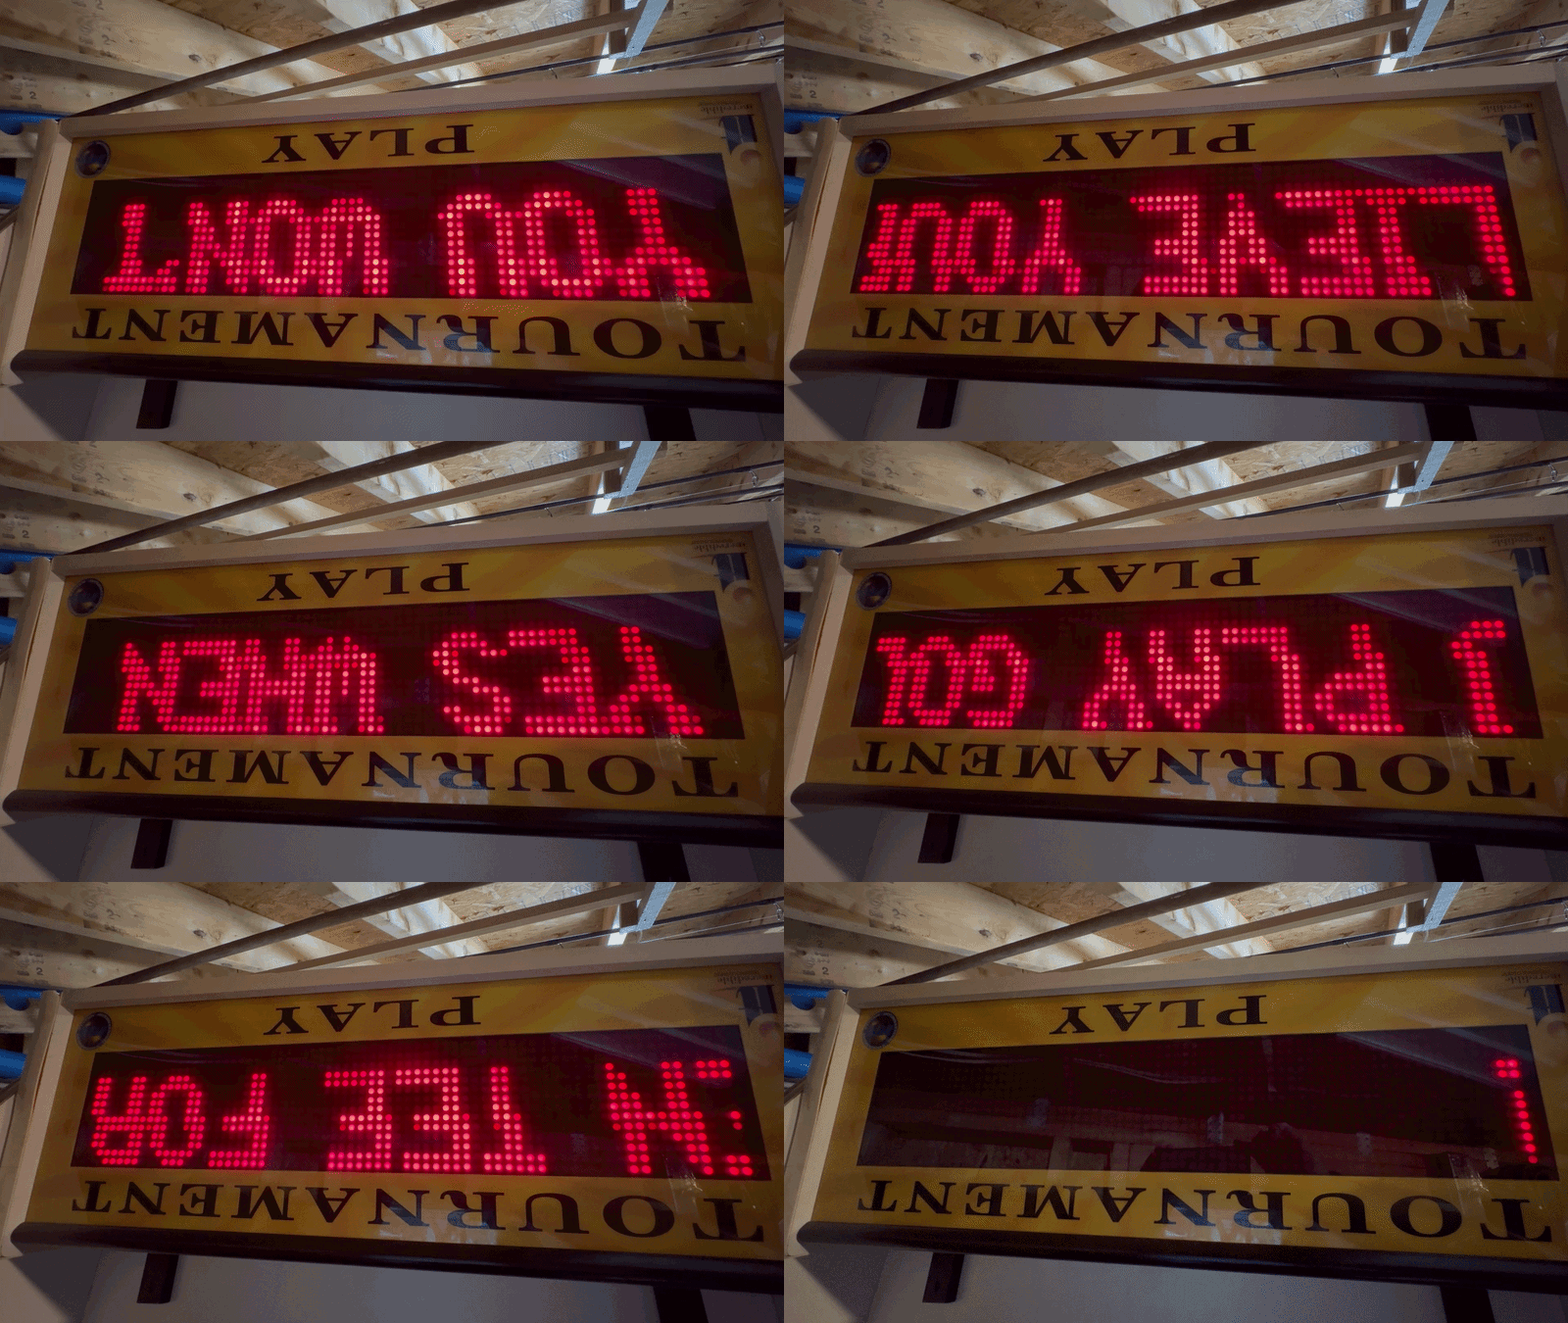
Looks beautiful
The trackball is giving me grief. For some reason, the Opti-Wiz 3 just isn’t working properly for it. I’ll just be replacing that with a Happ-style USB Trackball, see if I can work with the Opti-Wiz 3 on another project.
I also installed the new speakers… and they work great! It’s very straightforward, I didn’t need to do much more than install it on the top! The marquee light overpowers the speaker lights!
I also mounted the J-PAC and Opti-Wiz (though now I’ll be removing the Opti-Wiz). I 3D printed stand-offs and caps so I could keep them in place when the cabinet’s control panel are pulled in and out
INFO
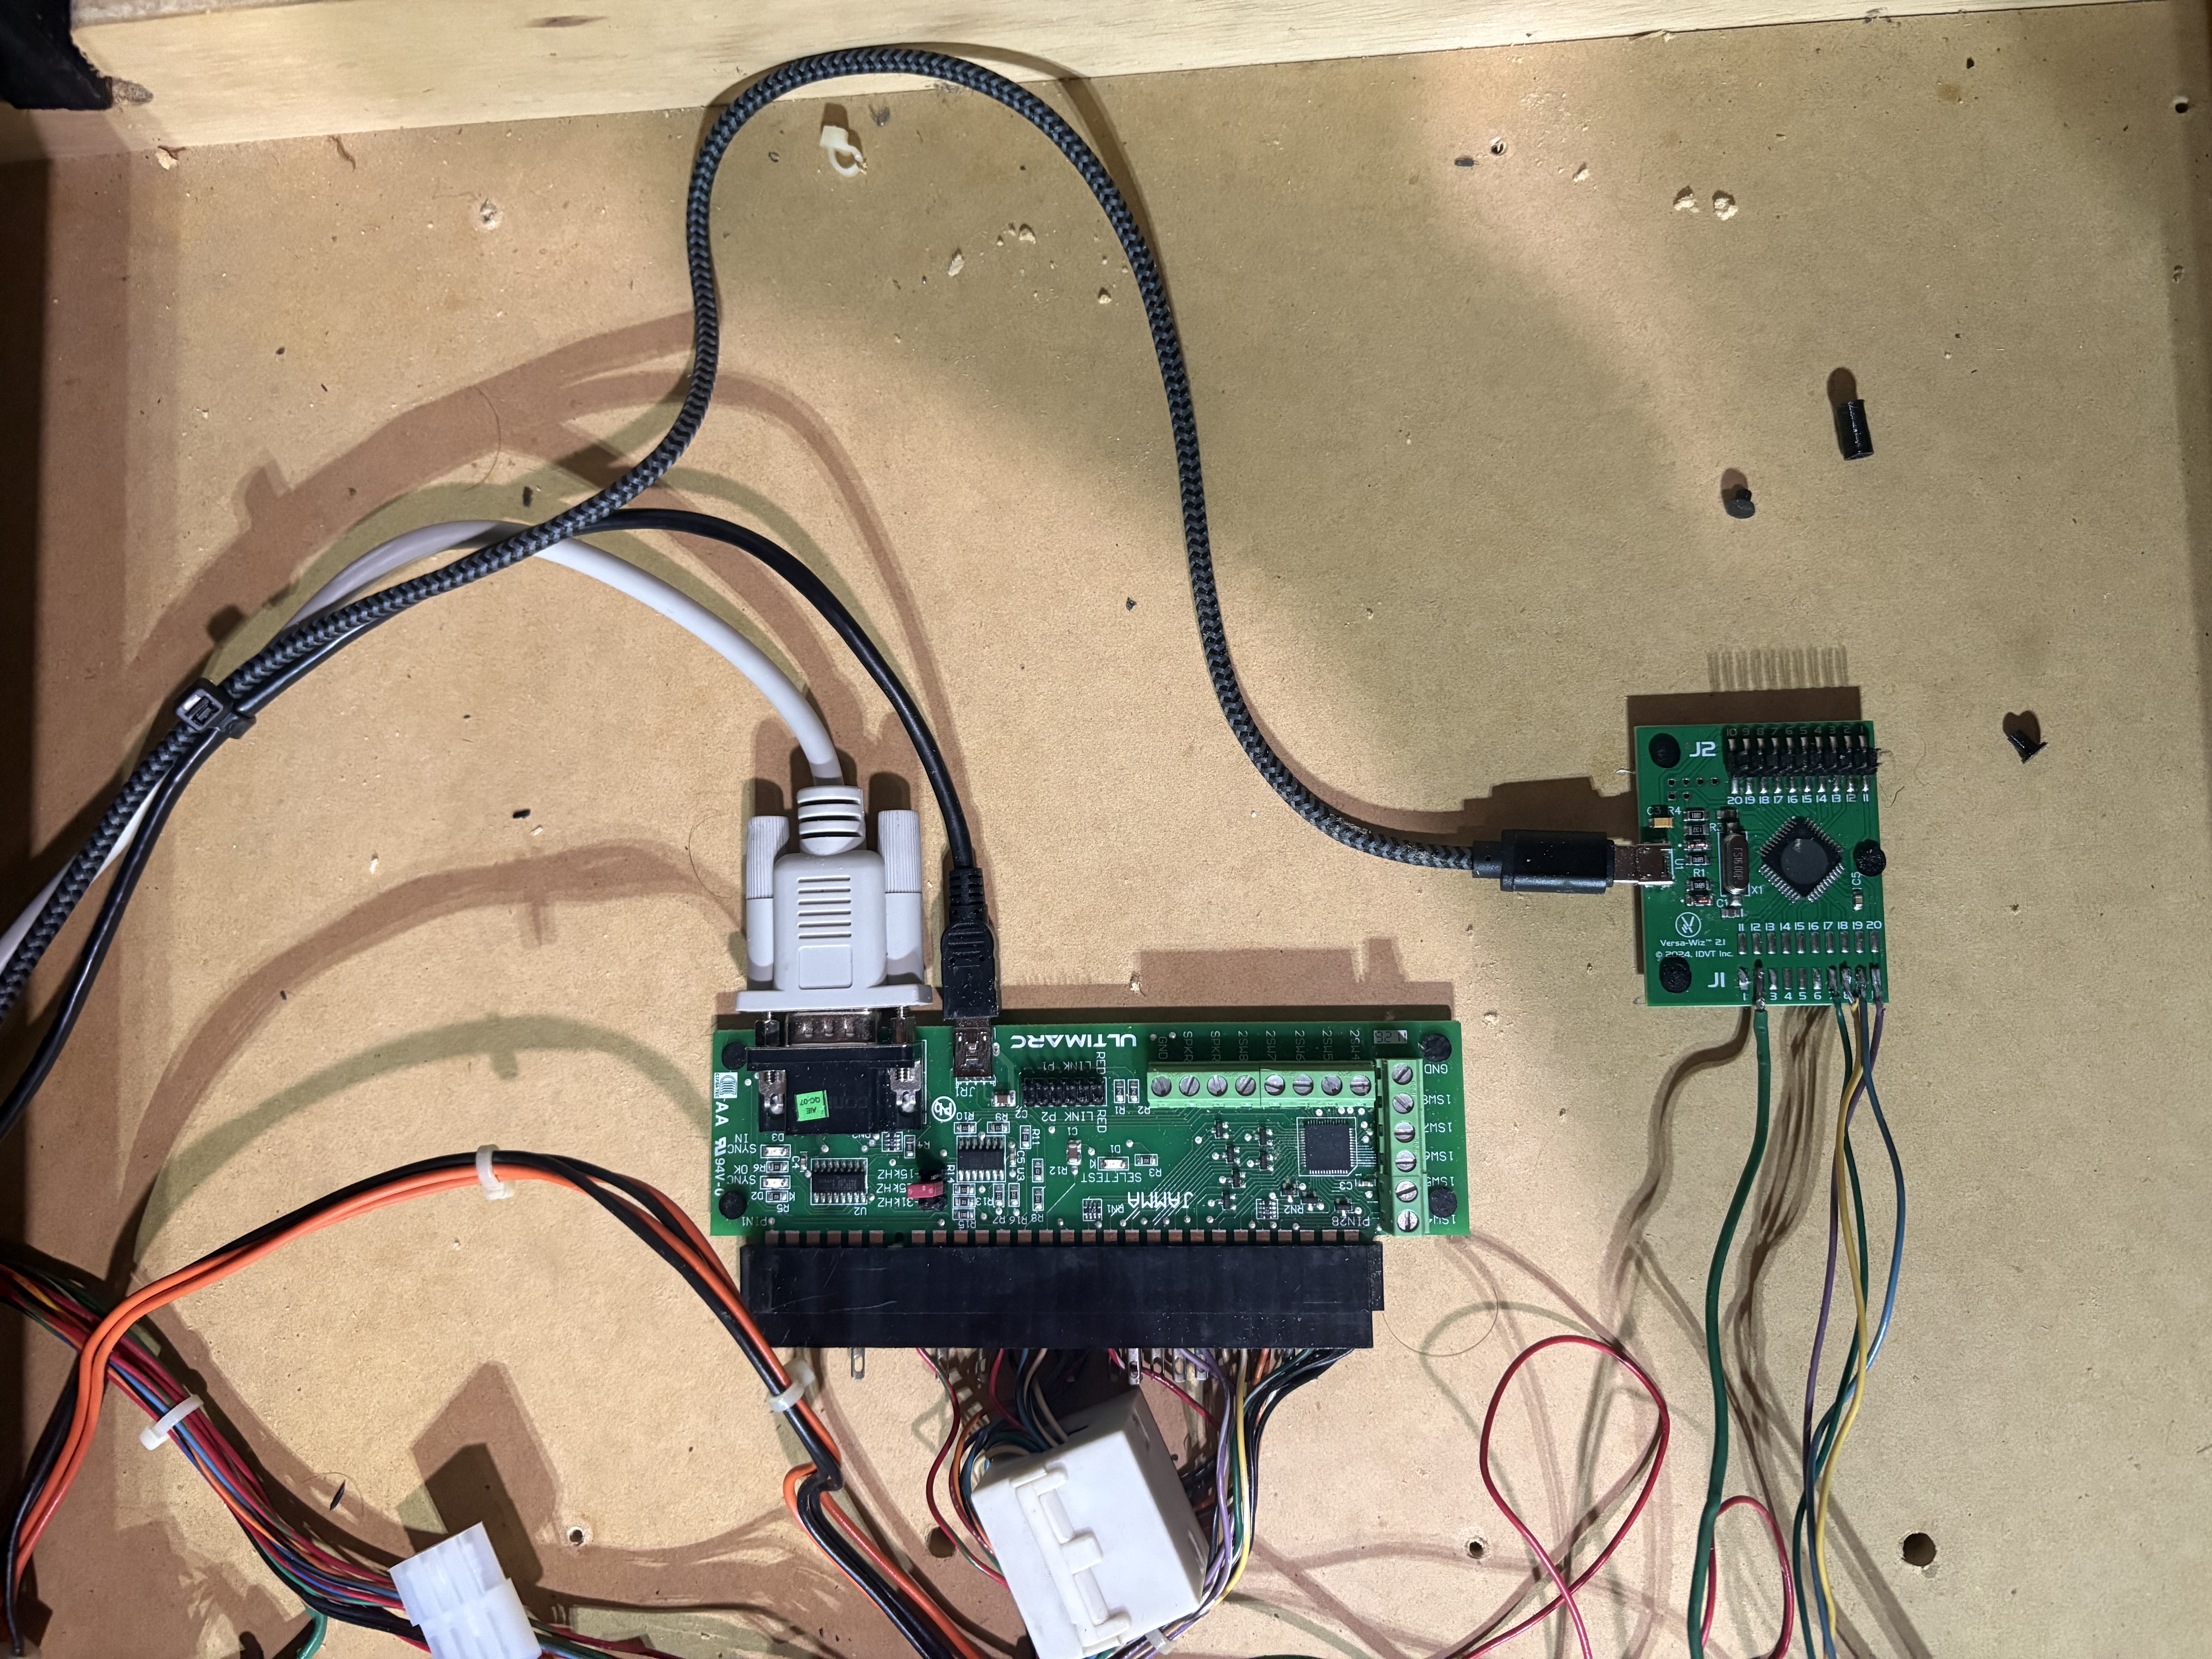
Looks great... But I have to remove one now.
Finally, I transferred the PC and all other components inside the arcade cabinet! I will need to secure the computer in place and clean up some of the wires, but the main wires are good to go!
INFO
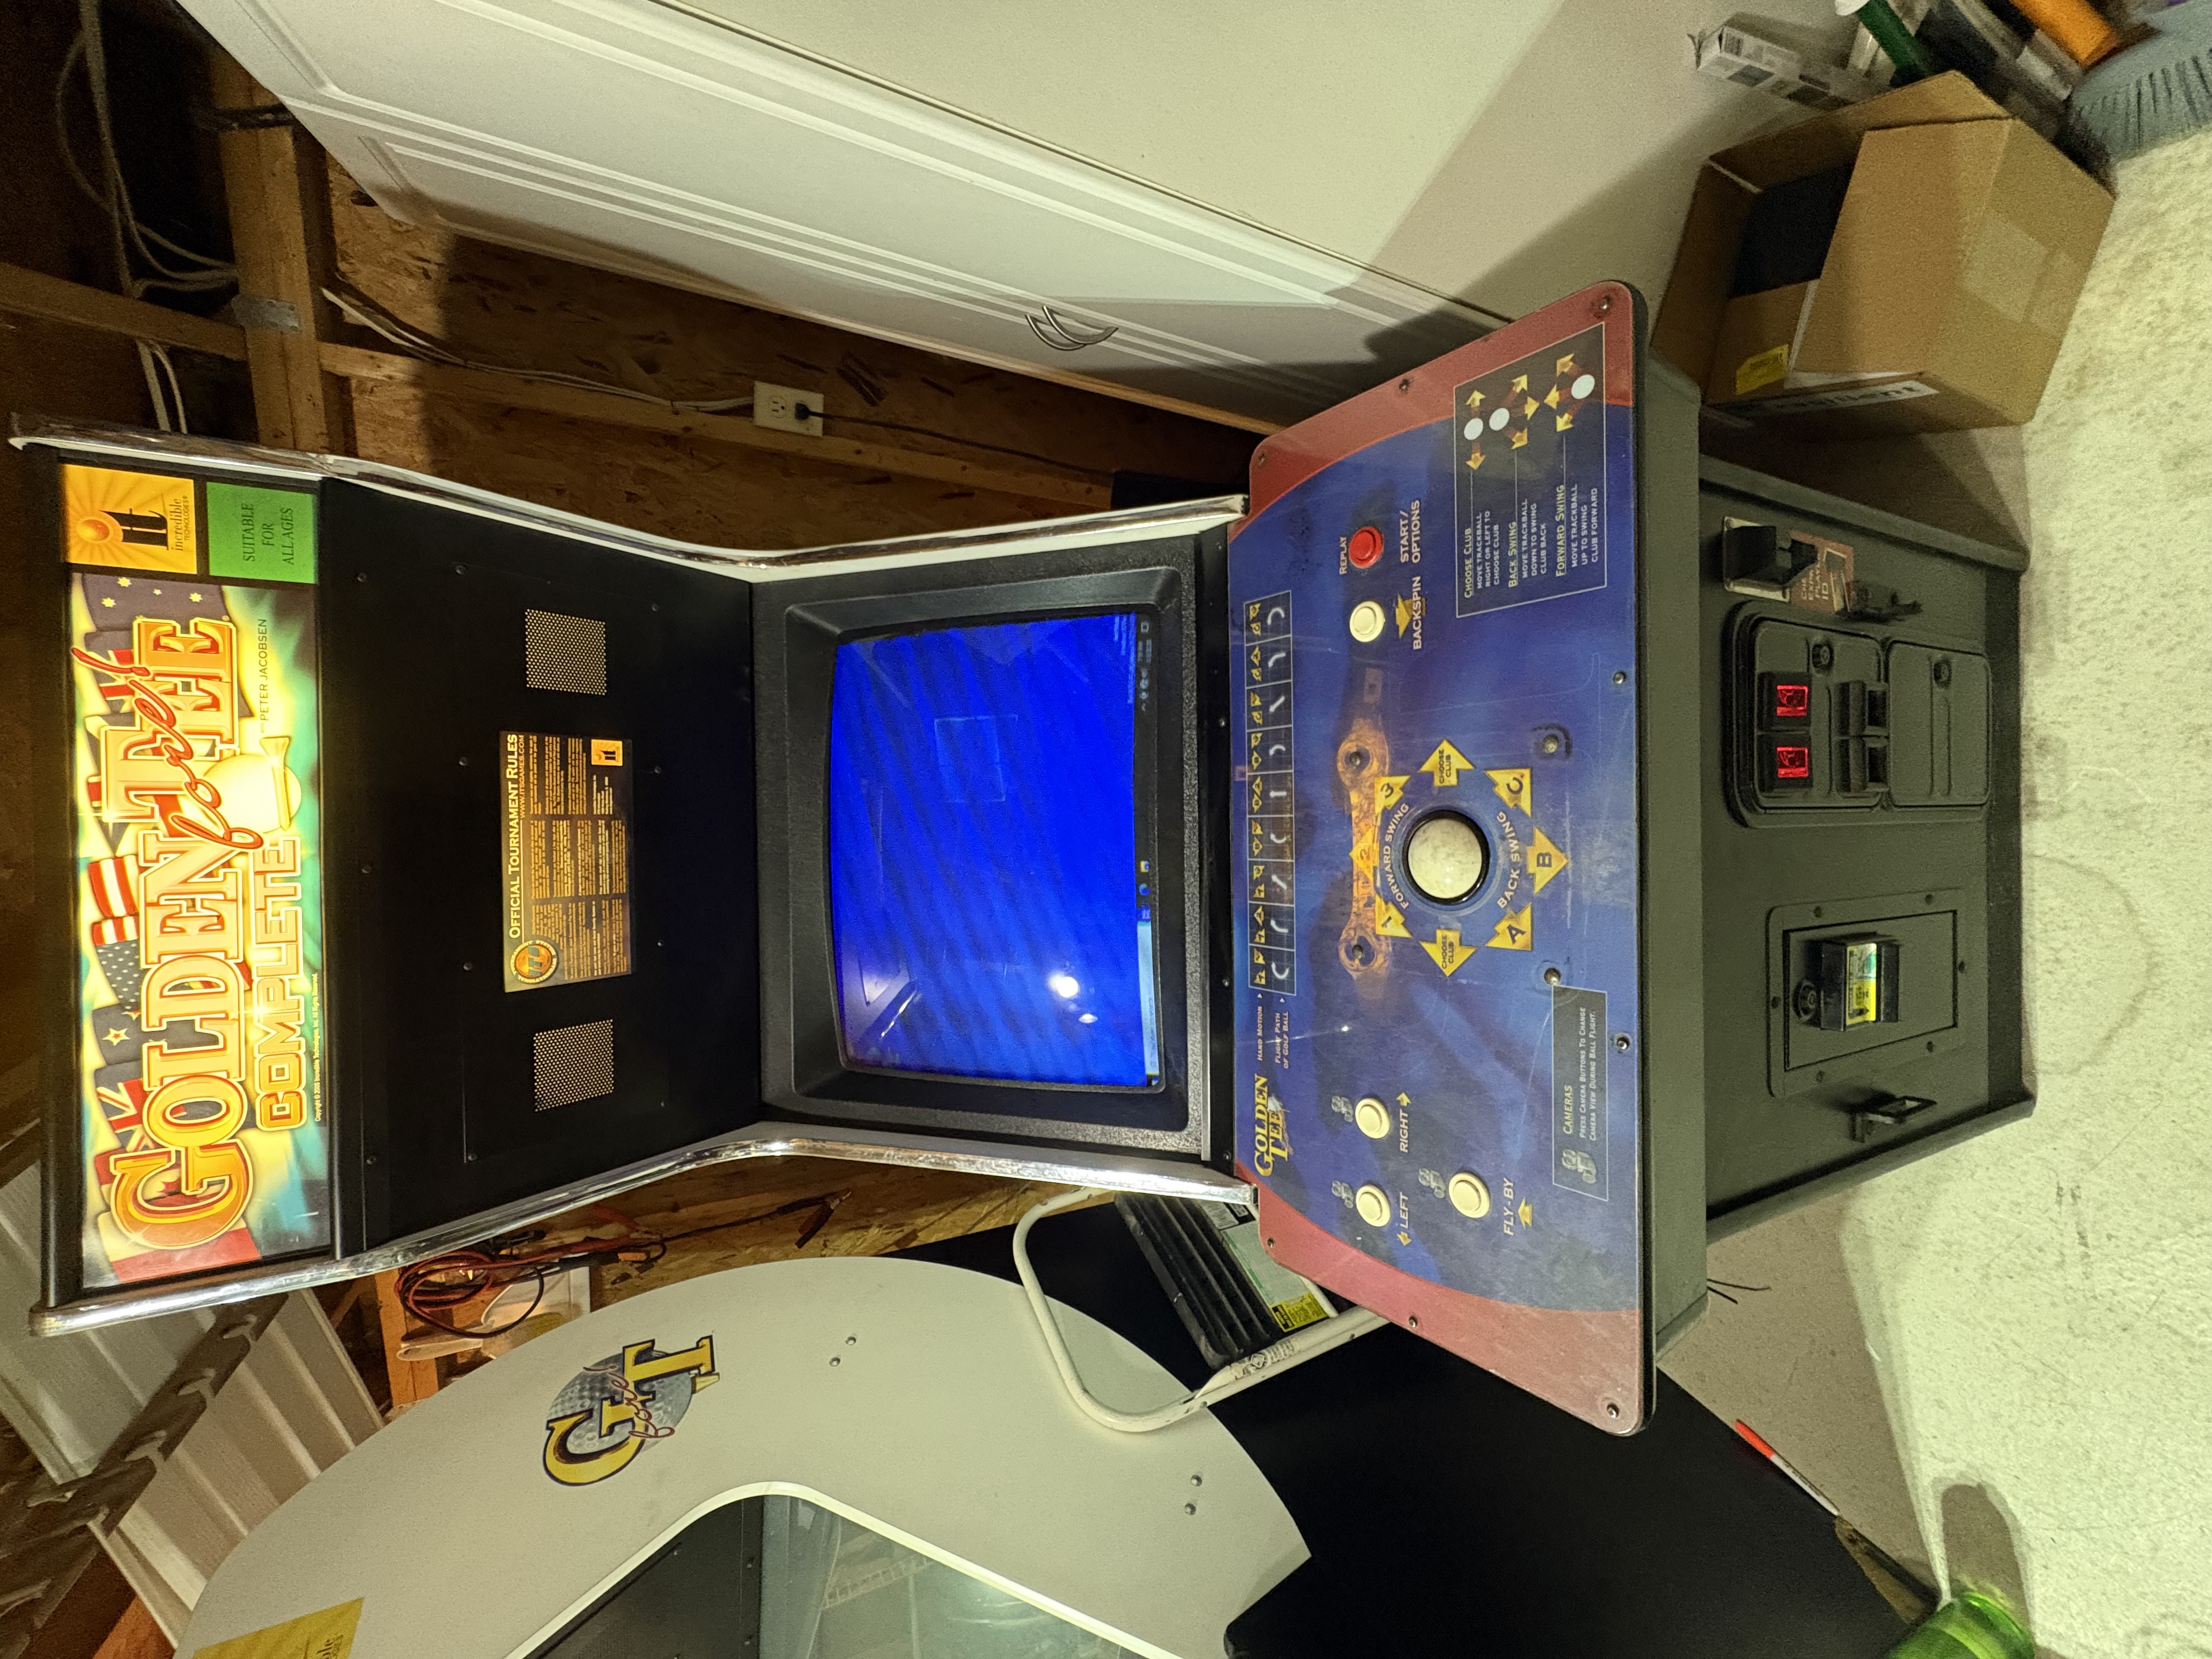
So close... Almost there
I’m pretty confident in how this is going, but there’s still a lot more to do! I look forward to the home stretch!
Day 20: Sold the Board
Pretty quick update today, I sold the arcade cabinet board. Between the fees and shipping, I made about $95.18 on the sale.
I feel good about this. I hope that I can work on boards like this in the future. But given how many issues these boards have, I figured someone else with more experience should get a crack at it. I wish them all the best!
Also, I bought a USB Trackball... so at least I made $25?